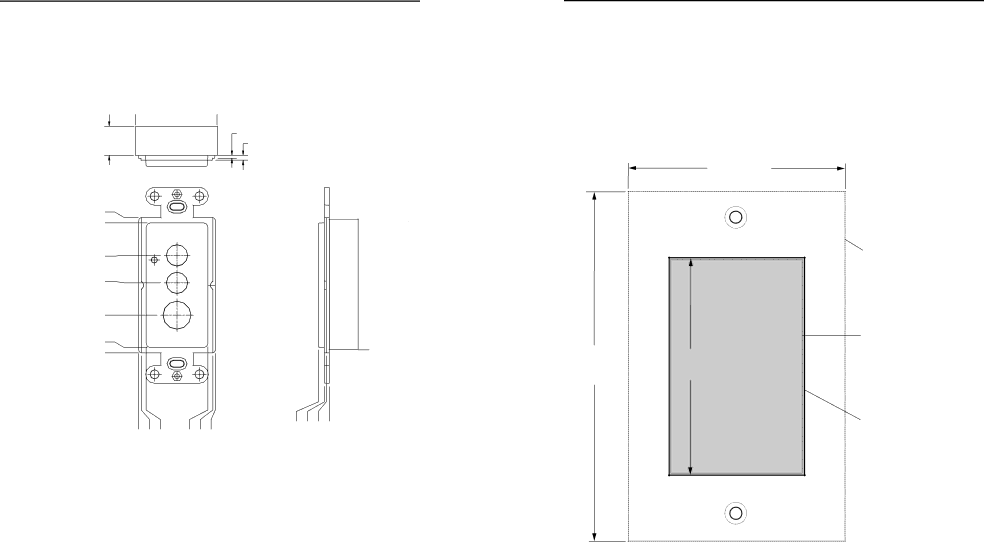
Dimensions and Template
Decora Models Dimensions
Dimensions are shown in inches [mm}.
.000 [0.000] | 1.700 [43.00] |
Cut-out Template
NAlways check and go by the dimensions given in this appendix. The template is not full size.
CVEQ 100 D & SVEQ 100 D
.600 [15.500]
2.830 [71.882]
2.720 [69.088]
2.040 [51.816]
1.465 [37.211]
0.790 [20.066]
0.110 [2.794]
0.000 [0.000]
.0000 [0.000] | 2X 0.050 [1.270] | 0.155 [3.937] | 1.445 [36.703] | 1.550 [39.370] | 1.600 [40.640] |
.060 [1.524]
.100 [2.540]
0.225 [5.715] | 0.100 [2.540] | 0.060 [1.524] | 0.000 [0.000] |
0.000 [0.000]
2.720 [70.000]
4.50"
(11.43 cm)
2.79"
(7.09 cm)
![]() 1.75"
1.75"![]() (4.5 cm)
(4.5 cm)
2.8" (7.1 cm)
SURFACE
FOR
FURNITURE
MOUNT
Wall Plate
Location of Line Driver
To install line driver directly into furniture or wall, cut along this line.
Front View | Side View |
TEMPLATE IS NOT FULL SIZE
CVEQ 100 and SVEQ 100 Series • Dimensions and Template | CVEQ 100 and SVEQ 100 Series • Dimensions and Template |