Dymo 330 Turbo, 310, 300, Duo, 400 Turbo, 320, 400 TWIN TURBO manual Label Alignment

Page 41

Print Settings

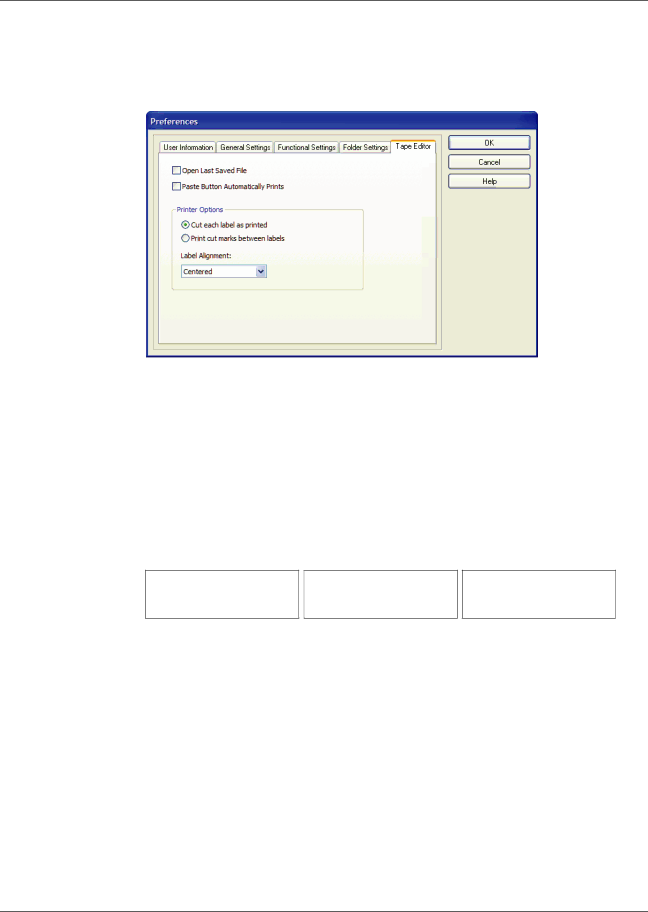
To change the chain print setting

1Select Options from the Edit menu. The Options dialog box appears.

2Select one of the following:

Cut each label as printed — Automatically cuts each label after printing.

Print cut marks between labels — Prints labels in a continuous stream with dotted lines between each label for cutting.

3Click OK to apply the new setting.

Label Alignment

As a label is printed, blank space is added at the beginning of the label and at the end of the label. Normally, the space is the same on both ends of the label. However, you have the option of printing the label with less space at the beginning or at end of the label.

DYMO Corp.

44 Commerce Road

Stamford, CT 06902

Centered

DYMO Corp.

44 Commerce Road

Stamford, CT 06902

Left Aligned

DYMO Corp.

44 Commerce Road

Stamford, CT 06902

Right Aligned

To change the label alignment

1Select Options from the Edit menu.

37

Image 41
Contents Dymo Label Software User Guide Certification Equipment InformationCopyright TrademarksContents Appendix a Using the LabelWriter Printer with Other ApplicationsSoftware IntroductionHardware LabelsGetting Help Installing the LabelWriterRegistering the Software Label Editor Getting StartedGetting Started Creating a New LabelChanging the Graphic Choosing a Label FileSelect File under Select Graphics Source Changing the Recipient Address Changing the Return AddressPrinting the Label Changing the FontSaving the Label Getting Started Starting the Designer Using the Label DesignerDesign Objects TextAddress Graphic Lines Rectangle Ellipse Barcode Counter Date-Time Creating a New Label FileOpening an Existing Label File Deleting Objects Adding an ObjectHow the Address Book Works Working with ListsUsing Lists with Multiple Variable Objects Using the Address BookRotating Names in Address Lists Creating a New ListOpening an Existing List Using the Mac OS Address Book Macintosh About Smart Paste Printing Labels Using Smart PasteSpreadsheet Text Text FileMulti-Line Text from a Word Processor Printing from a File Printing Multiple Labels Using Smart PastePrinting from the Clipboard Printing Labels Using Smart Paste Add-In for Microsoft Word Using the LabelWriter Printer with Other ApplicationsUsing the Word Add-In Enabling the Outlook Add-In Additional Windows Application Add-InsPrinting the Address About the Database Add-In Printing Directly from Other ApplicationsUsing the LabelWriter Printer with Other Applications Tape Editor Using the Tape EditorDesigning a Label Using the Tape EditorDesigning a Label Adding Special Characters Additional Formatting FeaturesAdding Borders Adding Special Font Effects Adding a Date and Time Stamp Select Outline under EffectsAdding a Barcode Adding GraphicsPrinting Vertically Printing from Other ApplicationsPrinting from Other Applications Chain Printing Print SettingsTape Cassette Color Setting Label Alignment Continuous Mode Printing Print Settings Using the Tape Editor Caring for the LabelWriter Printer Maintenance TroubleshootingObtaining Technical Support Performing a Printer Self-TestContacting Dymo Maintenance and Troubleshooting LabelWriter Printer Specifications Technical SpecificationsTape Printer Technical Specifications Documentation Feedback Developer and SDK InformationTechnical Specifications Index
Related manuals
Manual 12 pages 11.68 Kb