InFocus 210, 220 manual Using the Disk Mouse, Using the On-Screen Menus

Page 44

U s i n g

t h e

P r o j e c t o r


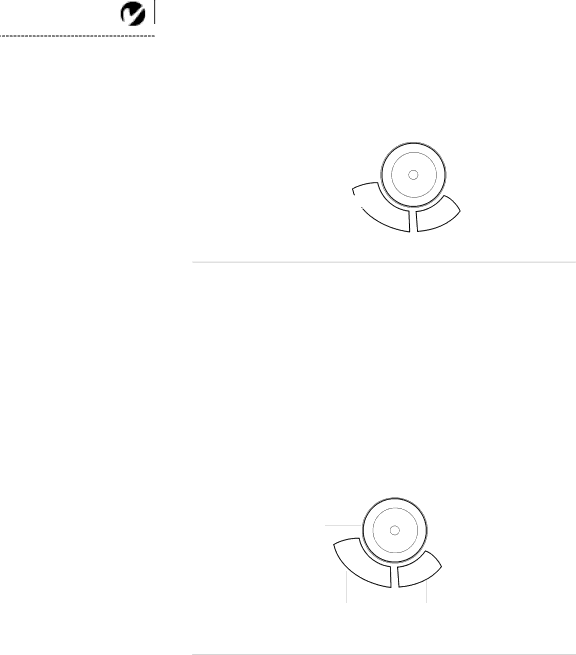
NOTE: Using a light touch on the

disk mouse often gets the best

results.

Using the Disk Mouse

Press anywhere on the edge of the disk mouse to move the cursor on the screen. For example, if you press the top edge of the disk, the cursor moves up the screen; if you press the bottom edge, the cursor moves down (Figure 28). You can move the cursor at any angle by pressing the corresponding edge of the disk.

press here to move the cursor up

press here to move the cursor down

FIGURE 28

Using the disk mouse

Using the On-Screen Menus

The projector has four on-screen menus that allow you to make image adjustments and change a variety of settings. Most of these adjustments aren’t available directly from the remote or keypad.

To open the on-screen menus, press the menu button on the remote or keypad. Press menu again when you want to close the menus.

To select a menu, use the disk mouse to move the cursor to the tab for the menu you want, then click either mouse button.

disk mouse

left mouse

right mouse

button

button

FIGURE 29

Disk mouse and mouse buttons

32

Image 44
Contents USER’S Guide User’s Guide Page Safety Certifications Declaration of Conformity Table of Contents Maintenance TroubleshootingAppendix IndexSafety Summary F e t y M m a r y Hot Surfaces Introduction Image Resolution IntroductionCompatibility Unpacking the ProjectorShipping box contents If You Need Assistance WarrantyUsage Guidelines Setting up the Projector Setting UP the Projector Connecting the CableWizard to the Projector Selecting Connectors on the CableWizardPuter, turn the selector until the window displays PC Preparing to Connect Your Equipment to the Projector Equipment you want to connectConnecting an IBM-Compatible Desktop Computer Monitor cable Mouse cable Computer cable Audio cable Connecting an IBM-Compatible Laptop Computer Mouse cable computer cable Audio cable Connecting a Macintosh Desktop Computer Monitor cable Mouse Connecting an Apple PowerBook Computer Audio cable Computer cable Connecting a Video Player Audio/video cableCable Connecting an External Speaker and a Subwoofer Connecting a Microphone Connecting a PS/2-Compatible MouseConnecting the Remote Control Cable Powering up the Projector and Adjusting the ImageIndicator LEDs Turning Off the Projector Using the Projector Using the Remote Control Using the ProjectorBasic Image Adjustment Adjusting the Projector Adjusting the height of the projector Using the Remote and Keypad Buttons Press help to display the online help information Menu Standby Using the Disk Mouse Using the On-Screen MenusDisplay Menu Functions Contrast Audio Menu Functions Fade Image Menu Functions Manual Tracking Controls Menu Functions Select Off if your monitor is not connected directly to Maintenance Removing and Replacing a Lens MaintenanceCleaning the Lens Using the Zoom Lens Replacing the Projection Lamp Removing the lamp module Replacing the Fuse Resetting the Lamp Monitor LightReplacing the Batteries in the Remote Control Remove the blown fuse from the fuse holder Figure Using the Kensington Lock Troubleshooting Troubleshooting Solutions to Common Problems Problem Only the start-up screen displays Problem Image is too wide or narrow for screen Problem Image is noisy or streaked Appendix Specifications AppendixP e n d i Accessories Standard Accessories Ship with the projector Part NumberOptional Accessories Portable and Laptop Activation Chart Key command to Computer Activate port De-activate portFN-F8 CRT/LCD NCR P e n d i Using Video Mirroring with a PowerBook Computer Projected Image Size LensesDistance to Diagonal Width Height Index Index D e Page D e Page Limited Warranty Part Number