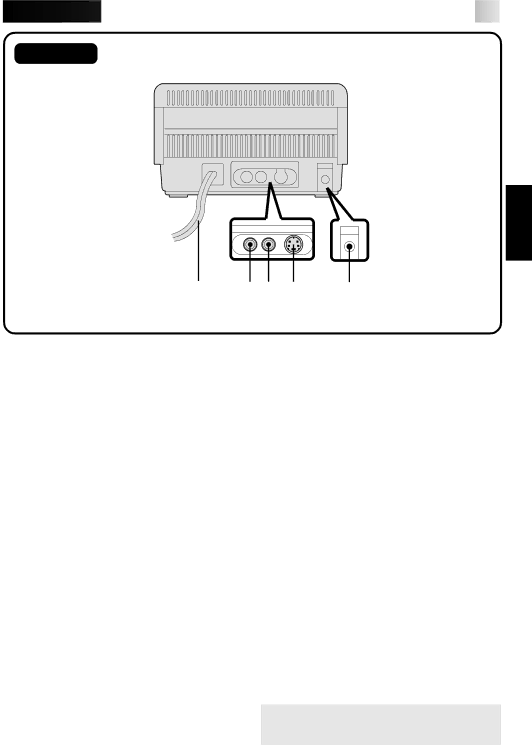
JVC GV-PT1 $ Pause Connector, Video Input Connector front, Power Cord, Video Output Connector

Page 9

9

Rear View

& *( ) q

$ PAUSE Connector

Used when printing snapshots or an editing index from a JVC camcorder or

video cassette recorder. Connect a commercially available φ 3.5 mm mini plug to either the camcorder’s editing jack or the video cassette recorder’s R.A. EDIT or SPECIAL FUNCTION jack.

%S-Video Input Connector (front)

If the source (camcorder or video cassette recorder) has an S-Video output jack, connect it to the video printer using a commercially available S-Video cable. The printer gives this input priority over the normal inputs and the rear S-Video input.

^Video Input Connector (front)

If the source doesn’t have an S-Video output jack, connect its normal video output to the printer using a commerically available video cable. The printer gives this input priority over the S-Video and normal video inputs on the rear of the unit.

&Power Cord

Plug into an AC outlet.

If the AC outlet is not a grounding-type outlet, use the provided conversion plug.

*Video Output Connector

Use this connector when you want to see the input image, or the image stored in memory, on a television. Using a commercially available video cable, connect the printer to a television.

( Video Input Connector (Rear)

If the source doesn’t have an S-Video output jack, connect its normal video output to this connector using a commercially available video cable.

) S-Video Input Connector (Rear)

If the source has an S-Video output jack, connect it to the printer using a commercially available S-Video cable. The printer gives this input priority over the rear normal video input.

q JLIP (Joint Level Interface Protocol)

Connector

In the future, connection to a computer or other device for manipulation of images will become possible.

*When using the PAUSE Connector $, JLIP cannot be used.

Input connectors are prioritized as follows:

%, ^, ), (

Image 9
Contents GV-PT1 It is recommended that you Dear CustomerPower Cord Protection Power SourcesGrounding or Polarization OverloadingDamage Requiring Service AccessoriesReplacement Parts Object and Liquid Entry Safety CheckAbout Thermal Heads Same scene Or different scenes Ajor FeaturesContents Power on Lamp Power On/OffPower OFF Lamp Mode Select ButtonVideo Input Connector front $ Pause ConnectorPower Cord Video Output ConnectorInstall/Remove Ink Sheet Cartridge SET Contents Uses About Print Sheet SetsAbout Ink Sheet Cartridges Front Connectors Connect To Front Input Connector Front Connectors Connect To FrontImage Source With Connect To Image Source VideoLanguage Select Single Print Select NO. of ScenesClose Print Menu Print Scene Store Desired SceneMenu Setting The Print MenuAccess Print Menu Turn on Video PRINTER’S PowerSelect Options Make ChoicesMulti-Print Same Scene Select Print ContentPrint Stored Scene Store Scene for PrintingIf you store the wrong image If you want to print multiple copies of the same image2and Multi-Print Different ScenesPrint Scenes Store Desired SCENE, Select PositionInset Print SET Size of Inset ImageSET Position of Inset Image Print Image LOCATE/STORE Inset ImageIf you want to add an inset to a 4-scene print To print multiple copies of the same imageSET Parameters Strobe PrintStore Desired Scene Title Impose Access Mode Select MenuStore Desired Image Record TITLE/DRAWINGPrint Stored Image Select ModeIf you want to print multiple copies of the same image If you want to change the title or drawingSnapshot Print Locate Desired Scene Store SnapshotPrint Snapshot Editing Index Performediting Random AssembleConnectprinter Image Source to Engagemode Source Edit Start To exit the Editing Index modePrint Stored Scenes To print multiple copies of the same sceneError Messsages Troubleshooting RE-INSTALL INK Sheet CARTRIDGE, Close LID Remove Problem SheetClean Heads Printer JamPower consumption PowerSignal ConnectorsGV-PT1