Setup
1Connecting your monitor to your computer
Video signal cable | to HD15 of the |
of the monitor | connecting computer |
Connecting to a Macintosh or compatible computer
When connecting this monitor to a Macintosh computer, use the Macintosh adapter (not supplied) if necessary. Connect the Macintosh adapter to the computer before connecting the cable.
The pin assignment of the HD 15 video signal cable
1 2 3 4 5
6 7 8 9 10
11 12 13 14 15
Adjustments
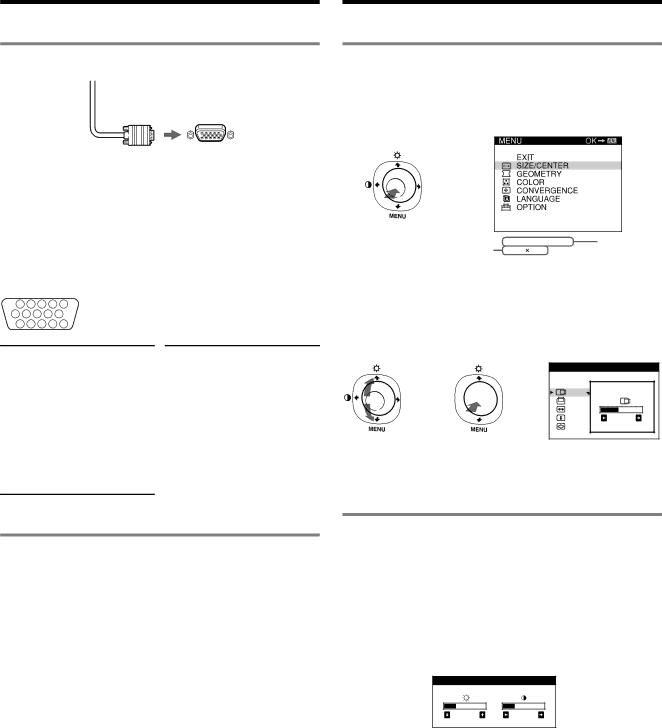
Navigating the menu
1 Press the center of the joystick to display the main menu.
Main menu
,
the resolution of the current | 60 . 0 kHz / 75Hz | the horizontal |
input signal (only if the signal | 1024 768 | and vertical |
matches to one of the |
| frequencies |
recommended VESA timing |
| of the current |
modes). |
| input signal |
2Move the joystick m/M to highlight the main menu that you want to adjust and press the center of the joystick.
Pin No. | Signal | |
1 | Red | |
|
| |
2 | Green (Sync on | |
Green) | ||
| ||
|
| |
3 | Blue | |
|
| |
4 | ID (Ground) | |
|
| |
5 | DDC Ground* | |
|
| |
6 | Red Ground | |
|
| |
7 | Green Ground | |
|
| |
8 | Blue Ground |
Pin No. | Signal | |
9 | DDC HOST 5V* | |
|
| |
10 | Ground | |
|
| |
11 | ID (Ground) | |
|
| |
12 | ||
Data (SDA)* | ||
| ||
|
| |
13 | H. Sync | |
|
| |
14 | V. Sync | |
|
| |
15 | Data Clock | |
(SCL)* | ||
|
Sub menu
S I ZE / CENTER
, ![]()
![]()
![]()
![]() ,
,
2 6
3Move the joystick m/M to highlight the submenu that you want to adjust. Then move the joystick </, to make adjustments.
* DDC (Display Data Channel) is a standard of VESA.
2Turning on the monitor and computer
1 Connect the power cord to the monitor and press the
1(power) switch to turn on the monitor.
2 Turn on the computer.
No need for specific drivers
This monitor complies with the “DDC” Plug & Play standard and automatically detects all the monitor’s information. No specific driver needs to be installed to the computer.
The first time you turn on your PC after connecting the monitor, the setup Wizard may appear on the screen. In this case, follow the
Notes
•Do not touch the pins of the video signal cable connector.
•Check the alignment of the HD15 connector to prevent bending the pins of the video signal cable connector.
Adjusting the brightness and contrast
Brightness and contrast adjustments are made using a separate BRIGHTNESS/CONTRAST menu. These adjustments are effective for all input signals.
1 Move the joystick in any direction to display the BRIGHTNESS/CONTRAST menu.
2Move the joystick m/M to adjust the brightness (![]() ), and </, to adjust the contrast (
), and </, to adjust the contrast ( ![]() ).
).
BR I GH T NE S S / CON T RA S T
2 6 | 2 6 |
Note
If you set the brightness and contrast level to “0”, the picture will black out and no picture will appear.
4