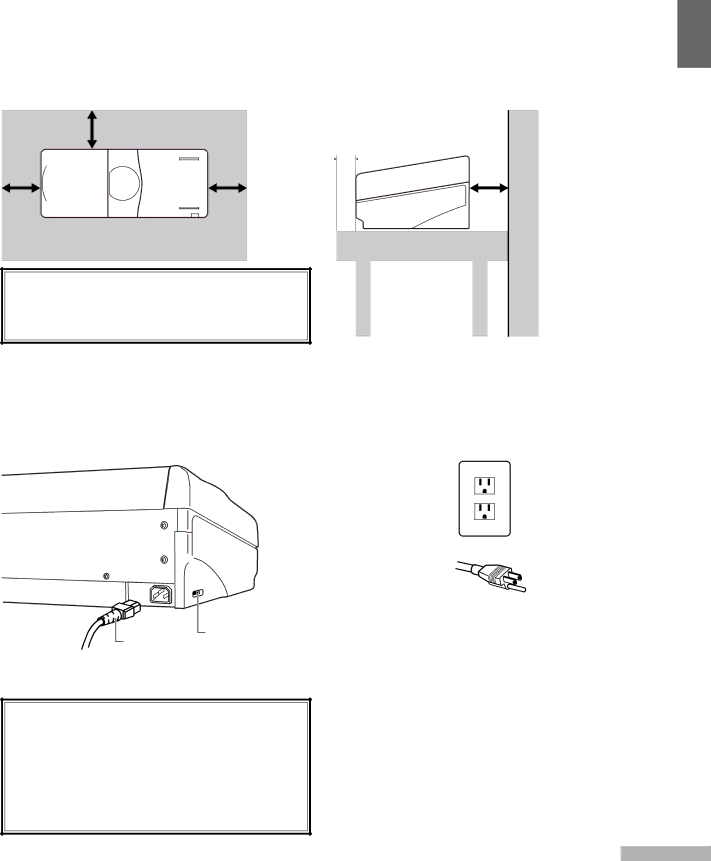
FujiFilm 3000 manual Installation Space, Connecting the Power Cord

Page 5

INSTALLATION SPACE

To ensure the proper functioning of your PosterPrinter 3000, it is important to

1


allow adequate space around the main unit. Install as indicated in the following


diagrams (unit: inch/mm).


8/200


8/200


8/200

2/50


8/200 wall


table

Caution

Be sure to place the printer on a sturdy, flat surface.

CONNECTING THE POWER CORD

Connect the power cord to the main unit.

Insert the power plug into a wall socket.


Inserting the plug into a

three-prong socket

power switch

power cord

Caution

1.Always connect the power cord to the printer before inserting the plug of the power cord into a power socket.

2.When using a two-prong socket, always connect the grounding wire to a grounding terminal.

3

Image 5
Contents USER’S Guide FCC IntroductionContents Unpacking the Printer Checklist of Items Included in PackageConnecting the Power Cord Installation SpaceDo not damage, crease or fold the power cord Safety PrecautionsGrounding Instructions for Proper USE of the Printer Variety of paper types and colors are available Main Features of the PosterprinterRear View Individual Part NamesFront View Printer ScannerFunction Control PanelContrast ModeOutput Size Paper remaining from the tip of the mark Installing PaperSetting the bracket in the printer Setting the left paper bracketAdjusting the left paper bracket Correct set positionBasic Functions Printing in Normal ModeWhat to do when a ‘document jam’ error occurs Points to note when using photo mode Printing in Photo ModePoints to note when using reverse mode Printing in Reverse ModeDivision Printing Using A123 paper to produce a 44x58 size posterPasting two output sheets together Printing Posters Smaller than the Paper Size Using A123 paper to produce a 20x27 size posterPoints to note in printing banners Printing Banners from Long Input DocumentsAdditional Functions Function ModeFunction mode Setting FunctionsChecking Current Setting Setting the Amount of Remaining Paper Remaining Paper ModePrinting the Amount of Remaining Paper Checking the Amount of Remaining PaperPrinting Area Scanning AreaDescription SuppliesDirect Thermal Paper DTP Thermal Transfer Paper TTPThermal Transfer Paper TTP / Heavy Duty Poly Paper HDP Points Common to All Types of PosterPrinter SuppliesError Message Description Response TroubleshootingError Messages and Responses Description Remedy TroubleshootingProblem Description and Remedies P29 Problem Part to Clean Cleaning the PrinterPlaten glass Printing resolution Scanning resolutionDimensions/weight Power supplyIndex 26-30, Nishiazabu 2-chome, Minato-ku, Tokyo 106-8620, Japan