APC 208 Vac user manual Input hardwire 230 V models only, Accessories

Page 9

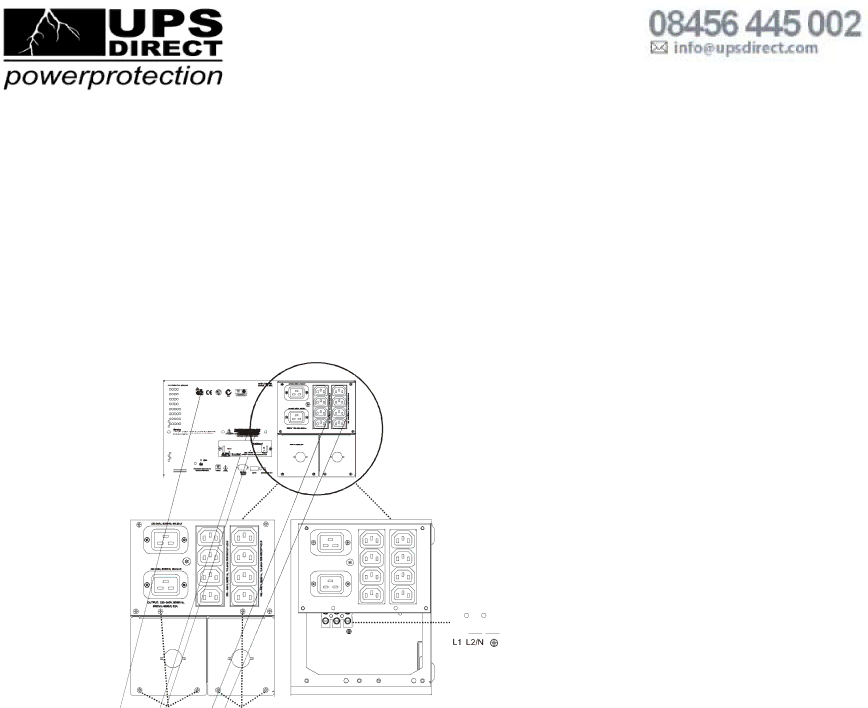
Input hardwire 230 V models only

Hardwiring must be performed by a qualified electrician. Adhere to all national and local regulations.

1.Use a dedicated branch circuit with a maximum of 32 A of over-current protection, (either a circuit breaker of fuses).

A lower rated branch may be used depending on the requirements of the UPS load. Allow an additional 600 W for the UPS during the battery replacement procedure.

2.Switch the circuit breaker OFF prior to connecting equipment and power to the UPS.

3.Remove the access panels located on the rear panel of the UPS.

4.Remove the knockout from the input access panel.

5.Use # 10 AWG (5 mm²).

Strip approximately six inches (152.4 mm) of the outer jacket from the input cable exposing the wires. Strip .5 inch (12.7 mm) of the individual wire coverings.

6.Route the input cable through the hole in the input access panel. Apply an appropriate strain relief.

7.Connect the ground wire prior to connecting the line wires.

8.Replace the access panels and secure each panel with three screws.


input

access panel

access panel

Access panel screws

Terminal block

L1 L2/N

Accessories

Install accessories prior to connecting power to the UPS.

Refer to the APC Web site, www.apc.com for available accessories.

Input/output hardwire kit

Two post rack option

Smart-UPS 5000 VA 208/230 Vac Tower/Rack-Mount 5U User Manual

5

For further information contact UPS Direct Ltd:

Tel: 08456 445 002 - Fax: 08456 445 003 - Email: info@upsdirect.com - Website: www.upsdirect.com

Image 9
Contents APC Smart-UPS≤ Page Contents Page Read the Safety Guide before installing the UPS About this UPSUnpack Installation SpecificationsRack-mount configuration Install rack-mount brackets and rail cleatsInstall unit in rack Rack-mount to tower conversion procedure Install stabilizer bracketsInstall two top covers Input hardwire 230 V models only AccessoriesConnect the ground wire prior to connecting the line wires Configure bezel Rack-mount configuration Tower configurationConnect batteries Rack-mount configuration Connect display cable and install bezelConnect Equipment and Power to the UPS Rear PanelsStart the UPS Communication Ports Emergency Power OffIndicator Indicator Title Description Display Panel Indicators and Function ButtonsDisplay Panels ModelsFeature Feature Title Function Button Function Factory User Selectable Description Default Choices UPS settingsBrightly Problem and/or Possible Cause Solution TroubleshootingReplace Battery/Battery Disconnected LED is illuminated Input circuit breaker tripsAVR Boost or AVR Trim LEDs are illuminated UPS operates on battery although line voltage exists There is no utility powerBattery Charge and Load LEDs flash simultaneously Diagnostic utility voltageMaintenance, Transport, and Service Replace battery modulesInstall new batteries Service Terms of warranty Two-Year WarrantyDate of product declaration