28
Microphone preamp
Attaching the preamp
Microphone preamp
The removable preamplifier (model
Attaching the preamp
1.Place the preamp connector over the mating connector at the top of the instrument. Gently press down while rotating the preamp until the preamp connector drops slightly in place.
2.Rotate the preamp ring until secure.
Connecting an extension cable
Optional Extension cables are available from 3M. They are typically used to make remote measurements by distancing the microphone from the instruments body.
1.To connect the microphone to the extension cable, first remove the preamp from the
Extension cable with connector pins (see A) connects to the top of the
|
|
|
|
|
| Extension cable pins with white molding (see B) |
|
|
|
|
|
| connects to preamp |
A |
| B |
| C |
| Preamp pins (aligns to extension cable pins) see C. |
|
|
|
|
|
|
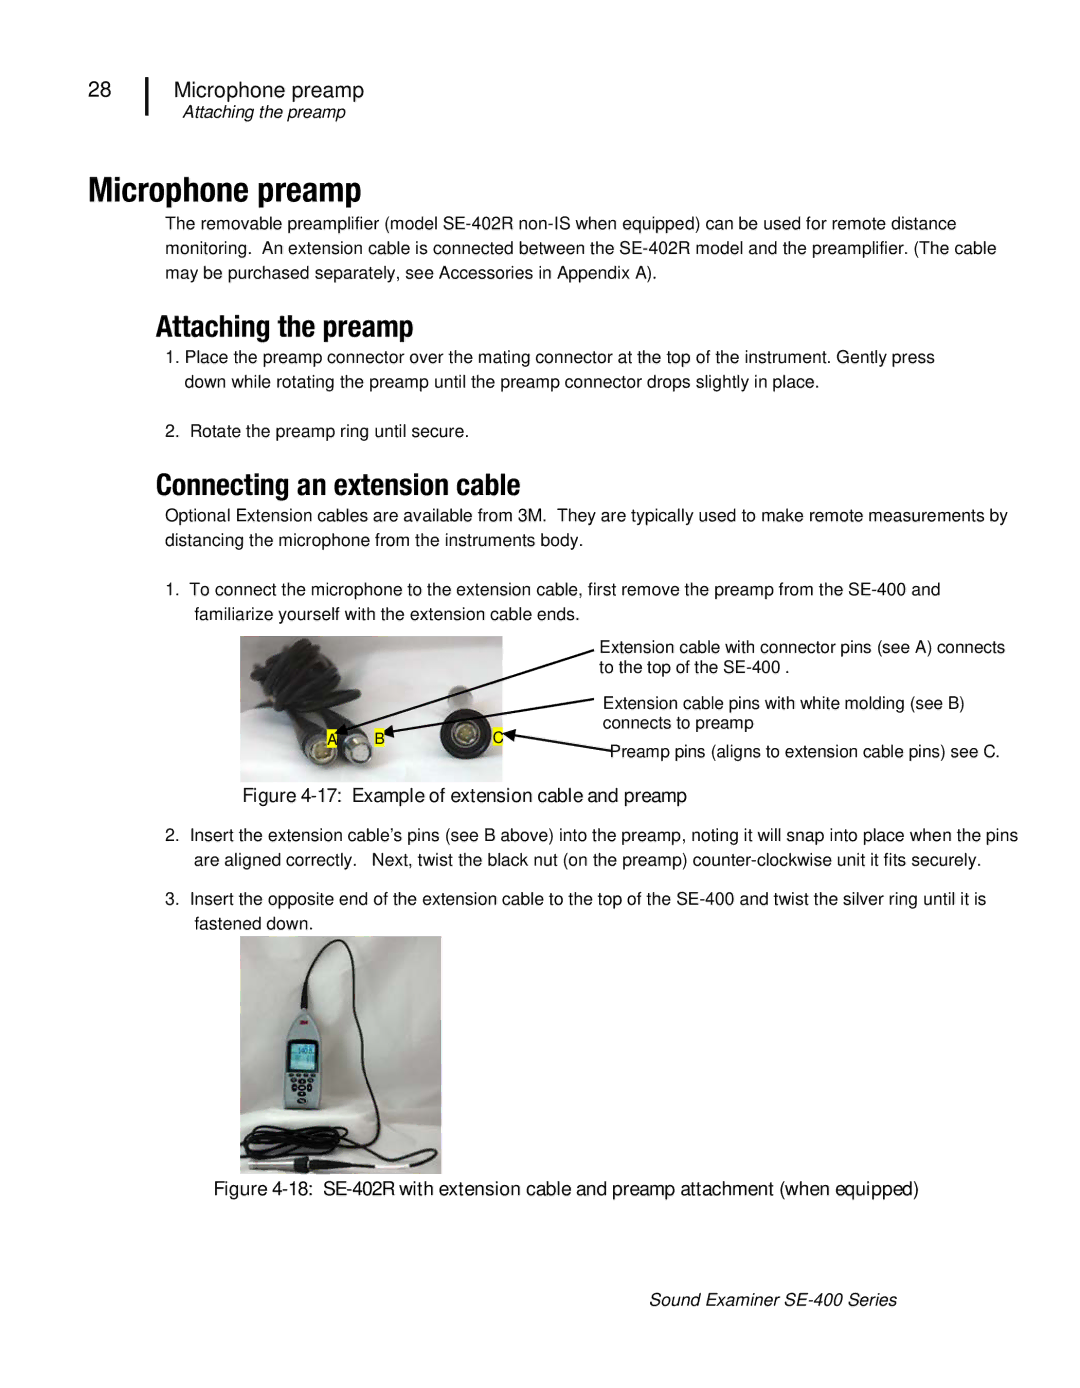
Figure 4-17: Example of extension cable and preamp
2.Insert the extension cable’s pins (see B above) into the preamp, noting it will snap into place when the pins are aligned correctly. Next, twist the black nut (on the preamp)
3.Insert the opposite end of the extension cable to the top of the
Figure 4-18: SE-402R with extension cable and preamp attachment (when equipped)
Sound Examiner
