25
SoundPatrol feature
Connecting the printer and settings
SoundPatrol feature (non-IS models only)
In some applications, the SoundPatrol feature is used for noise enforcement assessment with the capability to print to a cabled
Connecting the printer and settings
The portable thermal printer and the
| Dip Switch |
|
| Function |
|
| Switch Setting |
|
| 1 |
|
| Interface | Selection |
| Off (wireless) |
|
|
|
|
|
|
|
| On (wired interface) | |
| 2 |
|
| Communication mode |
| On | ||
| 3 |
|
| Reserve |
| Off/On | ||
| 4 |
|
| Start selection |
| Off/On | ||
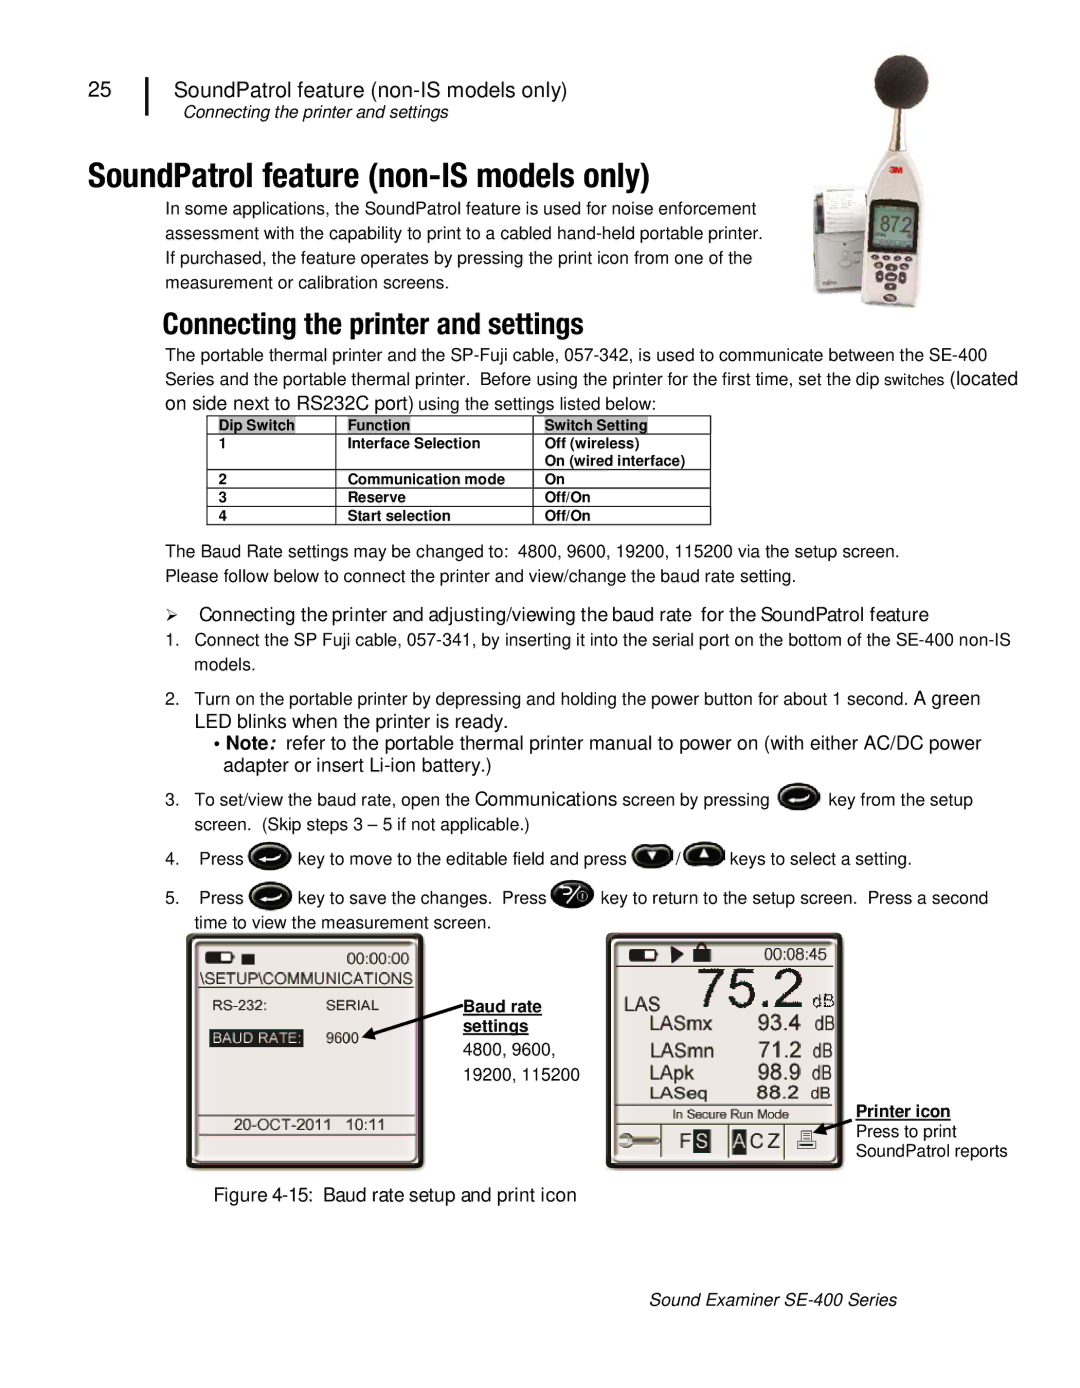
The Baud Rate settings may be changed to: 4800, 9600, 19200, 115200 via the setup screen. Please follow below to connect the printer and view/change the baud rate setting.
Connecting the printer and adjusting/viewing the baud rate for the SoundPatrol feature
1.Connect the SP Fuji cable,
2.Turn on the portable printer by depressing and holding the power button for about 1 second. A green
LED blinks when the printer is ready.
•Note: refer to the portable thermal printer manual to power on (with either AC/DC power adapter or insert
3. To set/view the baud rate, open the Communications screen by pressing | key from the setup |
screen. (Skip steps 3 – 5 if not applicable.) |
|
4. Press ![]() key to move to the editable field and press
key to move to the editable field and press ![]() /
/![]() keys to select a setting.
keys to select a setting.
5. Press | key to save the changes. Press | key to return to the setup screen. Press a second |
time to view the measurement screen. |
| |
Baud rate settings
4800, 9600, 19200, 115200
Printer icon
![]() Press to print
Press to print
SoundPatrol reports
Figure 4-15: Baud rate setup and print icon
Sound Examiner