Runco Q-750D Using This Manual, Certain features, Degrade performance or cause a malfunction

Page 18

Introduction

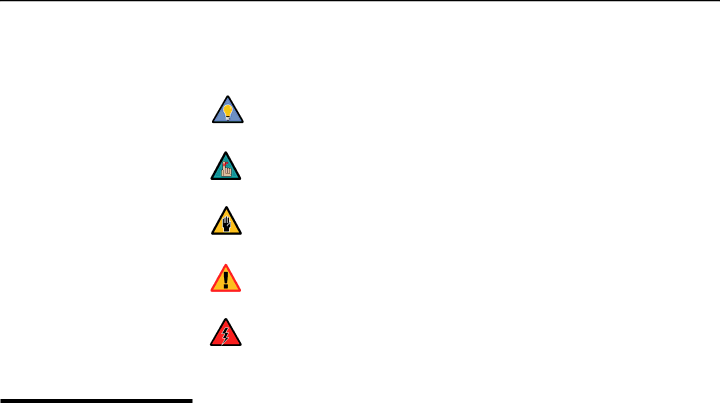
Graphic Conventions: These symbols appear in numerous places throughout the manual, to emphasize points that you must keep in mind to avoid problems with your equipment or injury:

Tip

TIPS highlight time-saving short cuts and helpful guidelines for using

certain features.

Note

NOTES emphasize text with unusual importance or special

significance. They also provide supplemental information.

Caution

CAUTIONS alert users that a given action or omitted action can

degrade performance or cause a malfunction.


WARNING

WARNINGS appear when a given action or omitted action can result

in damage to the equipment, or possible non-fatal injury to the user.

DANGER!

DANGER appears when a given action can cause severe injury or

death.


1.2

Using This Manual

Use the following table to locate the specific information you need in this manual.

If you need...

... Turn to page:


Information about obtaining service

iv


General information about the Q-750d Series LED

3

Home Theater Projector and DHD Controller


Installation instructions

13


First-time configuration instructions

40


Advanced configuration instructions

60


Troubleshooting tips

71


Product specifications

81


2

Q-750d Series Installation/Operation Manual

Image 18
Contents 750d Series 750d 750d/CineWide 750d/CineWide with AutoScopePage RuncoCare Standard Two Year Limited Warranty RuncoCare Standard FeaturesRuncoCare Claim Procedure Page Copyright and Trademarks Important Safety Instructions Compliance Information Declaration of ConformityFCC Part Page Table of Contents Maintenance and Troubleshooting OperationSpecifications External ControlTable of Contents Xiv List of Figures List of Figures Introduction About This ManualSignificance. They also provide supplemental information Using This ManualCertain features Degrade performance or cause a malfunctionDescription, Features and Benefits Format screenOptional Accessories Controls and Functions 750d at a GlancePower Input 100 to 240 VAC Connect the Q-750d to power here 750d Rear PanelOff = Normal operation DHD Controller Front Panel Virtual Cinema is available only on the Q-750d/CineWide orDHD Controller Rear Panel DHD Controller Rear PanelOutputs Inputs750d Remote Control Unit DHD Controller/Q-750d Remote ControlInformation about aspect ratios, refer to Table On / OFFCursor Buttons Menu button see below to exit the current menu169 Memory Preset ButtonsAspect Ratio Selection Buttons Letbox LetterboxInstallation Remote ControlInstallation specialist Quick Setup Installation OverviewStep Procedure For Details, Refer to Installation Considerations Projector Installation OptionsInstallation Type Ambient Light Throw DistanceThrow Ratios for the Q-750d Series PrimaryLens Screen Lens Only Anamorphic Minimum Maximum Vertical and Horizontal Ceiling InstallationFloor Installation PositionVertical lens shift figures are for ceiling mount Audio/Video Synchronization IssuesPossible Audio Latency for Various Input Timings Input Timing Possible Audio Latency millisecondsInstalling the Optional CineWide/AutoScope Lens Mount Other ConsiderationsQ-750d/CineWide with AutoScope Motor Assembly Exploded View Lens Motor Q-750d/CineWide with AutoScopeRemove Projector Front Feet Install Lens Motor Q-750d with Ceiling Mount Adapters/Projector StandsAutoScope Lens Motor Installation Installing the Fixed CineWide Base Plate 750d/CineWideDo not use the mounting screws provided with the ceiling Lens base plateFloor Mounting Upright Ceiling Mounting Inverted Adjusting the ProjectionMounting the Q-750d AngleConnector Panel Access Connecting the DHD Controller to the Q-750dConnections to the Q-750d and DHD Controller 11. RS-232 Connection from the DHD Controller to the Q-750d Hdmi Source Connections See Figure Connecting SourceComponents to the DHD Controller13. Component Video Source Connections DTV-Set-Top BoxComputer RGB CamcorderGaming Console 15. Scart Rgbs Source ConnectionsComposite and S-Video Source Connections CamcorderRS-232 Controller ConnectionConnecting 12-volt Trigger Outputs to External Equipment AutoScope Lens MotorConnecting an External IR Receiver to the DHDTurning on the Power Connecting to AC PowerYou must enter a passcode to access the Service menu Primary Lens AdjustmentsAdjusting the Picture Orientation Zoom Out FocusInstalling and Adjusting the CineWide Anamorphic Lens Anamorphic Lens Installation AdjustmentIt is extremely important that the primary lens is properly 21. Attaching the Anamorphic Lens to the Lens Ring Adjusting the Horizontal X Lens Position Time after turning on the systemInstallation Anamorphic Lens Top View Geometry Using the On-Screen Menus OperationService Main MenuRunco Video Input Source Input SourceAspect Ratio Aspect RatioSelect 169 to view 169 DVDs Aspect Ratio SettingsRemote Aspect Ratio Control Description Key 169 Hdtv programs in theirRemote Aspect Ratio Control Description Key OverscanPicture PictureTypical Gray Bar Pattern for Adjusting Contrast Gray Yellow Cyan Green Magenta Red Blue Gray Yellow Cyan Green Magenta Red Blue Resolution Input PositionInput Position Overscan Modes Memory Presets Adjust the Phase after adjusting Tracking see belowMemory Presets Sleep Timer Sleep TimerCalibration You must enter a passcode to access the Calibration menuInformation Should be used by ISF-certified technicians onlyCIE 1931 Chromaticity Diagram Color Temperature Presets and Associated Color Points Color Temperature Preset Associated x/y ValuesModes on a given input X/y Color Gamut Values Given inputColor Saturation Hue SaturationHue Copied settings are not retained after a power cycle Copy/PasteService ServiceInput Names Operation Operation 58 and ISF Day/Night Memory Presets Troubleshooting Chart Maintenance and TroubleshootingTroubleshooting Tips Symptom Possible Causes SolutionMaintenance and Troubleshooting External Control Port ConfigurationSerial Command Syntax Serial CommunicationsSerial Commands Input Selection CommandsPicture Adjust Commands Input Position Commands Output Shift CommandsMiscellaneous Commands Enter keyExit Return key Using Discrete IR Codes Command BitsWith Toggle Bit = Hex Binary Function Start RC5 Control Codes for the DHD Controller IR Command ListRemote Control With Toggle Description Button Name Bit = RC5 DataEnter Specifications 750d SpecificationsQ-750d Specifications Power Requirements Home Theater Calibration SpecificationsIndustry-Standard Specifications DimensionsDHD Controller Specifications DHD Controller SpecificationsOverall Dimensions Q-750d Overall Dimensions Q-750dOverall Dimensions Q-750d/CineWide with AutoScope Overall Dimensions Q-750d/CineWide with AutoScopeSupported Timings Supported Signal Timings by InputFormat Resolution Frequency Rate Hz MHz KHz Supported? √ = Yes, = NoVideo Video 1 S-Video Format Resolution FrequencyComponent/ Rgbhv Rate Hz MHz KHzPAL-M Page 020-0997-00 Rev. a November