HOME DVD PLAYER | V10M10_IM_EN_08072006 |
GETTING STARTED
Notes on the Connection Diagram – Continued
3.After making the video connection of your choice, please ensure that your TV is in the proper mode as well. If you choose the component VIDEO connection, your TV must be in the component mode. If you choose the
4.Some TV sets use the different audio input for each video mode. Please refer to the user’s manual of your TV for the detailed setting information.
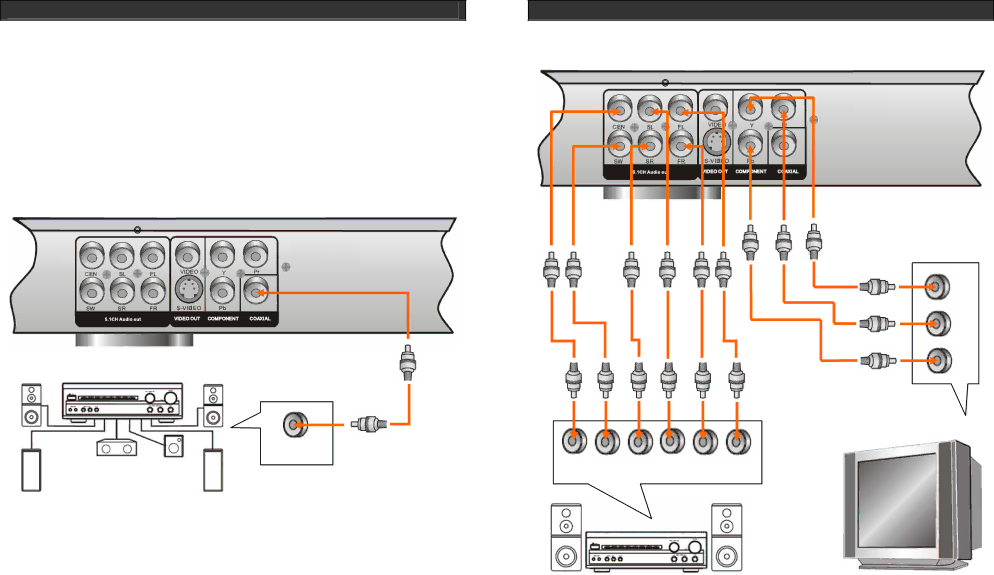
Connecting to an Audio Amplifier with Digital Audio Input
COAXIAL
Digital Audio Amplifier | Coaxial Audio Input |
Notes on the Connection Diagram
Some audio amplifiers or TV sets support the coaxial digital audio input. If you have such an audio device, you can connect this unit to the device with the coaxial digital audio connection. The coaxial digital audio connection can allow a device to deliver the higher quality of audio to another audio device with the minimum loss. There are two options regarding to the coaxial digital audio connection. If your audio device has the capability of Dolby Digital decoding, this unit can send the digital audio contents in the RAW format to the audio device. The audio contents in the RAW format are the digital audio contents before decoding the digital audio contents. If your audio device doesn’t have the capability of Dolby Digital decoding, this unit can also send the digital audio contents in the PCM format. The digital audio contents in the PCM format are the audio contents after decoding the audio content. Your audio device must be in the coaxial audio input mode. Please refer to the user’s manual of your audio device for the detailed instructions. The coaxial digital audio cable is not included in the package.
16www.jWIN.com
HOME DVD PLAYER | V10M10_IM_EN_08072006 |
GETTING STARTED
Connecting to a TV set and an Amplifier with
VIDEO IN
Y
Pr
Pb
CEN SW SR SL FR FL
5.1CH AUDIO INPUTS
Notes on the Connection Diagram
1.You can also use the composite VIDEO connection or
2.Your TV set and
17www.jWIN.com