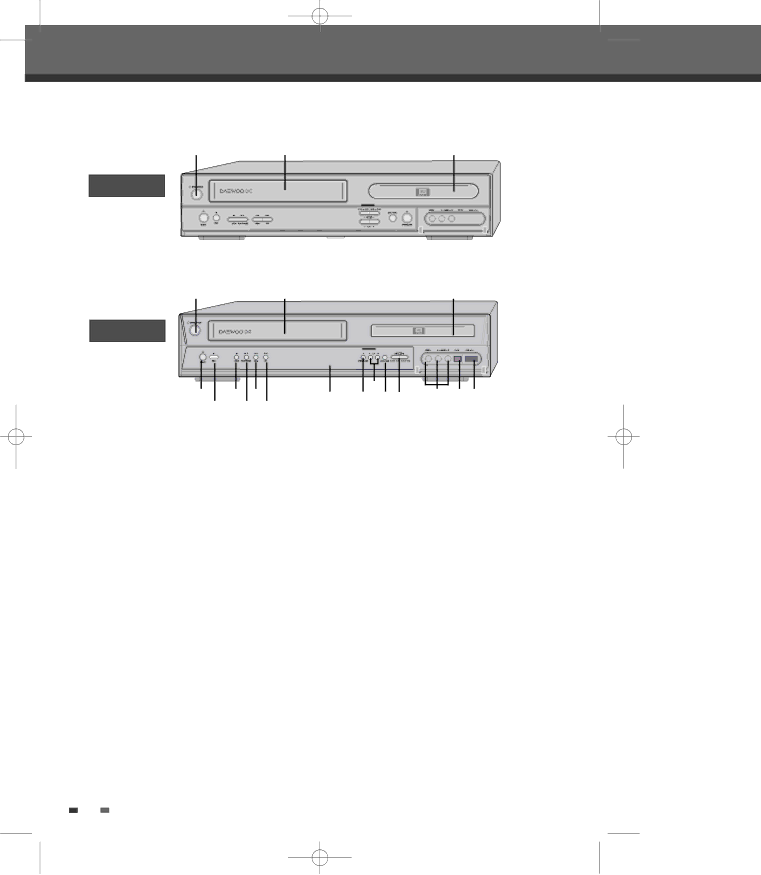
Identification of Controls
 Front Panel
! | @ | # |
|
|
|
|
|
|
|
|
|
|
|
|
|
|
|
|
|
|
|
|
|
|
|
|
|
|
|
|
|
|
|
|
|
|
|
|
|
|
|
|
|
|
|
|
|
|
|
|
$ |
| ^ |
| * |
| ) 12 3 4 5 67 | |||||||||||||||||
|
|
| |||||||||||||||||||||
%& (
!@#
DRVT-43
$ | ^ * |
| 2 | 5 67 |
) | 4 31 | |||
% | & ( |
|
|
|
!STANDBY/ON
Turns the
@Cassette Compartment (VCR deck) Insert a video cassette here.
#Disc Tray (DVD deck)
Insert a disc here.
$VCR EJECT
Ejects the tape in the VCR deck.
)Front Panel Display
Shows the current status of the
1COPY
Copies from DVD to VCR (or from VCR to DVD).
2CH+/–
Scans up or down through memorized channels. Also moves up and down in menus.
% REC | 3 SELECT DVD/VCR |
Starts recording. Press repeatedly to set the recording time.
Toggles control between the DVD mode and the VCR mode.
^STOP
Stops playback or recording.
&PLAY/PAUSE
Starts playback of a disc or tape. Pauses playback or recording temporarily.
*REW
DVD: Skips to previous chapter.
VCR: Rewinds the tape during Stop mode. Press during Play mode for fast reverse picture search.
4OPEN/CLOSE (DVD)
Opens or closes the disc tray.
5AVF Input (VIDEO,
Connects to the audio/video output of an external source (VCR, Camcorder, etc.).
6DV Input
Connects to the DV output of an external source (VCR, Camcorder, etc.).
( FF | 7 USB Input | |
DVD: Skips to next chapter. | ||
Connects to the USB device with Flash memory. | ||
VCR: Advances the tape during Stop mode. | ||
| ||
Press during Play mode for fast forward picture |
| |
search. |
|
12