Operation
Timer Menu Options
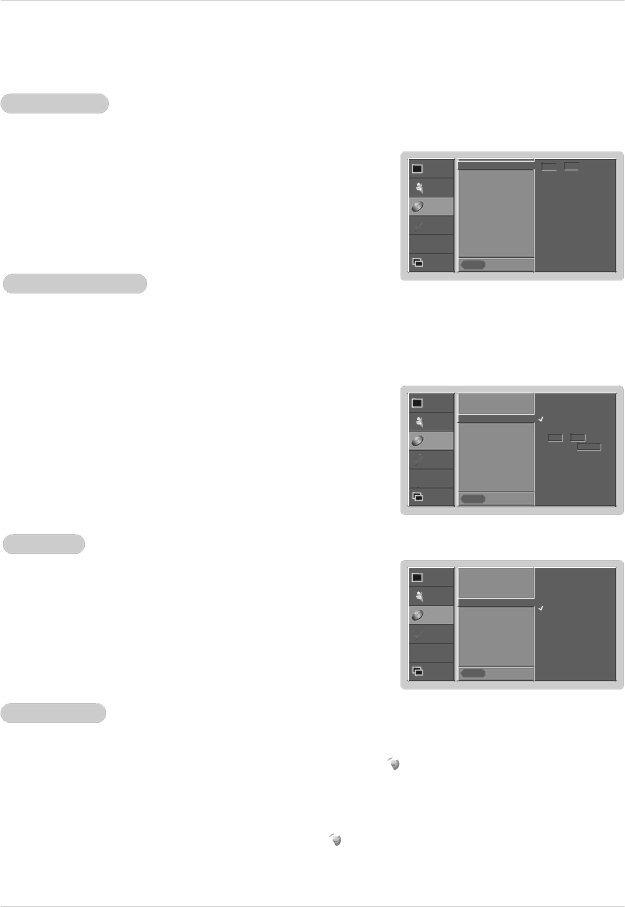
Clock Setup
-If current time setting is wrong, correct the clock setting.
1.Press the MENU button and then use D / E button to select the TIMER menu.
2.Press the G button and then use D / E button to select Clock.
3.Press the G button and then use D / E button to set the hour.
4.Press the G button and then use D / E button to set the minutes.
5.Press the ENTER button to save the new settings.
On/Off Timer Setup
PICTURE
SOUND
TIMER
![]() SPECIAL
SPECIAL
![]() SCREEN
SCREEN
PIP/DW
ClockG
Off timer
On timer
Auto off
Menu Prev.
- - ![]() : - -
: - - ![]() AM
AM
-Timer function operates only if current time has already been set.
-
-If you do not press any button within 2 hours after the monitor turns on with the On Timer function, the monitor will automatically revert to standby mode.
1.Press the MENU button and then use D / E button to select the TIMER menu.
2.Press the G button and then use D / E button to select Off timer or On timer.
3.Press the G button and then use D / E button to select On.
•To cancel On/Off timer function, select Off.
4.Press the G button and then use D / E button to set the hour.
5.Press the G button and then use D / E button to set the minutes.
For only On timer function; Press the G button and then use D / E button to set volume level.
PICTURE
SOUND
TIMER
![]() SPECIAL
SPECIAL
![]() SCREEN
SCREEN
PIP/DW
Clock |
|
|
|
|
|
|
Off timer |
|
|
|
|
| |
On timer | G | On |
|
|
| |
Auto off |
| Off |
|
|
| |
|
|
| 6 | : | 30 | AM |
|
|
| Volume |
| 17 | |
Menu | Prev. |
|
|
|
|
|
6. Press the ENTER button to save the new settings.
Auto Off
-If there is no input signal, the Monitor turns off automatically after 10 minutes.
1.Press the MENU button and then use D / E button to select the TIMER menu.
2.Press the G button and then use D / E button to select Auto off.
3.Press the G button and then use D / E button to select On or Off.
4.Press the ENTER button to save the new settings.
PICTURE
SOUND
TIMER
![]() SPECIAL
SPECIAL
![]() SCREEN
SCREEN
PIP/DW
Clock |
|
|
| |
Off timer |
|
| ||
On timer |
| On | ||
Auto off | G | |||
Off | ||||
|
|
| ||
Menu | Prev. |
|
| |
Sleep Timer
- The sleep timer turns the Monitor off at a preset time. Note that this setting is cleared when the monitor is turned off.
|
| zz |
1. Press the SLEEP button repeatedly to select the number of minutes. First the |
| |
|
screen, followed by the following sleep timer options: 10, 20, 30, 60, 90, 120, 180, and 240 minutes.
2.When the number of minutes you want is displayed on the screen, press the ENTER button. The timer begins to count down from the number of minutes selected.
3.To check the remaining minutes before the monitor turns off, press the SLEEP or ENTER button once.
|
| zz |
4. To cancel the Sleep Timer, press the SLEEP button repeatedly until |
| |
|
22 Plasma Monitor