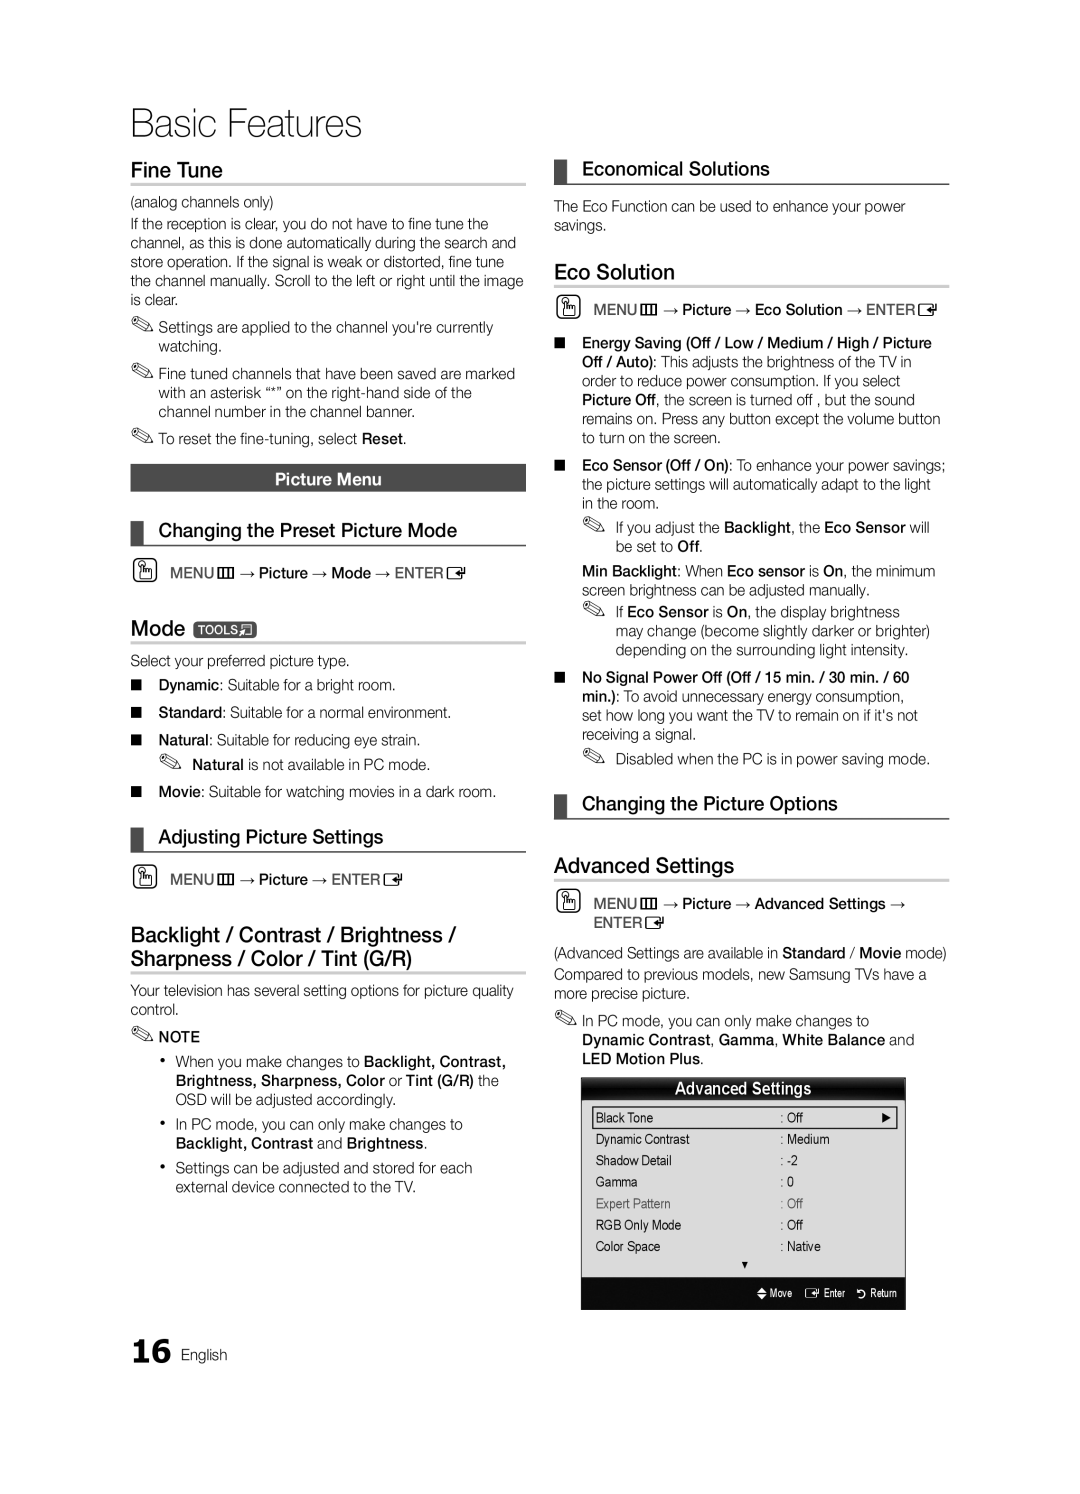
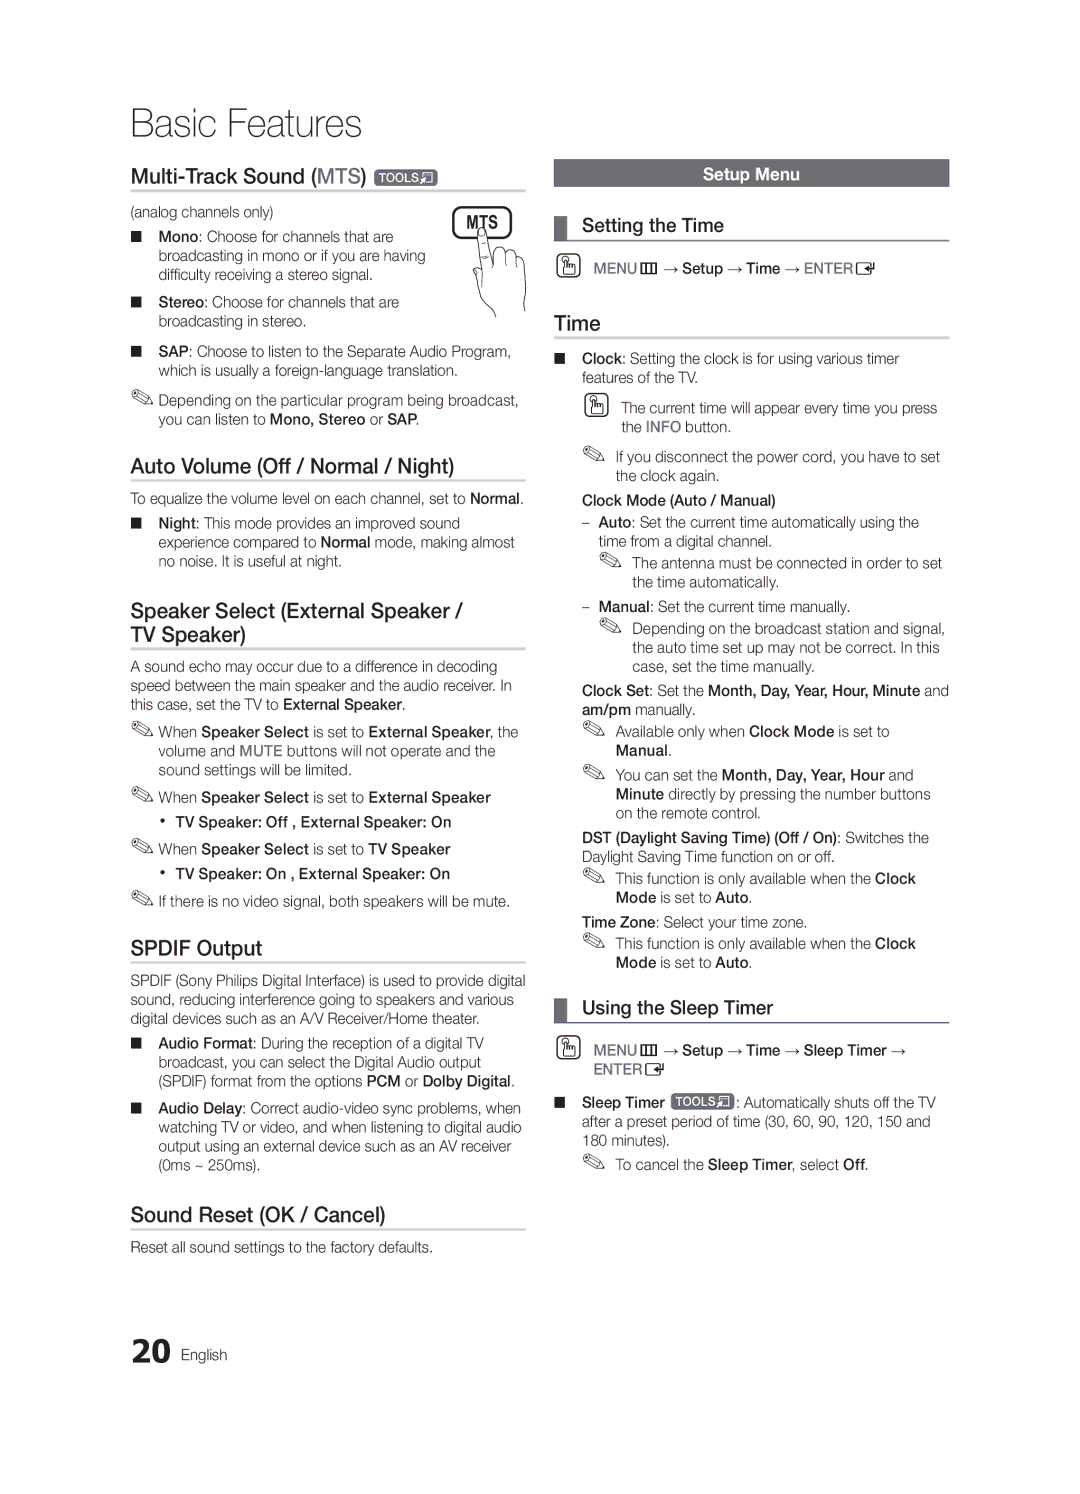
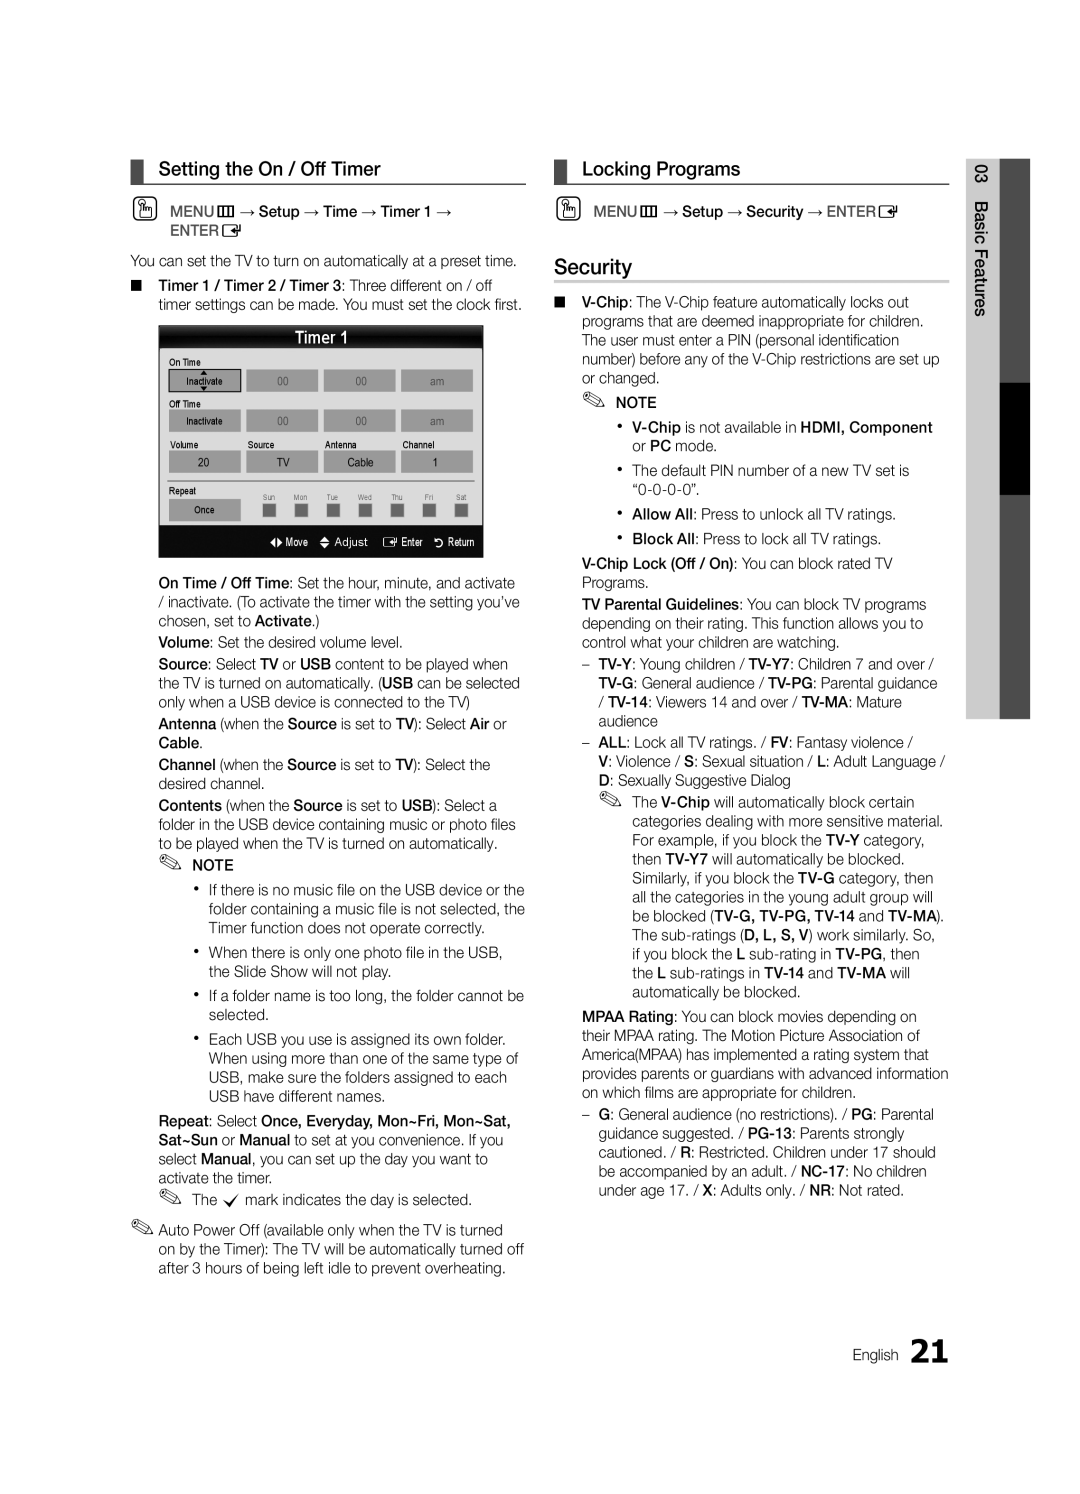
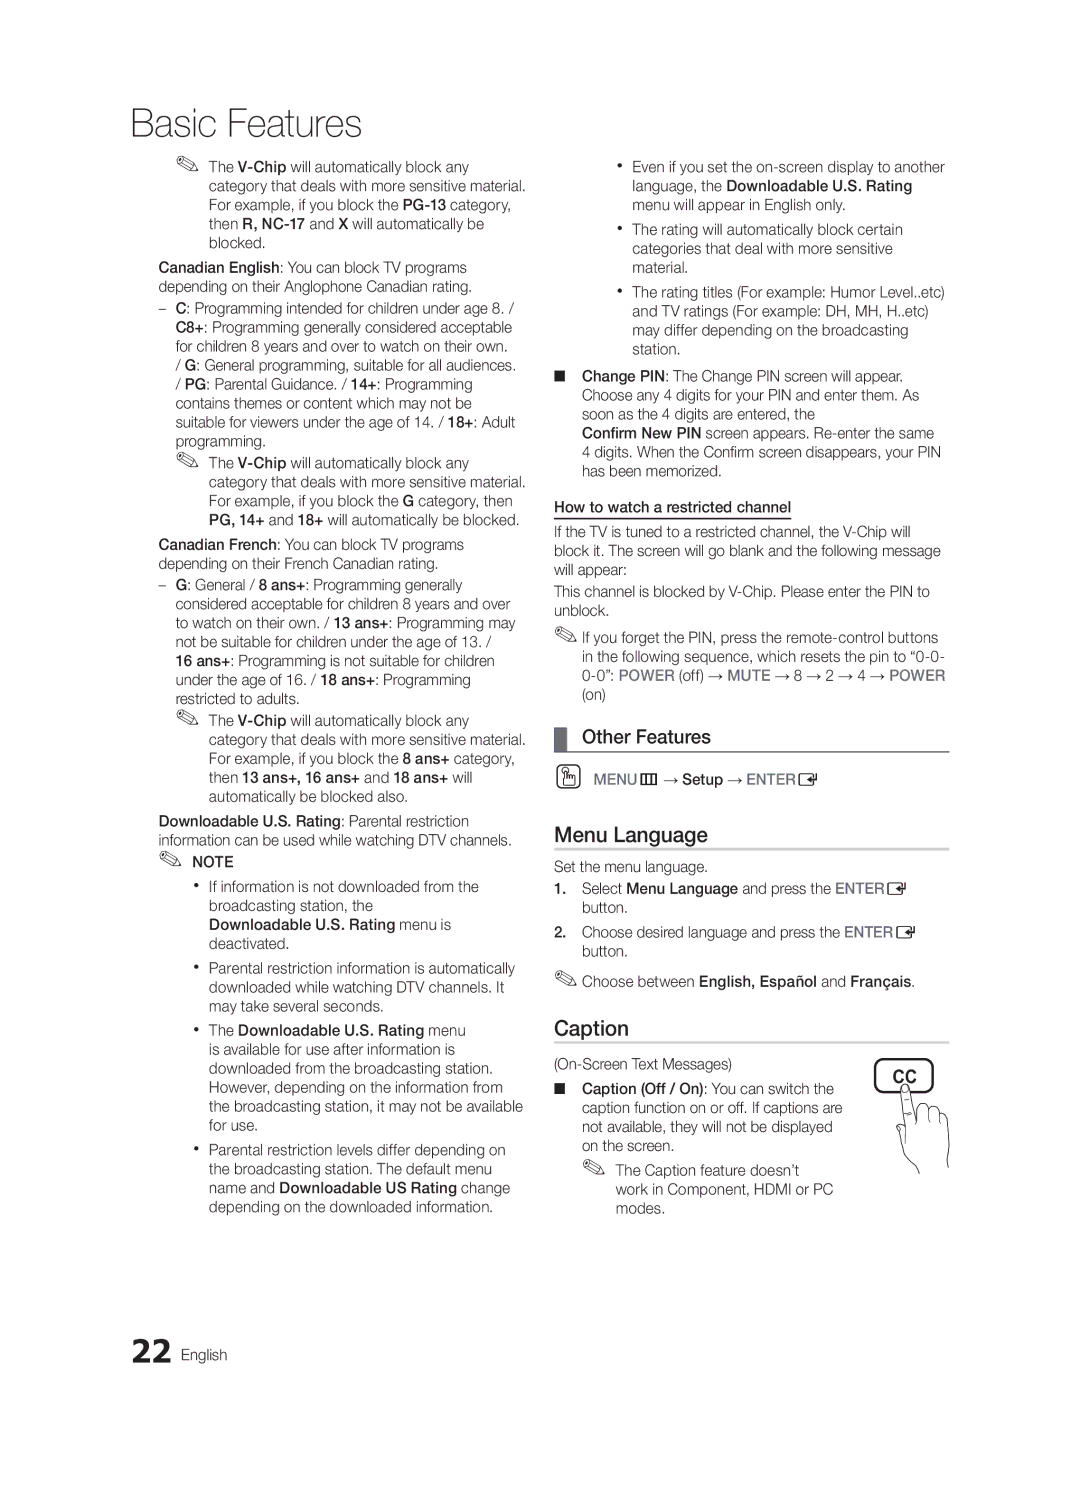
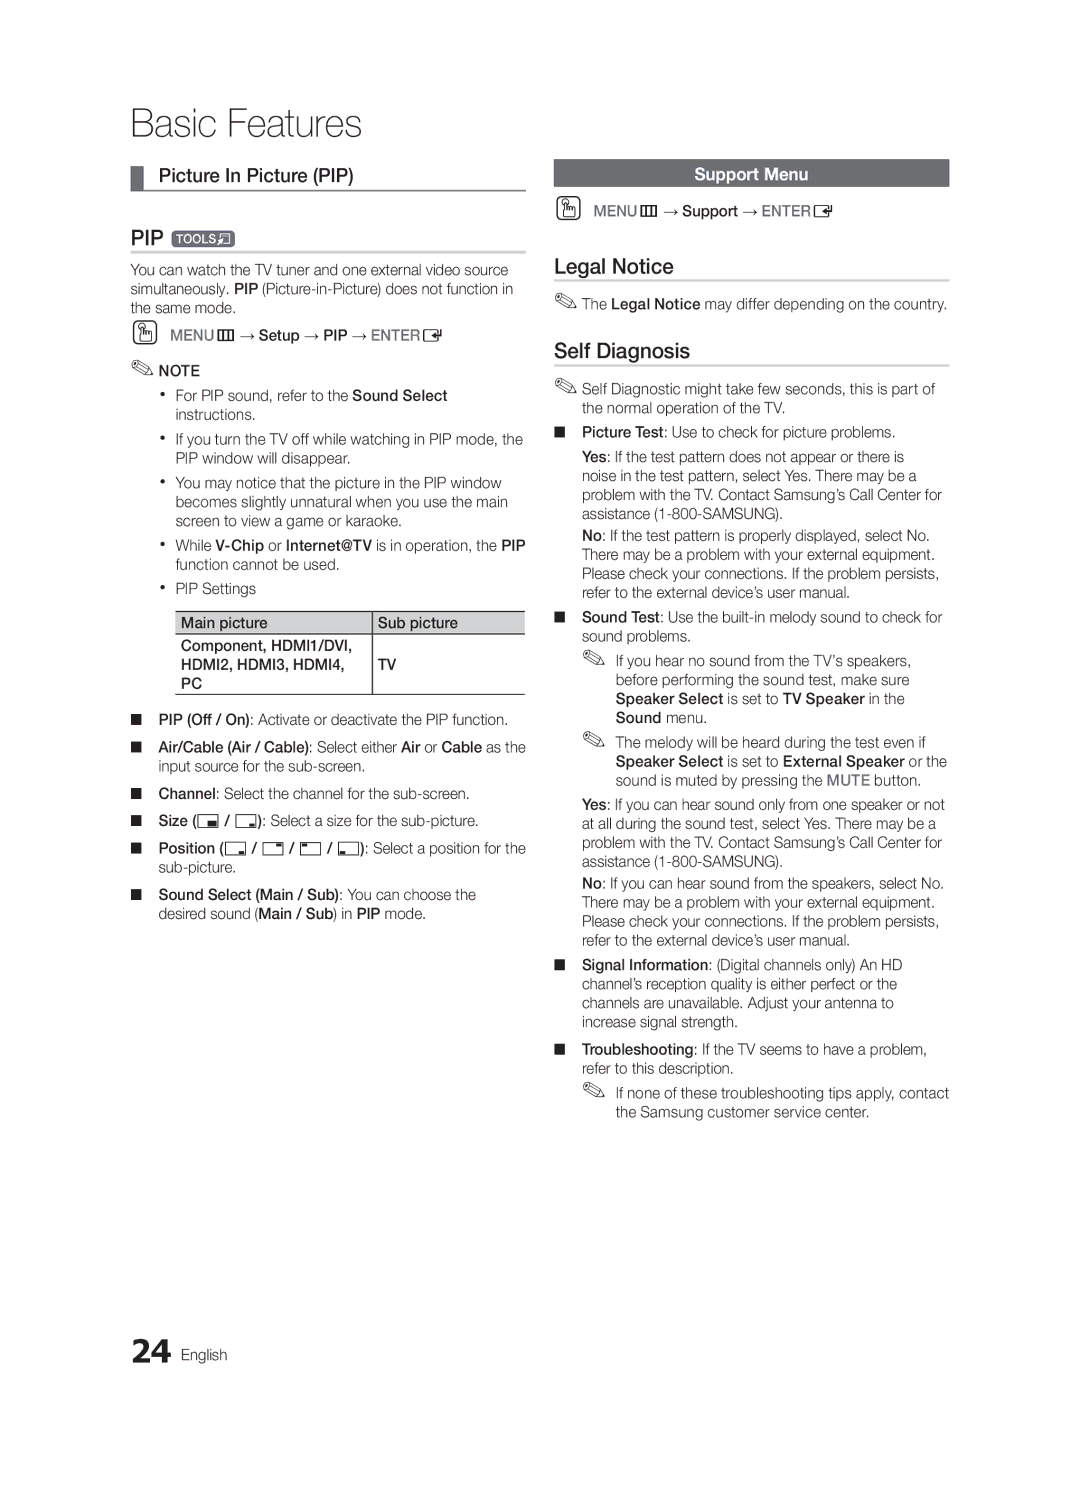
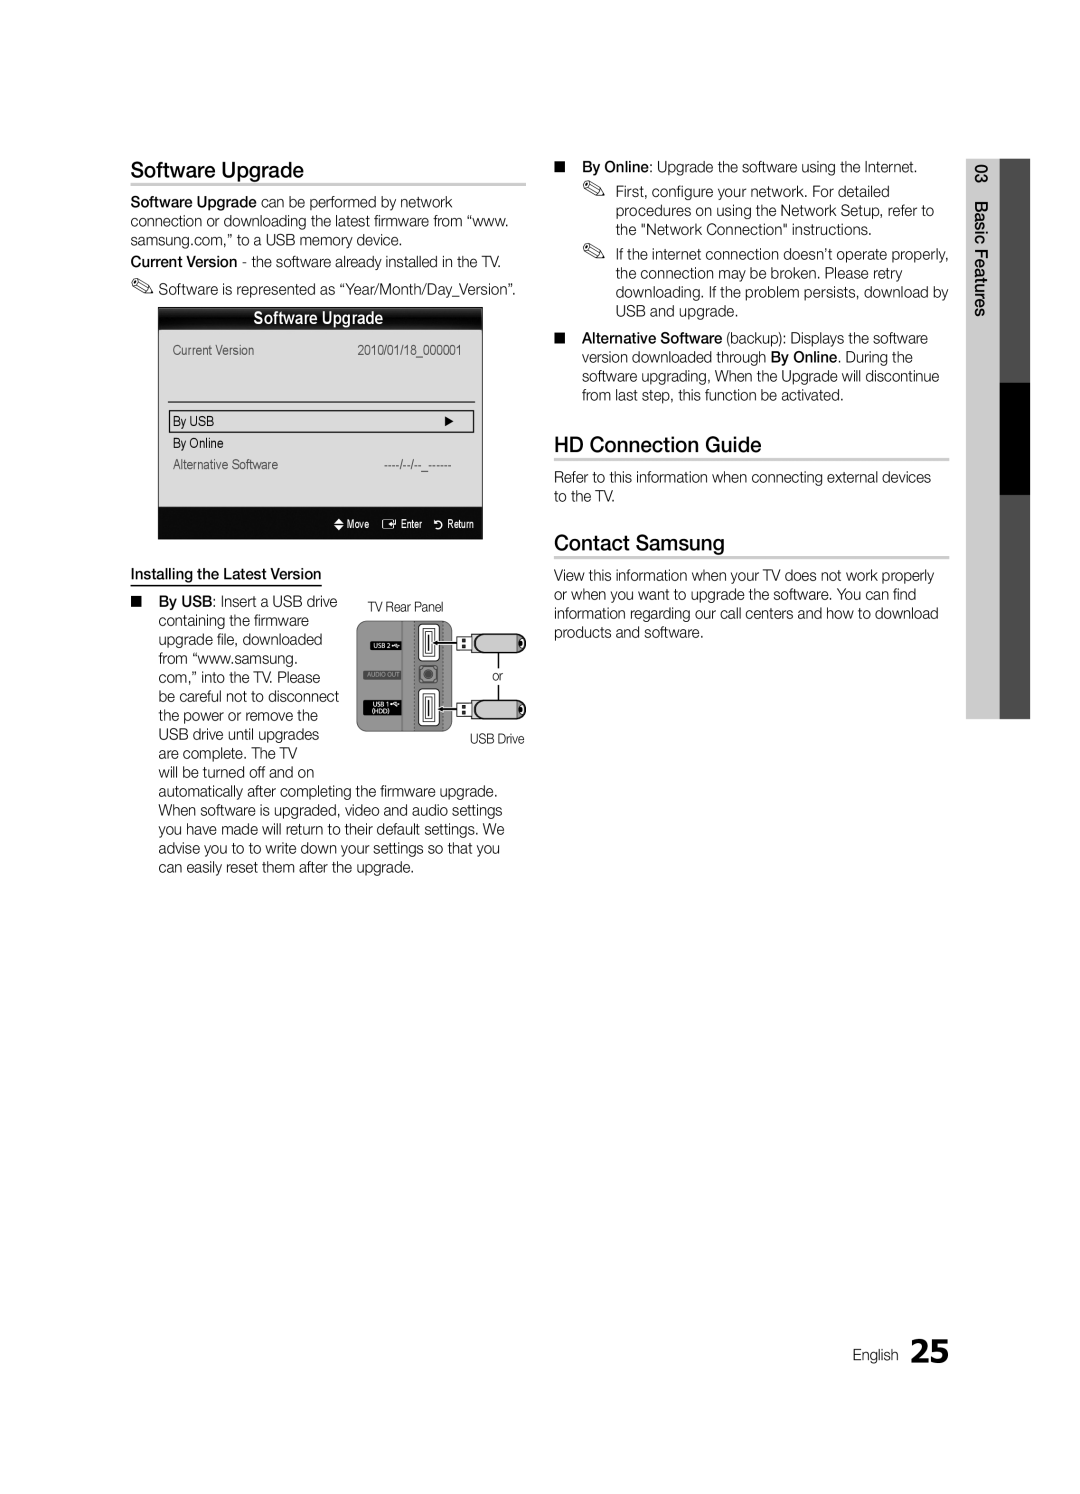
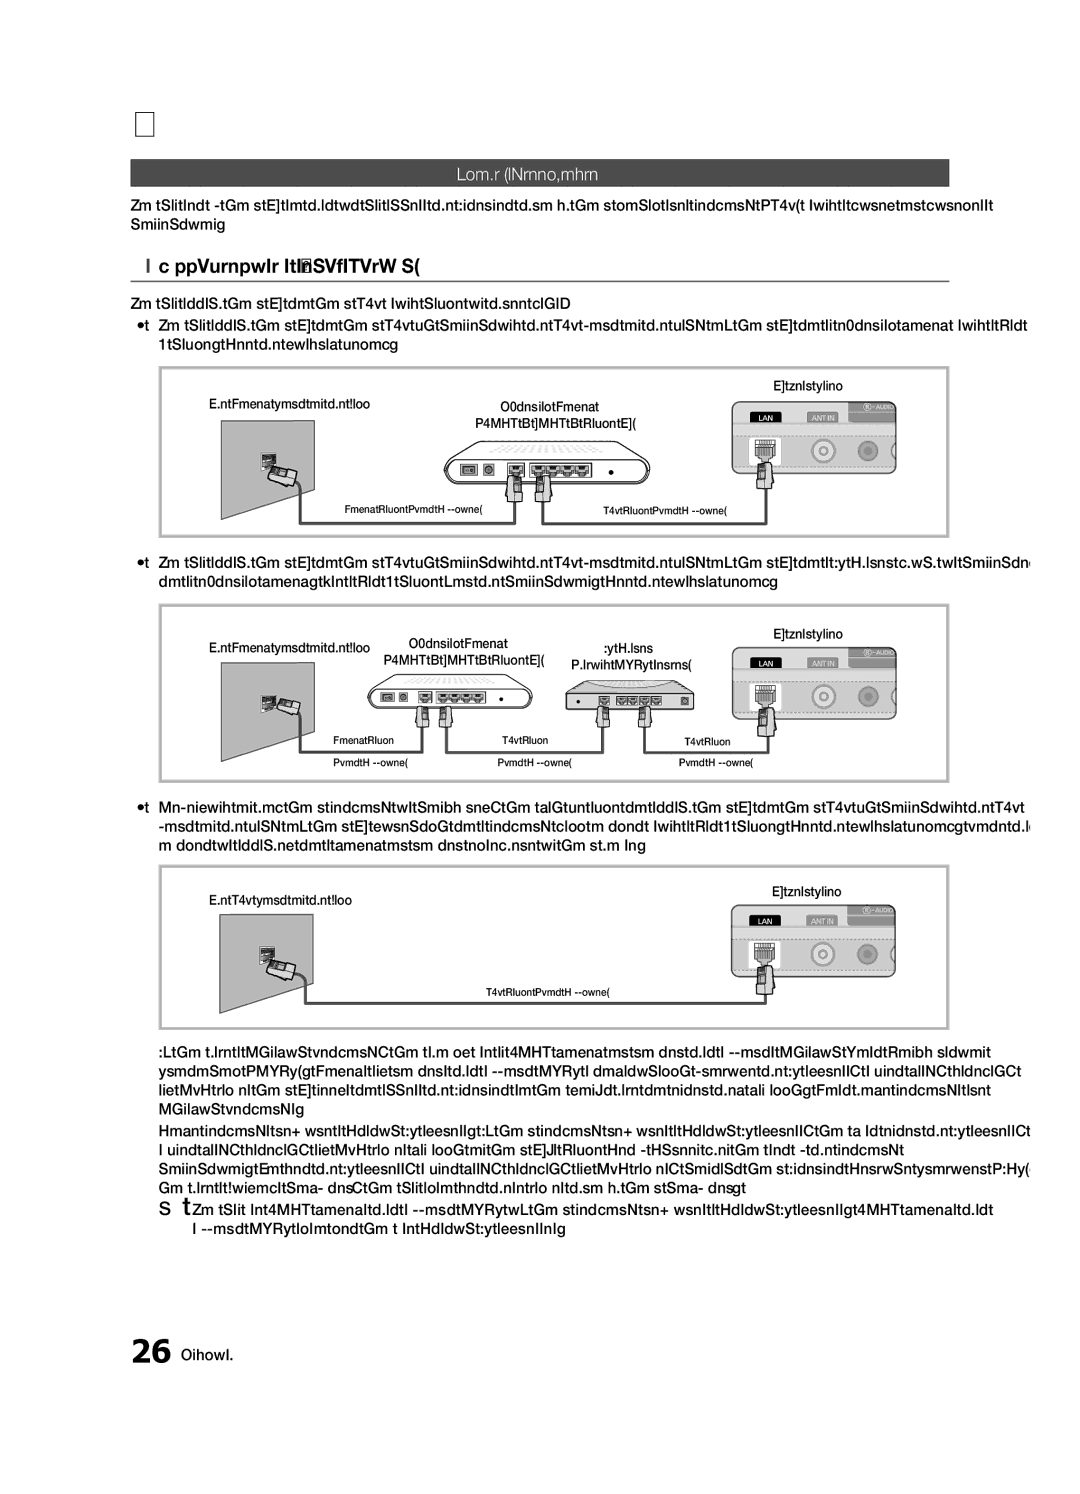
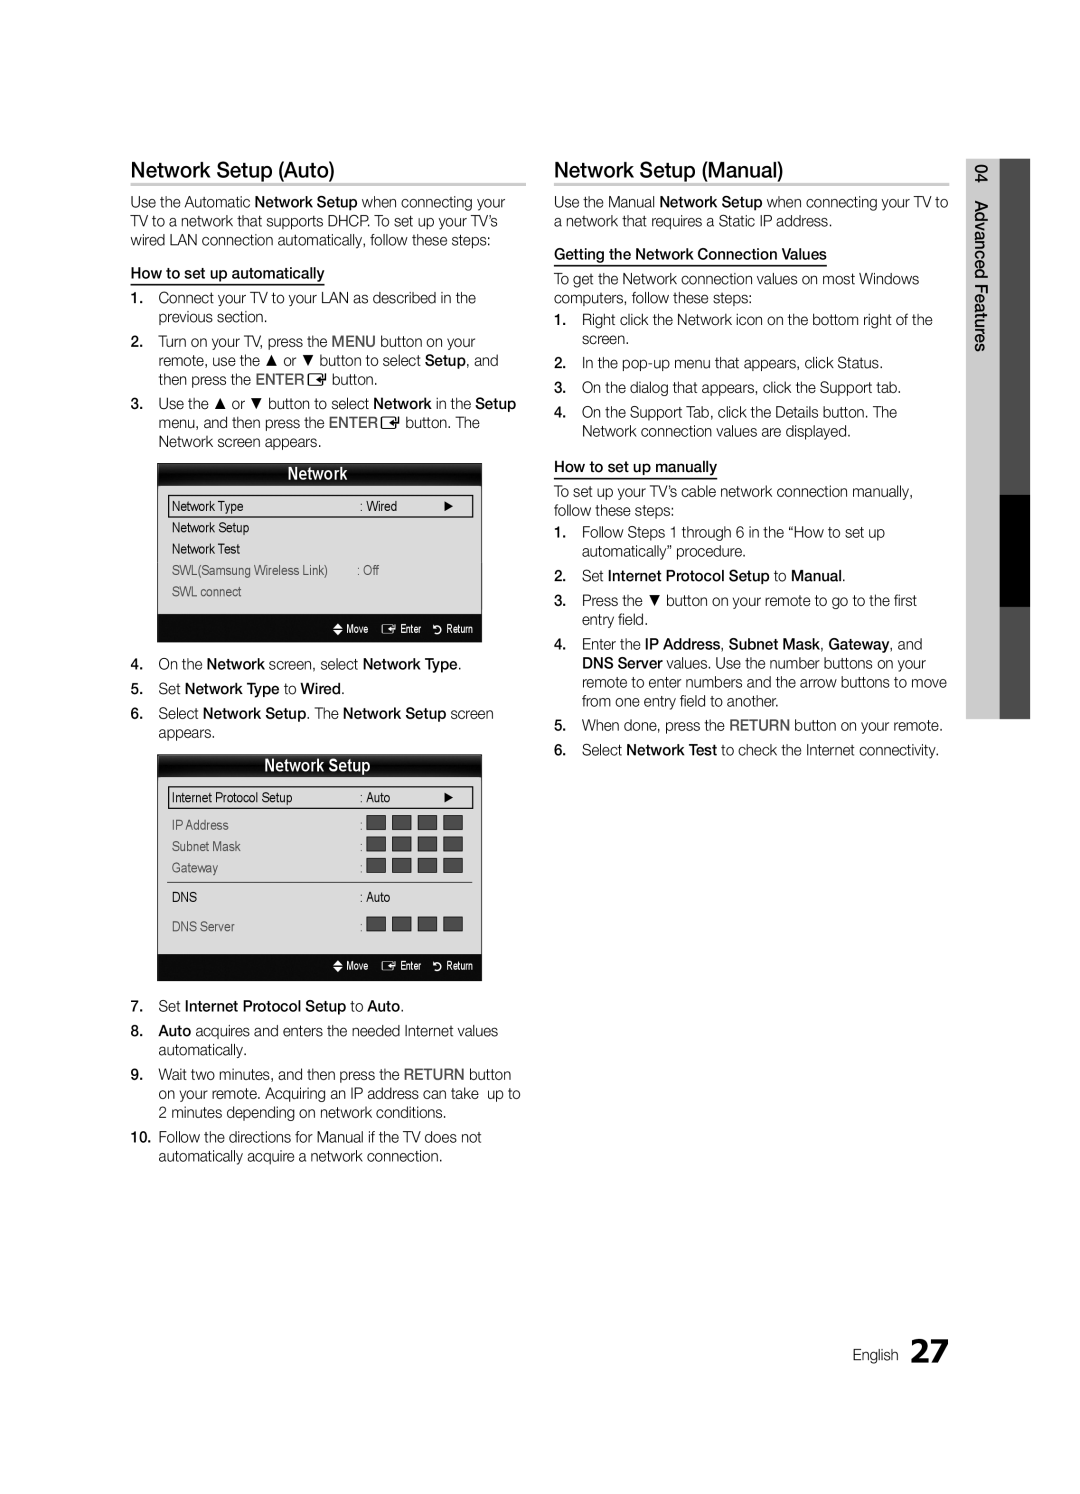
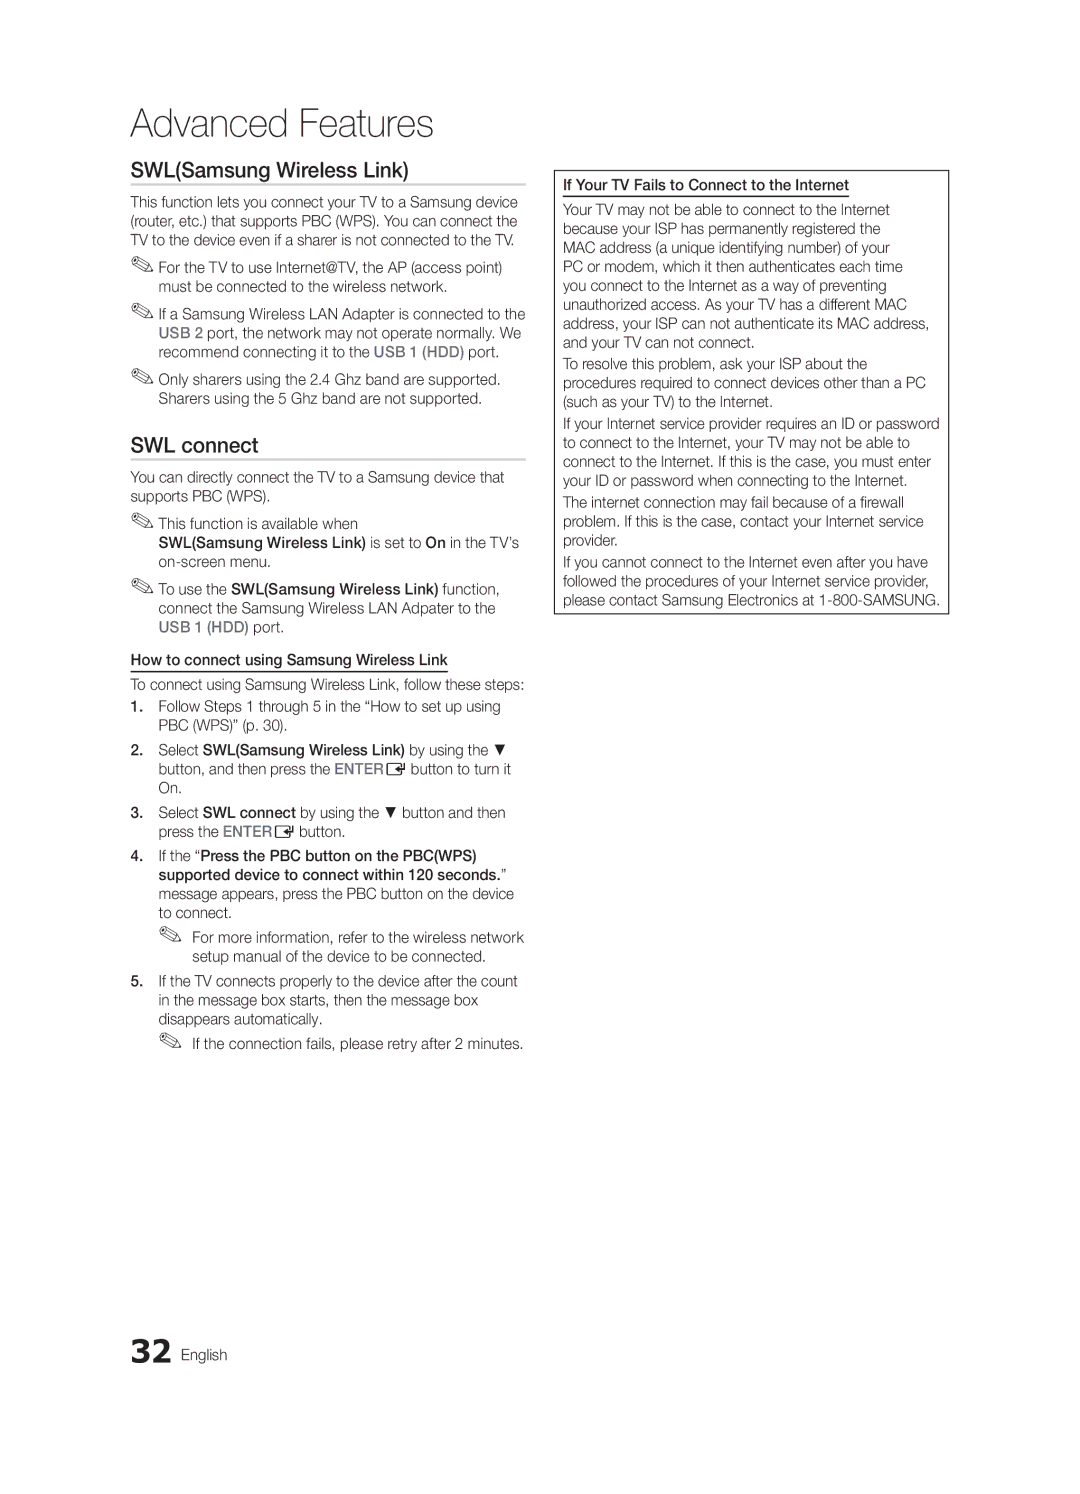
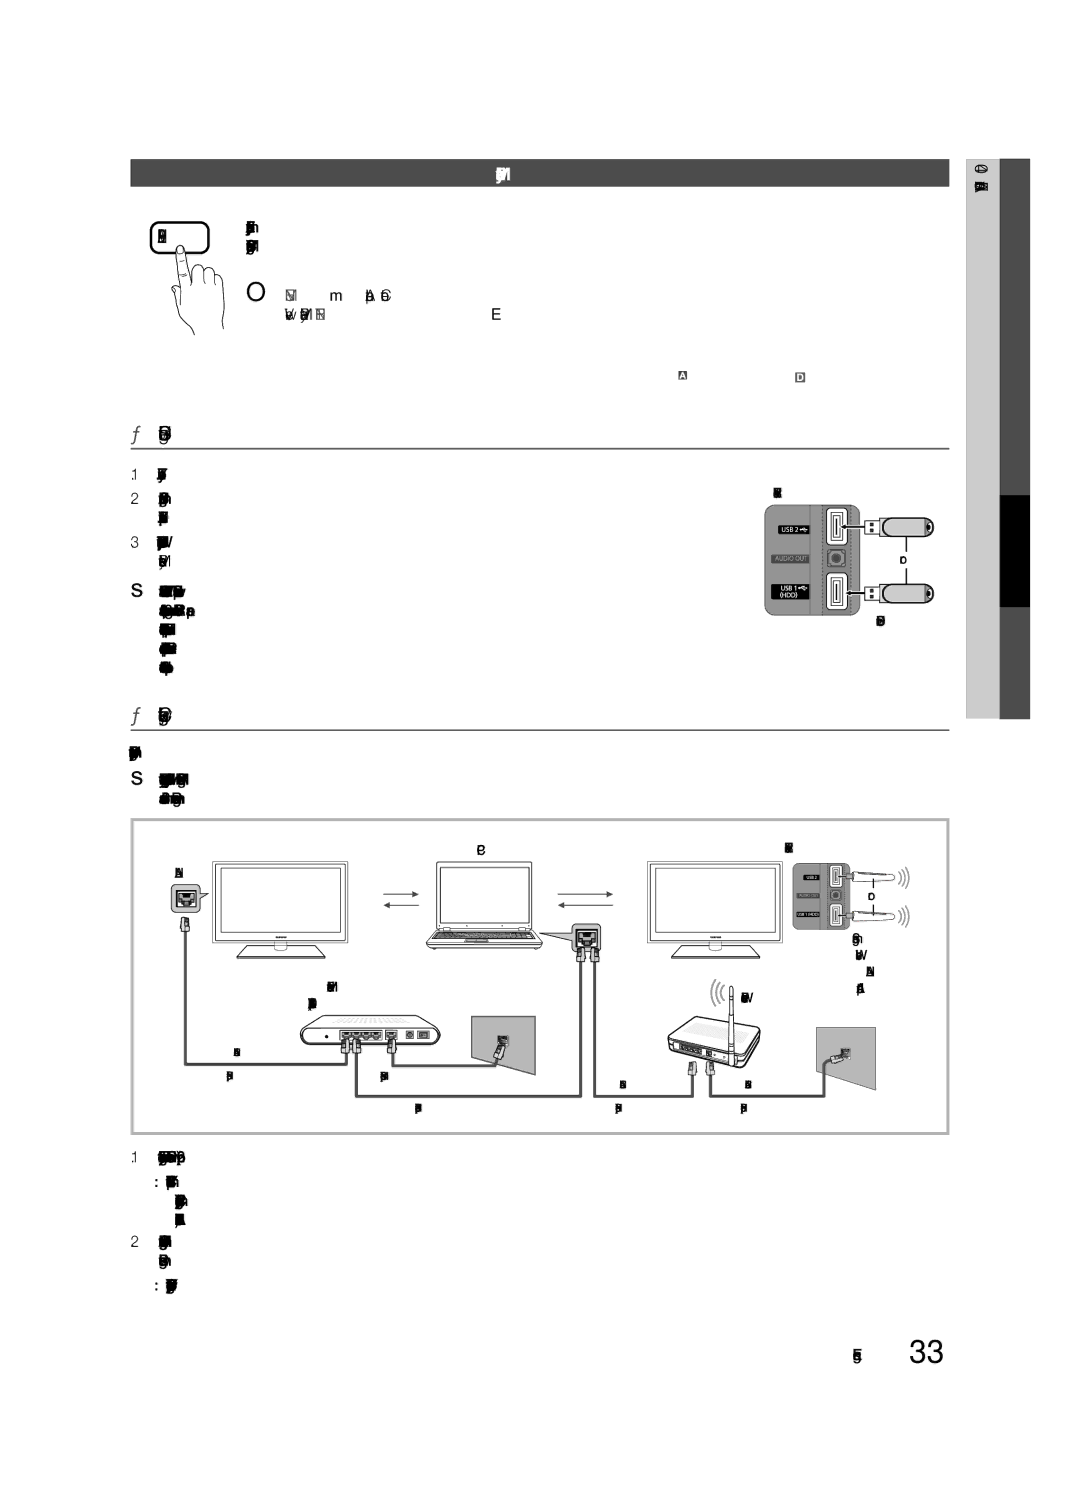
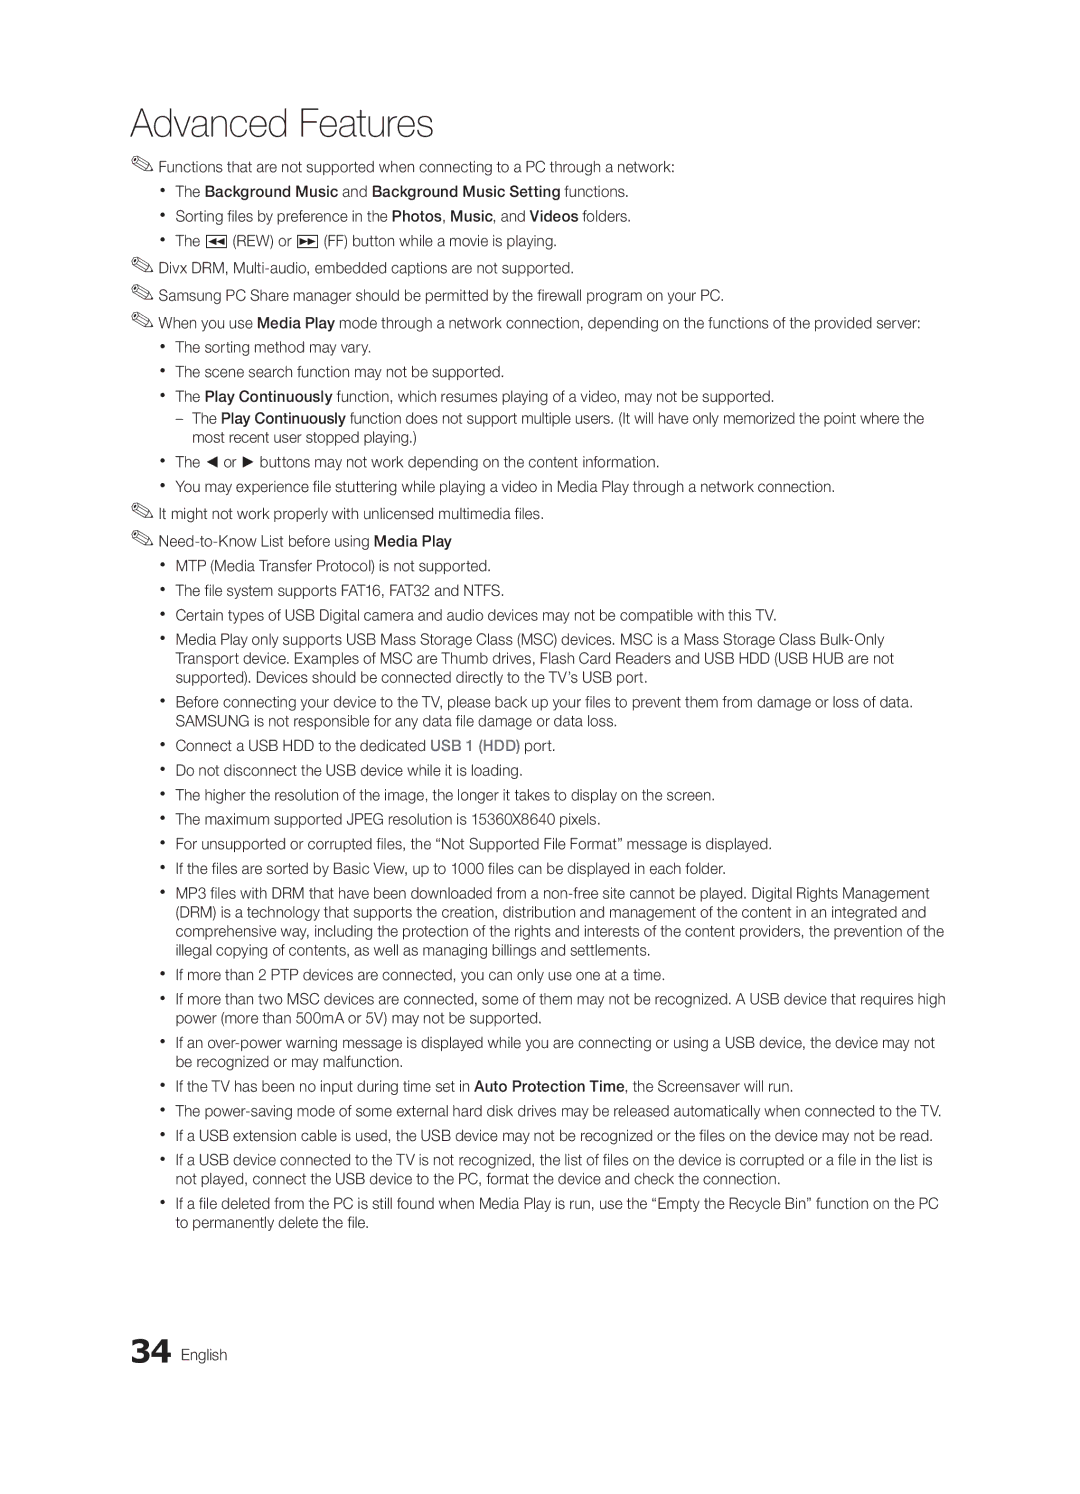
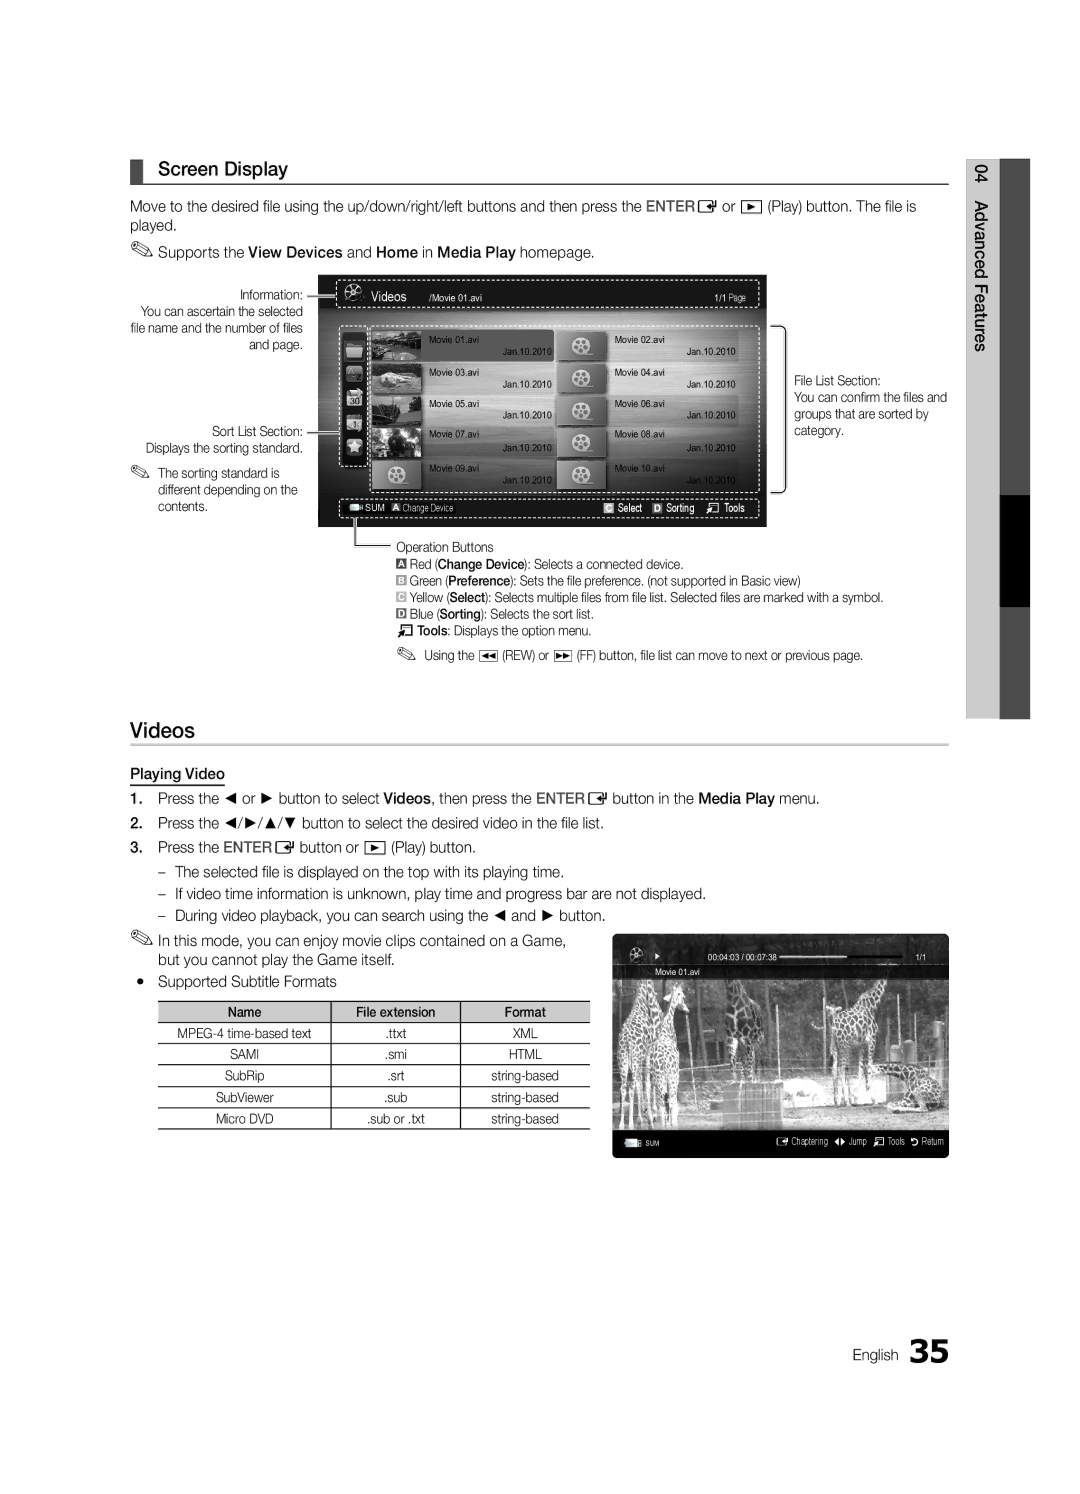
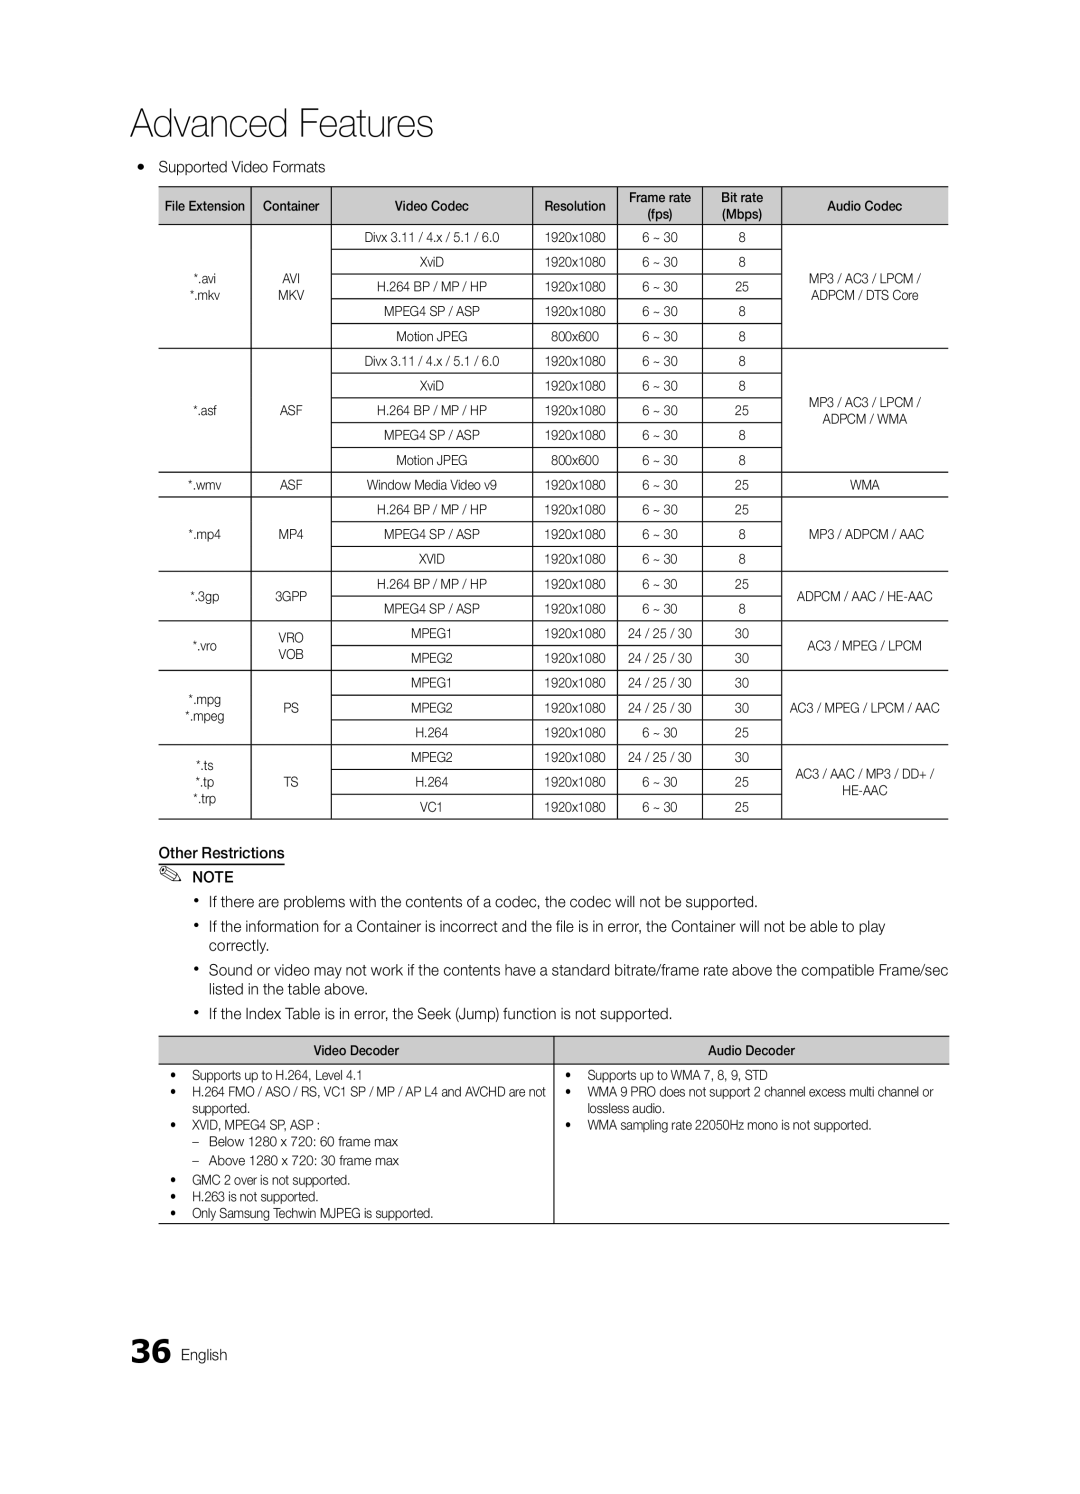
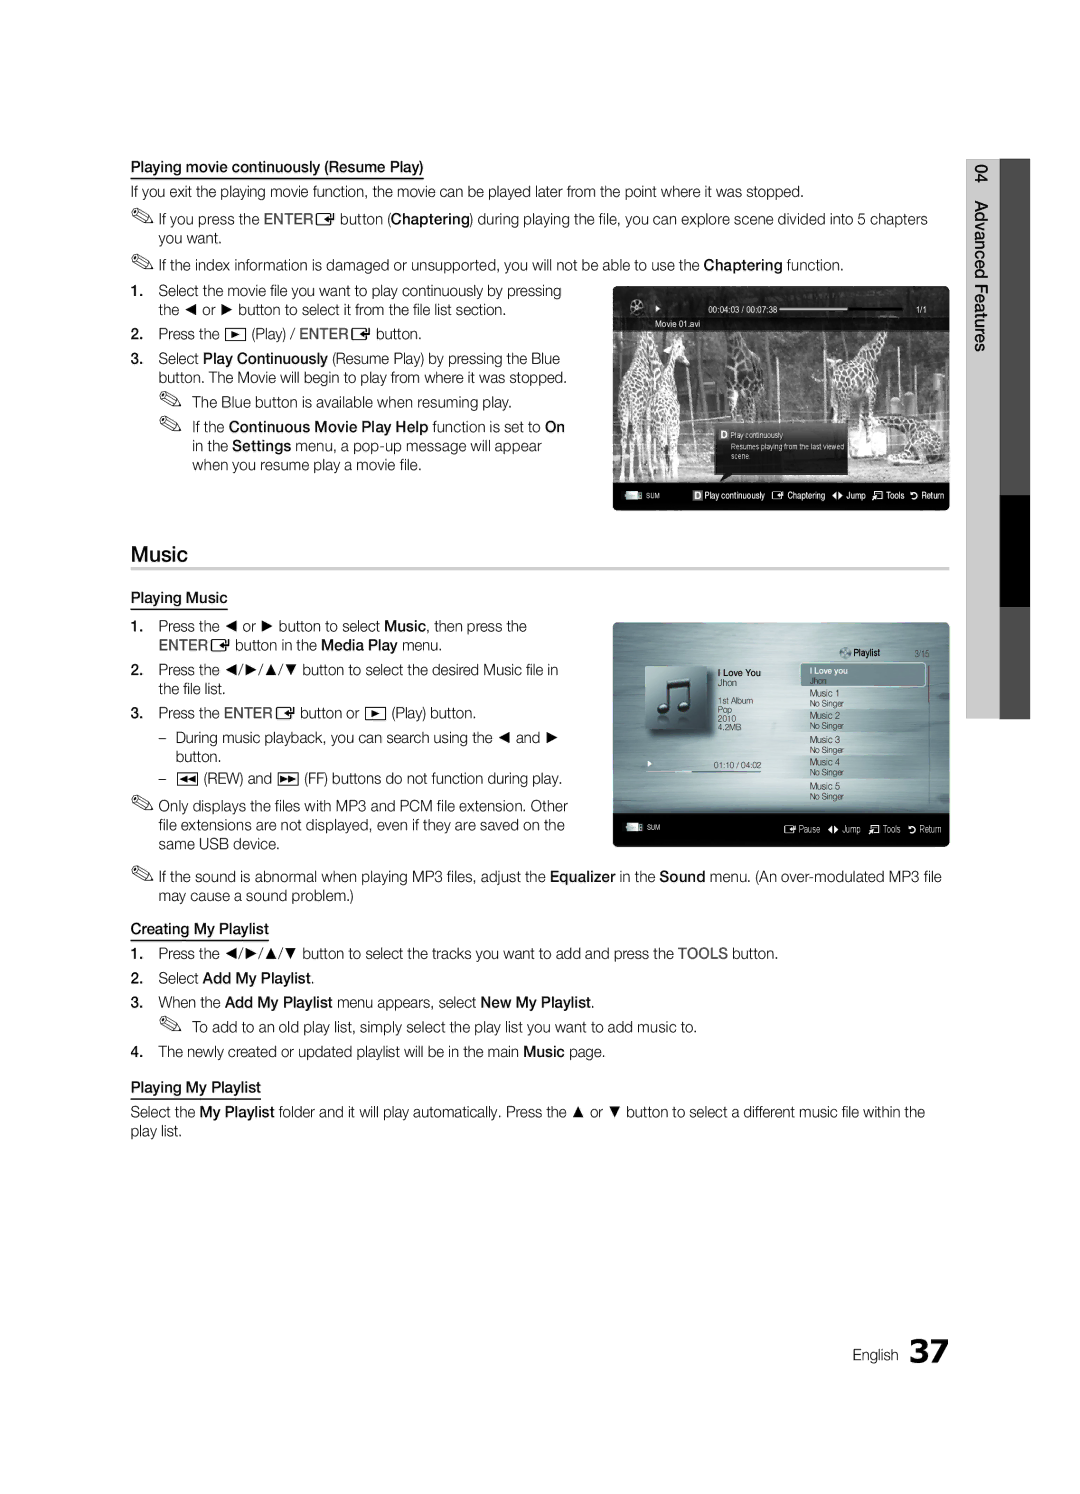
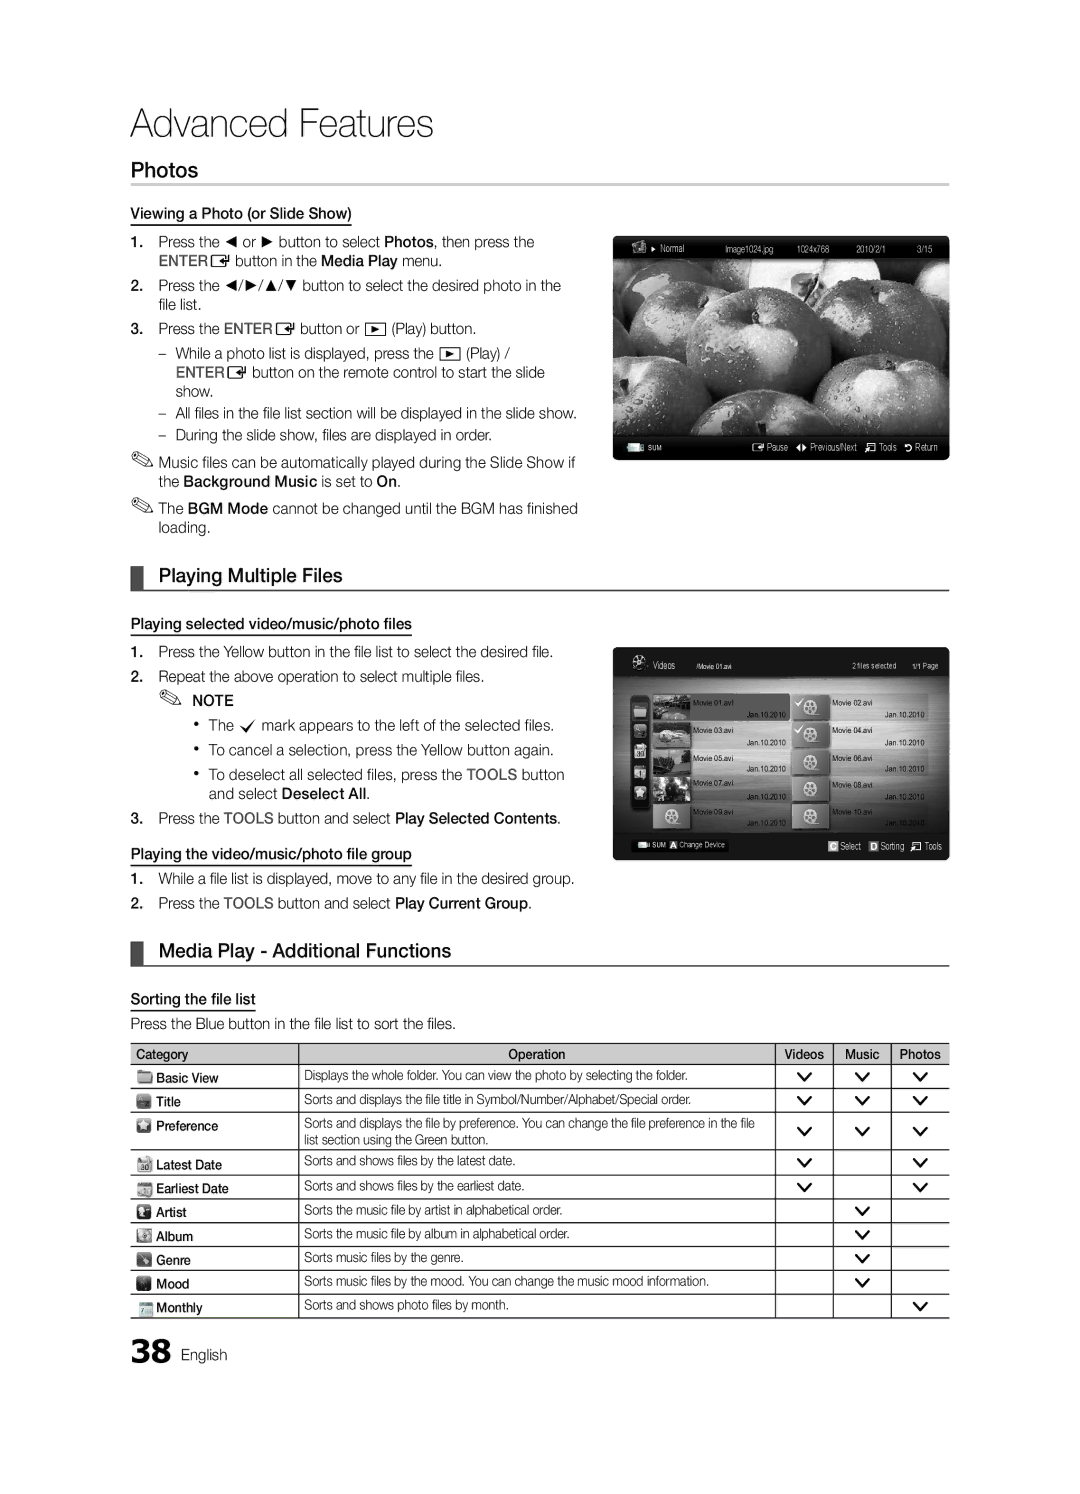
Samsung UN32C6500VFXZA Clear Scrambled Channel, Programmed, Editing Channels, Other Features

Page 15

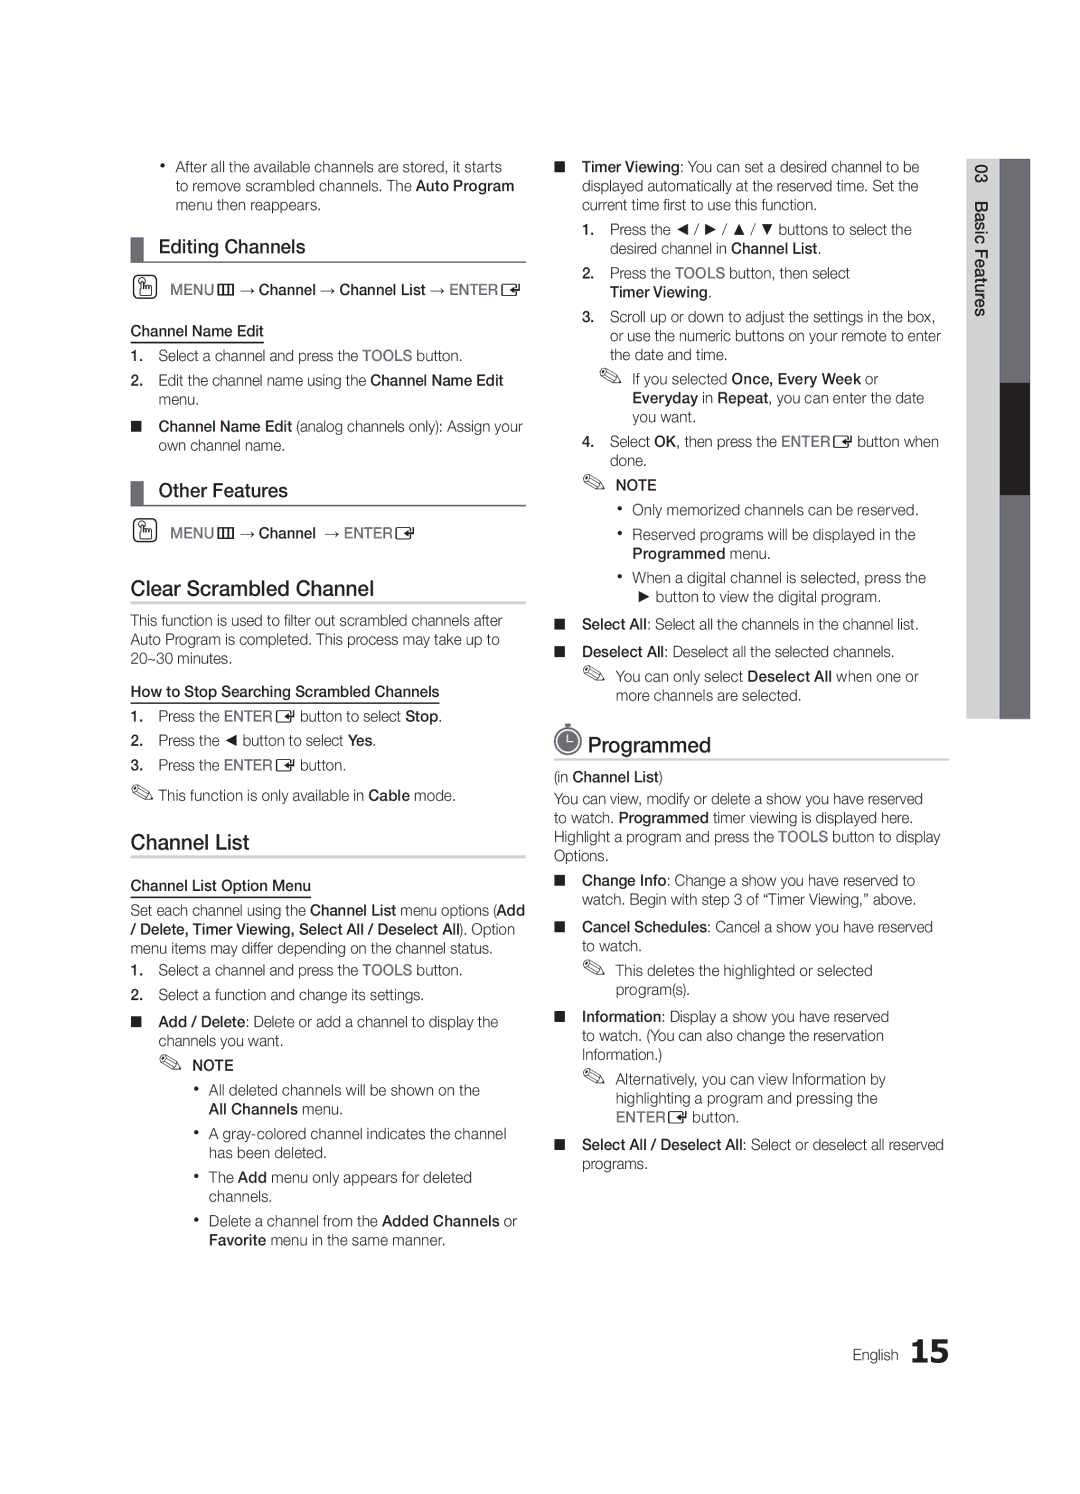
xx After all the available channels are stored, it starts to remove scrambled channels. The Auto Program menu then reappears.

¦¦ Editing Channels

OO MENUm→ Channel → Channel List → ENTERE

Channel Name Edit

1.Select a channel and press the TOOLS button.

2.Edit the channel name using the Channel Name Edit menu.

■■ Channel Name Edit (analog channels only): Assign your own channel name.

¦¦ Other Features

OO MENUm→ Channel → ENTERE

Clear Scrambled Channel

This function is used to filter out scrambled channels after Auto Program is completed. This process may take up to 20~30 minutes.

How to Stop Searching Scrambled Channels

1.Press the ENTEREbutton to select Stop.

2.Press the ◄ button to select Yes.

3.Press the ENTEREbutton.

This function is only available in Cable mode.

Channel List

Channel List Option Menu

Set each channel using the Channel List menu options (Add

/Delete, Timer Viewing, Select All / Deselect All). Option menu items may differ depending on the channel status.

1.Select a channel and press the TOOLS button.

2.Select a function and change its settings.

■■ Add / Delete: Delete or add a channel to display the channels you want.

NOTE

xx All deleted channels will be shown on the All Channels menu.

xx A gray-colored channel indicates the channel has been deleted.

xx The Add menu only appears for deleted channels.

xx Delete a channel from the Added Channels or Favorite menu in the same manner.

■■ Timer Viewing: You can set a desired channel to be displayed automatically at the reserved time. Set the current time first to use this function.

1.Press the ◄ / ► / ▲ / ▼ buttons to select the desired channel in Channel List.

2.Press the TOOLS button, then select Timer Viewing.

3.Scroll up or down to adjust the settings in the box, or use the numeric buttons on your remote to enter the date and time.

If you selected Once, Every Week or

Everyday in Repeat, you can enter the date you want.

4.Select OK, then press the ENTEREbutton when done.

NOTE

xx Only memorized channels can be reserved.

xx Reserved programs will be displayed in the Programmed menu.

xx When a digital channel is selected, press the

button to view the digital program.

■■ Select All: Select all the channels in the channel list.

■■ Deselect All: Deselect all the selected channels.

You can only select Deselect All when one or more channels are selected.

Programmed

(in Channel List)

You can view, modify or delete a show you have reserved to watch. Programmed timer viewing is displayed here. Highlight a program and press the TOOLS button to display Options.

■■ Change Info: Change a show you have reserved to watch. Begin with step 3 of “Timer Viewing,” above.

■■ Cancel Schedules: Cancel a show you have reserved to watch.

This deletes the highlighted or selected program(s).

■■ Information: Display a show you have reserved to watch. (You can also change the reservation Information.)

Alternatively, you can view Information by highlighting a program and pressing the ENTEREbutton.

■■ Select All / Deselect All: Select or deselect all reserved programs.

English 15

03FeaturesBasic

Image 15
Contents Contact Samsung Worldwide Samsung Electronics Canada Inc., Customer ServiceStill image warning Securing the Installation SpaceInstallation with a stand Installation with a wall-mountContents Component Composite AV Coaxial RF List of FeaturesAccessories Cleaning Cloth BN63-01798BRear Install the StandGuide Stand 1EA Guide StandM4 X L8 Screws 9EAWith your TV upright, connect the TV to the Stand as shown Guide Stand RearSpeakers Remote control sensor / Power Indicator Buttons on the remote controlPPower Turns the TV on or off Standby mode Power IndicatorMEDIA.P YAHOO! MTS FAV.CH P.SIZE CC Viewing the Remote ControlPress the or button, then press the ENTEREbutton. Select Connecting to an AntennaPlug & Play Initial Setup Enjoy your TVConnections Connecting to an AV DeviceDigital Audio OUT Optical Connecting to an Audio DeviceSync Polarity Connecting to a PCUsing an HDMI/DVI Cable or a D-sub Cable Mode Resolution Horizontal Frequency Vertical FrequencyChanging the Input Source How to Navigate MenusSource List Edit NameAuto Program Channel ListAdd to Favorite / Delete from Favorite Antenna Air / Cable tEditing Channels Other FeaturesClear Scrambled Channel ProgrammedFine Tune Mode tEco Solution Advanced SettingsOO MENUm→ Picture → Picture Options → Picture OptionsPicture Options Off Turns the Expert Pattern function offPicture Reset OK / Cancel Auto Adjustment tSetting up the TV with Your PC SRS TruDialog Off / On ScreenEqualizer SRS TruSurround HD Off / On tSpeaker Select External Speaker / TV Speaker Auto Volume Off / Normal / NightSound Reset OK / Cancel Multi-Track Sound MTS tTo be played when the TV is turned on automatically Setting the On / Off TimerTimer OO MENUm→ Setup → Time → Timer 1 →Caption Menu LanguageGeneral Wireless Remote Control Off / OnPicture In Picture PIP PIP tLegal Notice Self DiagnosisHD Connection Guide Software UpgradeSoftware Upgrade By Online Upgrade the software using the InternetLAN Port on the Wall Connecting to a Wired NetworkNetwork Connection Modem Port on the WallNetwork Type Wired Network Setup Network Test Network Setup AutoNetwork Setup Manual Network SetupConnecting to a Wireless Network Network Setup Samsung Auto Configuration 04Features AdvancedBoot up Security Key Entered ~9 Number Network Setup PBC WPS04Features Advanced English Network Setup Ad-HocDisappears automatically SWLSamsung Wireless LinkSWL connect To connectConnecting a USB Device Connecting to your PC through a networkMedia Play Advanced Features Name File extension Format Sorting standard is different depending on the contentsVideos Screen DisplaySupported Lossless audio Yy Supported Video FormatsMbps 1920x1080Music Media Play Additional Functions List section using the Green buttonPhotos Playing Multiple FilesSame file name as the video Audio SettingsAnynet+ Home Theater Anynet+Device TV Rear Panel Setting Up Anynet+ Switching between Anynet+ DevicesRecording Listening through a Receiver Troubleshooting for Anynet+Advanced Features Screen DisplayGetting Started with Internet@TV Internet@TVCreate Create an account and link it with desired Setting up Internet@TVLogin Default password set isHow to create Internet@TV ID Samsung Apps Using the Internet@TV serviceYahoo Sidebar ModeAdd Widget to My Profile To install a widget, selectProfile Widget Widget GalleryTroubleshooting for Internet@TV Problem Possible SolutionCheck with the service provider About AllShare SetupSetting Up AllShare Message / Media / ScreenShareMy Mobile Assembling the Cables Other InformationBlanking Bracket Installing the Wall MountAnti-theft Kensington Lock TV-Holder BN96-15753A Installing the TV-HolderSecuring the TV to the Wall TV-Holder Kit Sold SeparatelyIssues Solutions and Explanations Troubleshooting05InformationOher English Every time the TV is turned off Storage and MaintenanceDegree connectors Caption must be activated on the external device pLicense Specifications Dimensions UN55C6500 Model name UN32C6500UN40C6500 UN46C6500Favorite Channel Film Mode Fine Tune Flesh Tone Frequency IndexAllShare Amplify Antenna Anynet+ This page is intentionally Left blank