Vivitar Tripod/Video Equipment Use S or T to select Print, then press Button to confirm, EN-49

Page 49

Step

Figure

Procedure


Print

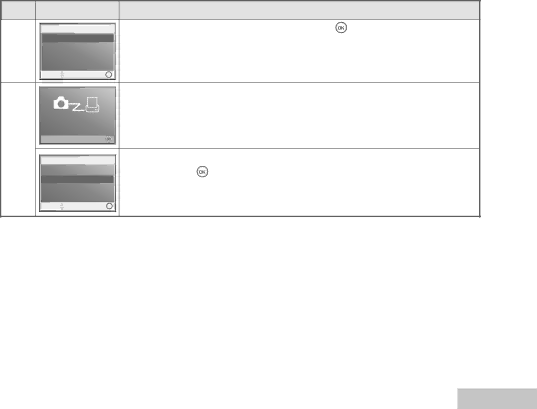
Use S or T to select [Print], then press the

button to confirm.


Print

* The “Transferring” screen is displayed.


6


Cancel


Total: 2


Select :

Set :

OK


This starts printing and displays the message “Transferring” on the monitor


screen. The message will disappear after the printing is finished.


T r a n s f e r r i n g


1/2


7


Cancel :


Print

* To cancel printing:


Continue

Pressing the

button during print data transfer displays the screen for


Cancel


selecting whether to [Continue] or [Cancel] printing.


Select :

Set :

OK


EN-49

Image 49
Contents EN-1 FCC StatementEN-2 Read this FirstDo not place the camera on inclined or unstable surfaces Do not disassemble, change or repair the cameraKeep the batteries out of the reach of children EN-3Before you move the camera, disconnect cords and cables Do not subject the LCD monitor to impactEN-4 EN-5 Contents EN-7 Playback Mode Advanced FeaturesIntroduction Package Contents Front View Getting to Know Your VivicamEN-10 EN-11 Rear ViewMode Description Mode DialEN-12 LCD Monitor Information Camera ModeEN-13 Image Playback Video ModeVideo Playback EN-14Preparing the Vivicam Installing the BatteriesEN-15 EN-16 Using the AC Power Adapter Optional AccessoryEN-17 Inserting and Removing an SD Memory Card Optional AccessoryIndicator State Description/Activity LED IndicatorsAttaching the Camera Strap EN-18Getting Started Turning the Power On/OffChoosing the Screen Language EN-19EN-20 Setting the Date and TimeEN-21 Formatting an SD Memory Card or Internal MemoryEN-22 Using the LCD MonitorShooting Images The Basics Photography ModeEN-23 EN-24 Setting Image Resolution and QualityEN-25 Using the Zoom FunctionFocus mode Description Setting FocusEN-26 Flash mode Description Using the FlashEN-27 OFF 2 10 10+2 No Indication Using the Self-TimerEN-28 EN-29 Adjusting the Exposure EV CompensationEN-30 Setting White BalanceSimple Mode a Using the Mode DialProgram Mode P Aperture Priority Mode Av Shutter Speed Priority Mode TvEN-32 Scene Mode Scene Manual Mode MEN-33 Burst Advanced ShootingEN-34 EN-35 Auto Exposure Bracketing AEBEN-36 Selecting the Metering ModeViewing Images Playback Mode the BasicsEN-37 EN-38 Magnifying ImagesEN-39 Thumbnail DisplayEN-40 Slideshow DisplayEN-41 Resizing an ImageRecording Video Clips Video ModeEN-42 EN-43 Playing Back Video ClipsEN-44 Playing Back Still Images/Video Clips on TVEN-45 Deleting Images/Video ClipsEN-46 Protecting Images/Video ClipsConnecting to a PictBridge Compliant Printer EN-48 Button to printSelecting whether to Continue or Cancel printing To cancel printingUse S or T to select Print, then press Button to confirm Transferring screen is displayedTransferring Files from Your Vivicam 8400 to Your Computer Installation on Windows 98 & 98SE Install the USB driverInstallation on MAC OS EN-51EN-52 Connect the ViviCam 8400 to your computerEN-53 Download images or video clipsInstalling Photo Explorer Editing Software InstallationEN-54 EN-55 Installing Photo ExpressClick Install Acrobat Reader Installing Adobe Acrobat ReaderEN-56 EN-57 Camera Menu Menu OptionsFunctional Description EN-58EN-59 Mode1 Functional DescriptionEN-60 Mode2 Functional DescriptionEN-61 Mode3 Functional DescriptionEN-62 Video MenuPlayback Menu Playback1 settings Functional DescriptionEN-63 EN-64 Playback2 settings Functional DescriptionSet-up1 settings Functional Description Setup MenuEN-65 Set-up3 settings Set-up2 settings Functional DescriptionEN-66 EN-67 Connecting the Vivicam 8400 to Other DevicesEN-68 Vivicam 8400 SpecificationsEN-69 AppendixEN-70 „ Possible Number of Recordable Images