Fostex VR800 owner manual Record button RECORD/ Auto Punch, Store key Store, Hold/ key Hold

Page 12

VR800 Owner’s Manual (Names and Functions)
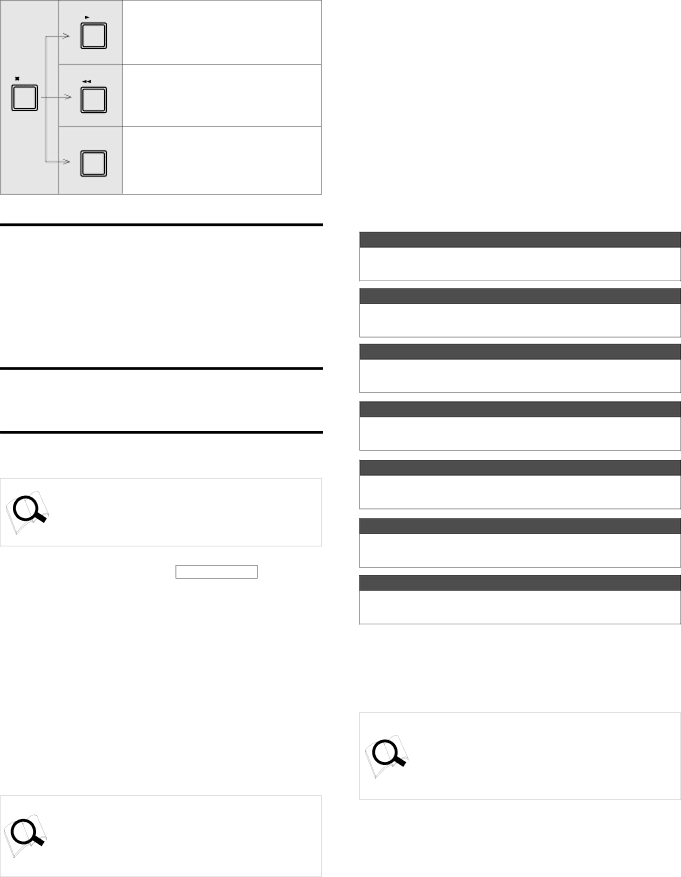
PLAY

“CLIPBOARD PLAY” operation starts. (See


below.) . During the operation, the STOP


lamp flashes and the PLAY lamp lights up.

STOP

REW

ABS 0 is located. (See below.)

F FWD

REC END is located. (See below.)

* CLIPBOARD PLAY operation

The CLIPBOARD PLAY operation plays back data on the clipboard. (If the clipboard does not contain any data, the display shows [Void Data !] and nothing happens.). During this operation, the display indicates the type of the data (“Copy Clip” for copy data, and “Move Clip” for move data), and the duration. The indicator of the copy source or move source track will flash. This way, you will know which track the currently playing data comes from and why the data is on the clipboard.

* ABS 0 locate operation

This operation locates the beginning of the current program (ABS time: 00m 00s 00f).

* REC END locate operation

This operation locates the end of the audio recording (REC END) on the real track in the current program.

*Refer to page 54 for more information on these operations.

*Refer to page 40 for more information on the Punch In/ Out operation using a foot switch.

24.Record button [RECORD/ AUTO PUNCH ]

Pressing the PLAY button while holding down this button will start the VR800 recording any READY tracks.

The flashing lamp of the RECORD TRACK select key for the corresponding READY track will light steadily, and the PLAY lamp and the RECORD lamp light.

If you press only the RECORD button, a READY real track enters input monitoring mode (The RECORD lamp flashes.). At this time, pressing the RECORD button again will cancel the input monitoring mode, and the track will return to the playback monitoring mode.

Pressing the RECORD button while holding down the SHIFT key will toggle between AUTO PUNCH on and off.

*Refer to page 36 for more information on AUTO PUNCH mode.

*Refer to page 24 for more information on input monitoring and playback monitoring.

25. Store key [STORE]

This is the key for registering (storing) the time (or BAR/ BEAT/CLK figures) for ABS or MTC into any memory key or LOCATE key. The key lamp will be lit when this is pressed and together with a display of [Press LOC:], the locate number will blink. When registering time data in a memory key such as AUTO PUNCH IN, any memory key can be pressed by ignoring this [Press LOC:] display, when registering in the LOCATE key, specify any locate number (01~99) while [Press LOC:] is displayed, then press the LOCATE key. In either case, the STORE key lamp will be extinguished simultaneous with the completion of time data registering, and return to the original time base display. After pressing this key, if you wish to cancel the store operation, press the EXIT/NO key, or STOP button.

Press the STORE key, and press the CLIPBOARD IN key.

The CLIPBOARD IN point will be stored.

This data can be used as locate data.

Press the STORE key, and press the CLIPBOARD OUT key.

The CLIPBOARD OUT point will be stored.

This data can be used as locate data.

Press the STORE key, and press the AUTO PUNCH IN key.

The AUTO PUNCH IN point will be stored.

This data can be used as locate data.

Press the STORE key, and press the AUTO PUNCH OUT key.

The AUTO PUNCH OUT point will be stored.

This data can be used as locate data.

Press the STORE key, and press the AUTO RTN START key.

The AUTO RTN START point will be stored.

This data can be used as locate data.

Press the STORE key, and press the AUTO RTN END key.

The AUTO RTN END point will be stored.

This data can be used as locate data.

Specify locate number and press LOCATE key

The specified locate number will be stored as locate data.

A maximum 99 locate numbers can be registered.

If you press the STORE key and the HOLD/> key simultaneously while the recorder is stopped, the VR800 will enter the program select mode, in which you can select a program or set up a new one.

*Refer to page 54 for more information on the Locate function.

*Refer to page 48 for more information on storing edit points

(locate points).

*Refer to page 32 for more information on the Program Select function.

26.Hold/> key [HOLD/>]

Pressing the HOLD/> key while the recorder is operating will cause the VR800 to capture the time when you pressed it (or bar/beat/clock value), display it, and then enter edit mode. (If you press the HOLD/> key while the recorder section is stopped, the VR800 enter edit mode directly.)

To cancel edit mode, press the STOP button, DISP SEL key, or the EXIT/NO key.

12

Image 12
Contents Model Safety Instructions Table of Contents 106 Introduction Precautions Names and Functions Top panelAccess LED Access Record track select keys Record Track 1Contrast adjustment knob Setup key SetupClipboard In key Clipboard IN/ Preview Execute/Yes key EXECUTE/YESAuto Return/Auto Play mode on/off key Edit key EditJOG dial JOG/ Shuttle Scrub key ScrubVari Pitch key Vari PITCH/ P.EDIT Shift key ShiftFast forward button F FWD Rewind button RewindRecord button RECORD/ Auto Punch Store key StoreHold/ key Hold Auto Return End key Auto RTN END/ Preview Auto Return Start keyAuto Punch In key Auto Punch IN/ Preview Auto Punch Out keyData output jack Data OUT Connector Optical Data input jack Data in Connector OpticalMidi OUT jack Midi OUT Connector DIN 5-pin Scsi connector Scsi Connector D-SUB 25-pinSide Panel Display Section Time base is ABS DigitalTime base is BAR/BEAT/CLK Time base is MTCAcc Error message Load Err messageUnformat ! message Action to takeBefore Starting Time BaseRecording method and Remain indicator Remain indicatorRecording method Managing songs by Program Change function You can name a programReal tracks and Additional tracks You can swap data between twenty-four mono tracksAdditional tracks in units of eight tracks When you set a track to recording mode When you set a track to recording stand-by modeInput monitoring and playback monitoring Input monitoringAudio file and event About an audio fileHints Recording mode Formatting a DiskFormatting a current drive disk Scsi disk Formatting a new diskRe-formatting a formatted disk Insert a formatted disk into the Scsi drivePress the EXECUTE/YES key Press the EXECUTE/YES key againFormatting a backup disk Scsi disk Formatting an unformatted disk for backupInsert a new disk into the backup drive Formatting a current drive disk 3.5-inch E-IDE hard diskFormatting a backup disk fixed disk Re-formatting a formatted disk for backupInsert a formatted disk into the backup drive Turn on the power to the VR800 and a connected Scsi drive Handling ProgramsCreating a new Program While holding down the HOLD/ key, press the Store keyUsing a Program Change function To enter a titlePress the Setup key while the VR800 is stopped Deleting a ProgramEditing a Program title JOG dial to enter characters or numbersAfter you enter the title, press the EXECUTE/YES key What is Punch In/Out recording? Punch In/Out RecordingAuto Punch In/Out Storing the edit pointsMusic instrument Guitar Rehearsing Auto Punch In/Out recording Press the Record button while holding down the Shift keySet the track for Auto Punch In/Out to Ready Recording levelWhen you finish recording, press the Stop button Auto Punch In/Out TakeUndo/Redo Auto Punch In/Out recording Press the Record button while holding down the Play buttonPress the foot switch while holding down the Stop button Manual Punch In/OutRehearsing Manual Punch In/Out recording Play the guitar accompanying the playback of tracksCancelling Rehearsal mode Manual Punch In/Out takeUndo/Redo Manual Punch In/Out recording Recording to a Metronome Sound Creating a Tempo MapTurning the Metronome function on Music InstrumentAdjusting monitor/record level of the musical instrument Checking the metronome soundStarting recording Quitting recordingConnecting an external digital device Assigning tracks and setting the digital-in clockDigital Recording Digital recording from an external digital deviceDigital recording to an external device Selecting a recording trackStarting and quitting recording Setting a digital output track Selecting a playback programStoring a Locate Point Edit Point Memory keyStoring and editing the locate points to the memory keys Storing in real-timePress the Store key Press the desired memory keyEditing and storing locate data Editing and storing dataPress the HOLD/ key while the VR800 is stopped Press the memory key that you pressed in againStoring and editing Locate key Select the Locate number desired using the JOG dial Next press the Locate keyPress the Store key. the Store key lamp lights up Edit and re-store data that is already stored Locate Function Direct LocateAuto Play Auto ReturnAuto Repeat Start playback a little before the Auto RTN Start pointCue & Review function using the Rewind and F FWD buttons Cue & Review function using the Shuttle featureCue & Review Function Digital scrubbing using the Scrub function Press the Scrub key while the VR800 is stoppedTurn the JOG dial to perform digital scrubbing Press the Stop button to stop the digital scrubbingPreview Function Executing the Preview functionPreviewing the rise of the sound fade Previewing the fall of the sound fade outTrimming the sound while previewing Press the Stop button or the EXIT/NO keyEditing Tracks Copy & Paste and Move & PasteCopy & Paste Move & PasteExecuting Copy or Move Checking the clipboard dataPaste start point Key for which you wish to check the edit pointExecuting Paste Undo/Redo PasteSelect a destination track to paste data Turn the JOG dial to enter the number of repeats Repeat=Erase Erasing a specified part of the data between ABS 0Erasing data from a specified point to REC END Executing Erase Undo/Redo EraseStoring the erase start and end points Track Exchange Swapping mono track data between Real tracks, AddiExecuting Track Exchange Connecting external equipment Refer to connecting schematic Midi sync functionConnect the VR800 Midi OUT to Midi in of the Midi sequencer Setup of VR800 Confirming the Midi clock syncMTC sync/MIDI machine control system Execution of recordingConnecting to external equipment Setup of external equipmentOffset mode For ABS Confirming MTC sync/MMCExternal Midi equipment sync system by the slave mode Connection to external equipmentPrecautions at MTC related setups Confirming chase lockUsing a Scsi drive as the current drive Saving and Loading Song DataOutline of the save/load operation Fostex D-5, Pioneer D-05 Save DAT or adat Saving/loading data using another Scsi drive Title of data to be saved to a backup Scsi diskInsert an unformatted disk into the backup drive Press the EXIT/NO key to exit Setup modeSave PGM ? menu Select a flashing SCSi id-6 and press EXECUTE/YES key Load PGM ? menuSaving/loading via a DAT or adat Saving song data via a DAT or adat DAT or adat connection and preparationUse the JOG dial to select a Program to save Use the JOG dial to select the desired tracksStart recording on the DAT or adat Loading song data via a DAT or adat ProgressesStart playing the DAT or adat Use the JOG dial to select a Program into which to load dataSaving and loading song data via a Scsi drive If you wish to delete the existing data If you do not wish to delete the existing dataChanging the Initial Settings Setup Mode Selecting Setup mode Following diagram shows the position of each menuSetting a time signature Sign. Set ? menu Storing a time signatureSelect a Program for which to set a time signature Clearing all time signature and tempo settings Modifying or deleting stored time signaturesChanging the BAR at ABS 0 of the time base Setting a tempo Tempo Set ? menu Checking the stored tempo settingSelect a Program to check the tempo setting for Storing a tempo valueSetting the Metronome function Click ? menu Setting the Metronome functionRepeat steps 3-5 to store necessary tempo data Setting a preroll value Preroll ? menu Setting a preroll timeTurn the JOG dial to select on or oFF Turn the JOG dial to enter a desired preroll time valueSetting Midi sync output signal Sync Out ? menu Setting Midi sync signalTurn the JOG dial to select the desired Midi sync signal Setting an MTC frame rate Frame Rate ? menu Setting an MTC offset value Mtc Offset ? menuSetting an MTC frame rate Turn the JOG dial to enter the desired frame rateSetting Offset mode Ofset Mode ? menu Setting an MTC offsetSetting the Slave mode Slave Mode ? menu Setting MTC Offset modeTurning Slave mode on and off Use the JOG dial to select the desired Offset modeSetting the Slave type Slave Type ? menu Setting the Slave typeUse the JOG dial to turn Slave mode on and off Use the JOG dial to select the desired Slave typeSetting the Record Protect function Rec Protect ? menu Recording enabled/disabledUse the JOG dial to enable or disable recording 100Setting digital input tracks Digi. In ? menu Setting digital input tracks101 Setting digital output tracks Digi. Out ? menu Setting a clock of digitalSetting digital output tracks 102Setting BAR/BEAT resolution mode Resolu ? menu Setting BAR/BEAT resolution mode103 Setting the Midi device number Device ID ? menu Setting the Midi device IDUse the JOG dial to turn the mode on or off 104Checking the number of track events NOs Event ? menu Checking the number of track events105 Midi Implementation Chart 106Transmitted Recognized Remarks Command List Movement Recorder MMC Response/Information Field List Command107 Fostex Midi System Exclusive Message Format for VR800 108Status Request 109Example 2 Locate memory is recalled using the read command 110111 Data Type112 Signature map113 114 Status Request Command 115116 117 Maintenance 118Declaration of EC Directive 119Index Remain Fostex Corporation
Related manuals
Manual 24 pages 22.9 Kb