


SECTION
4. Transfer the
NOTE: The flow arrow points away from the intake.
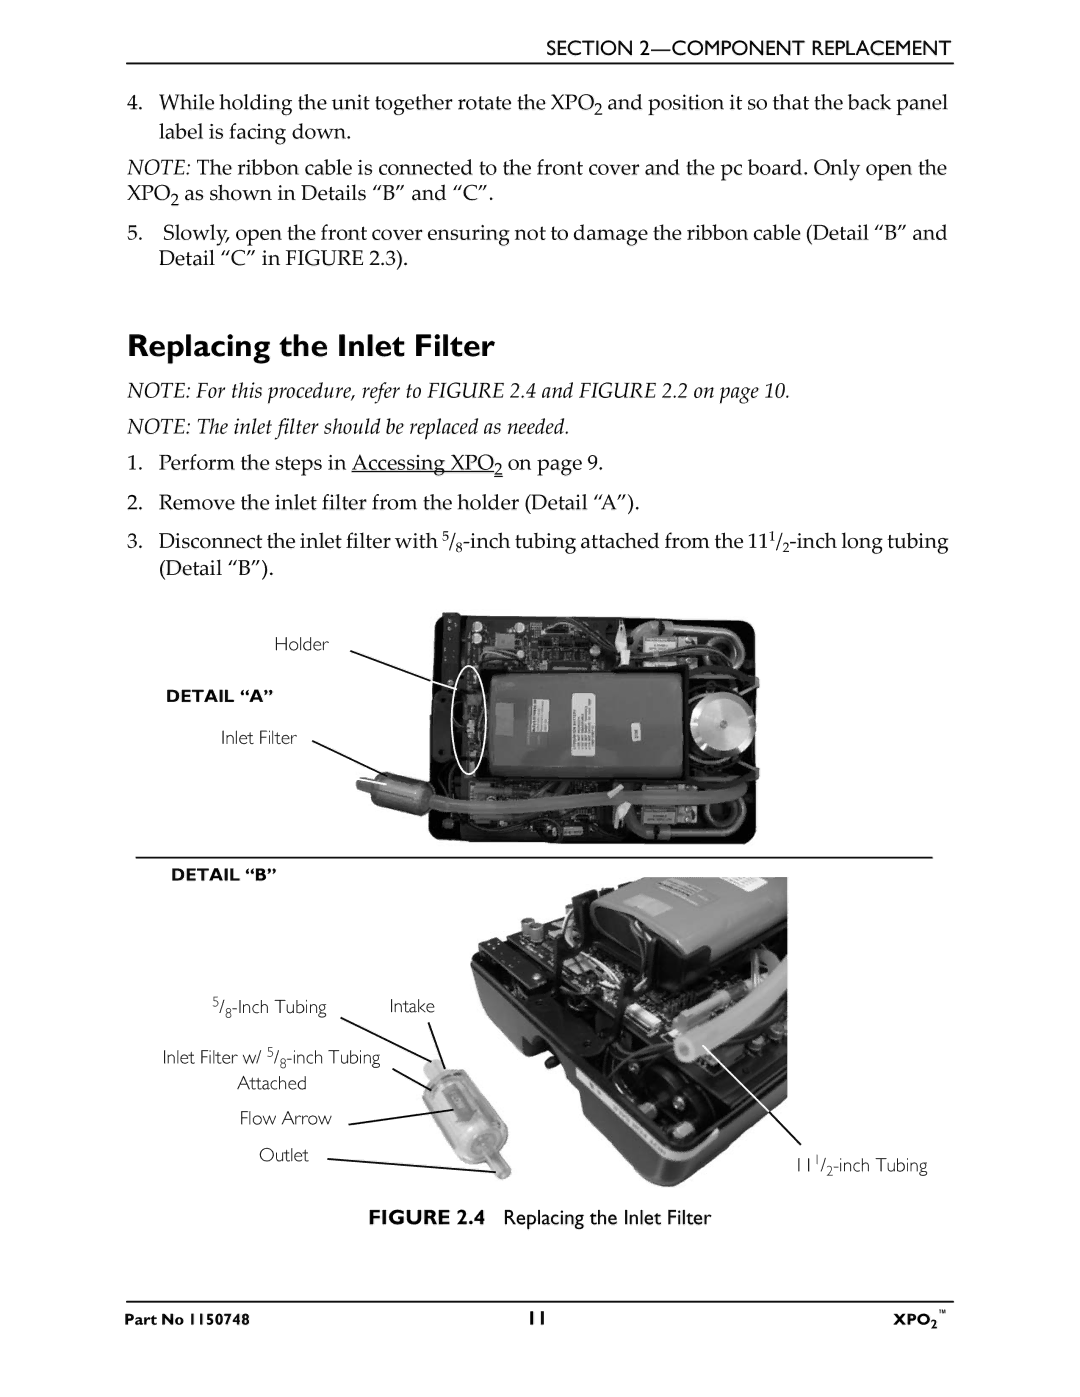
5.Connect the 11½- inch tubing to the outlet of the inlet filter (Detail “A” of FIGURE 2.4).
6.Position and orient the new filter in the holder (Detail “B” of FIGURE 2.3).
7.
Replacing the Battery
CAUTION
Before handling the P.C. board, ensure you are properly grounded to prevent static damage to the components of the board. A static cuff MUST be worn and properly grounded using an alligator clip. Electrical conduit or a water pipe is normally sufficient when a known good ground in unavailable. Care should be taken to ensure that the alligator clip contacts a bare metal surface.
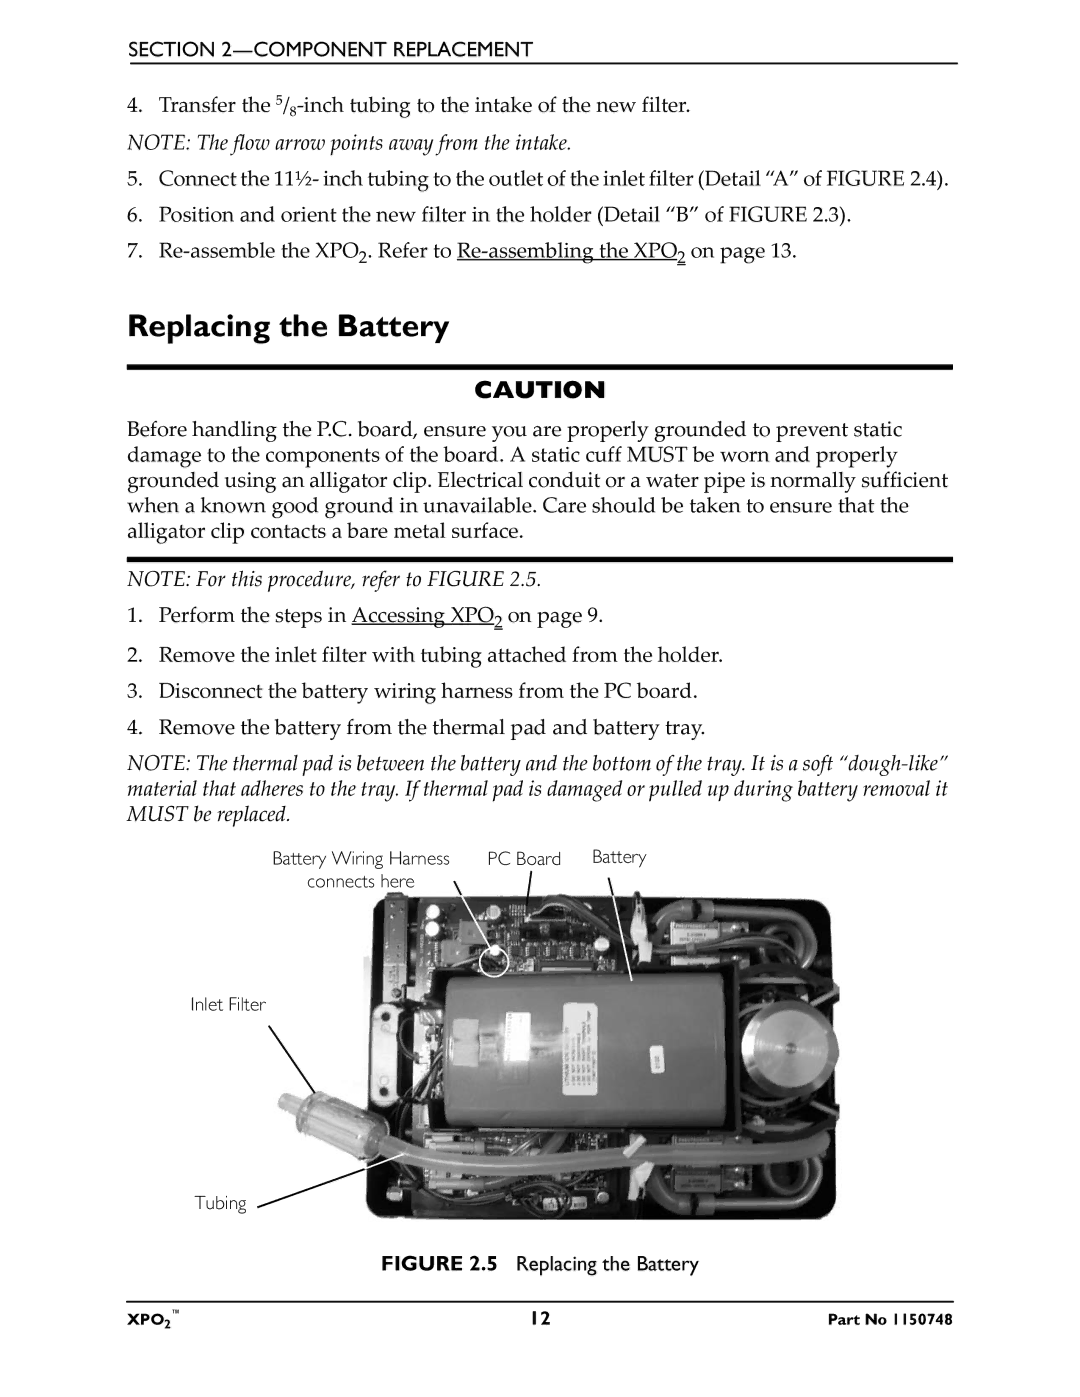
NOTE: For this procedure, refer to FIGURE 2.5.
1.Perform the steps in Accessing XPO2 on page 9.
2.Remove the inlet filter with tubing attached from the holder.
3.Disconnect the battery wiring harness from the PC board.
4.Remove the battery from the thermal pad and battery tray.
NOTE: The thermal pad is between the battery and the bottom of the tray. It is a soft
Battery Wiring Harness | PC Board | Battery |
connects here |
|
|
Inlet Filter
Tubing
FIGURE 2.5 Replacing the Battery
XPO2™ | 12 | Part No 1150748 |