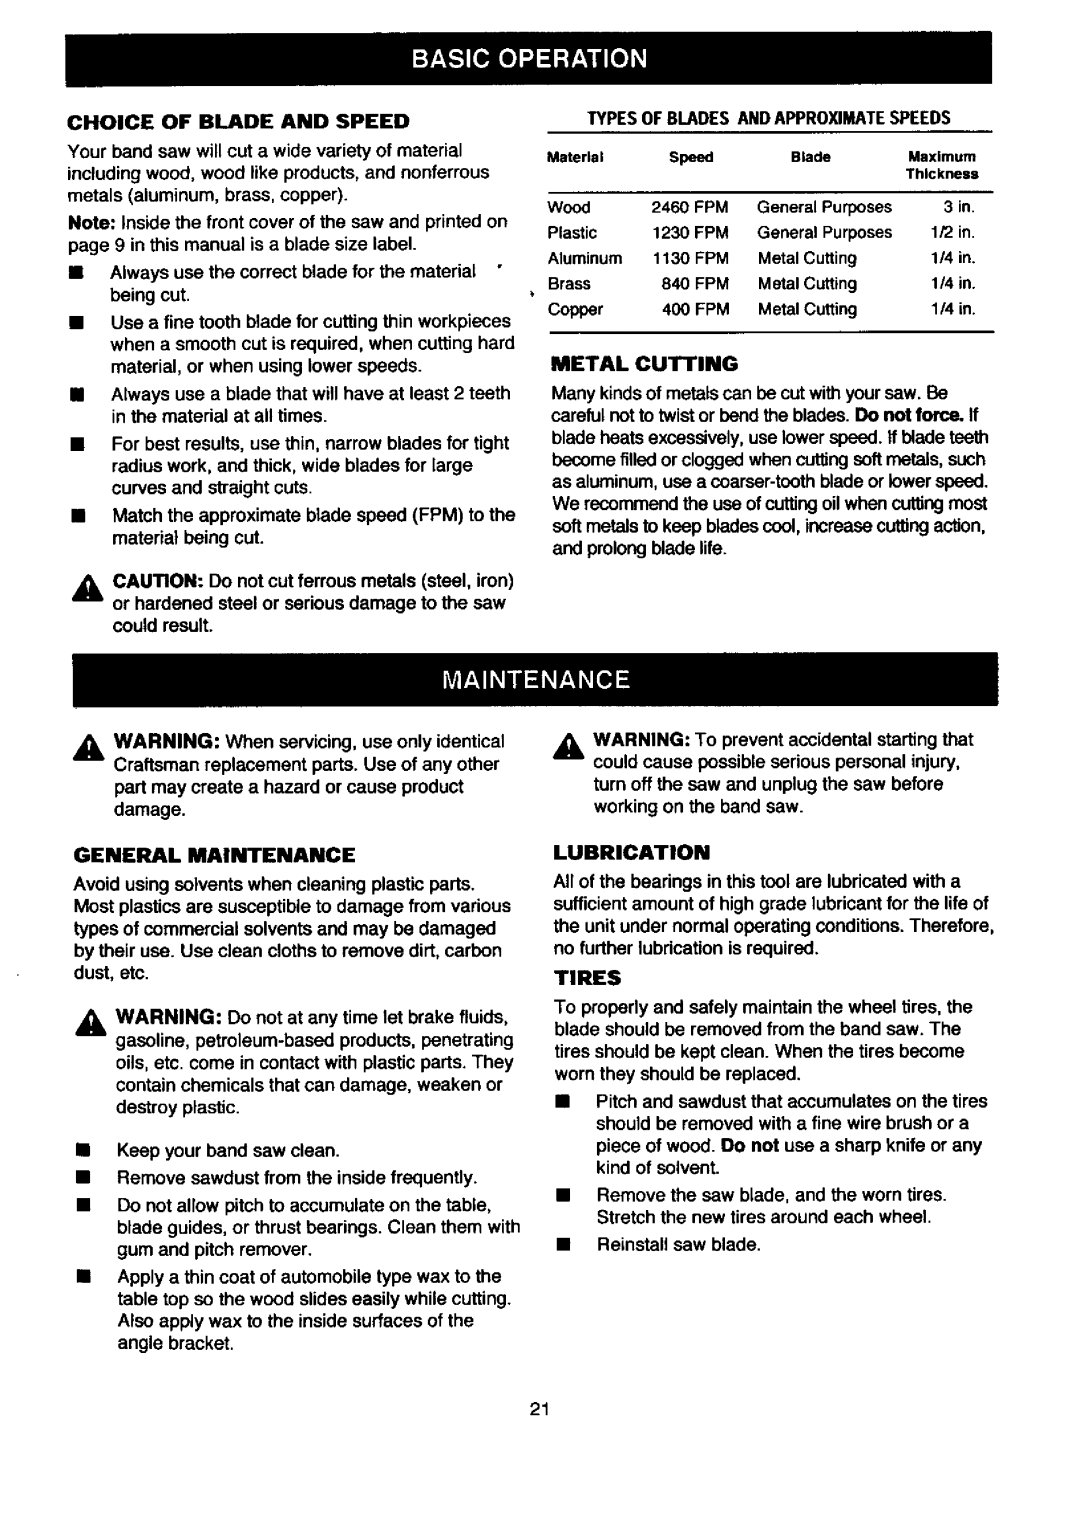
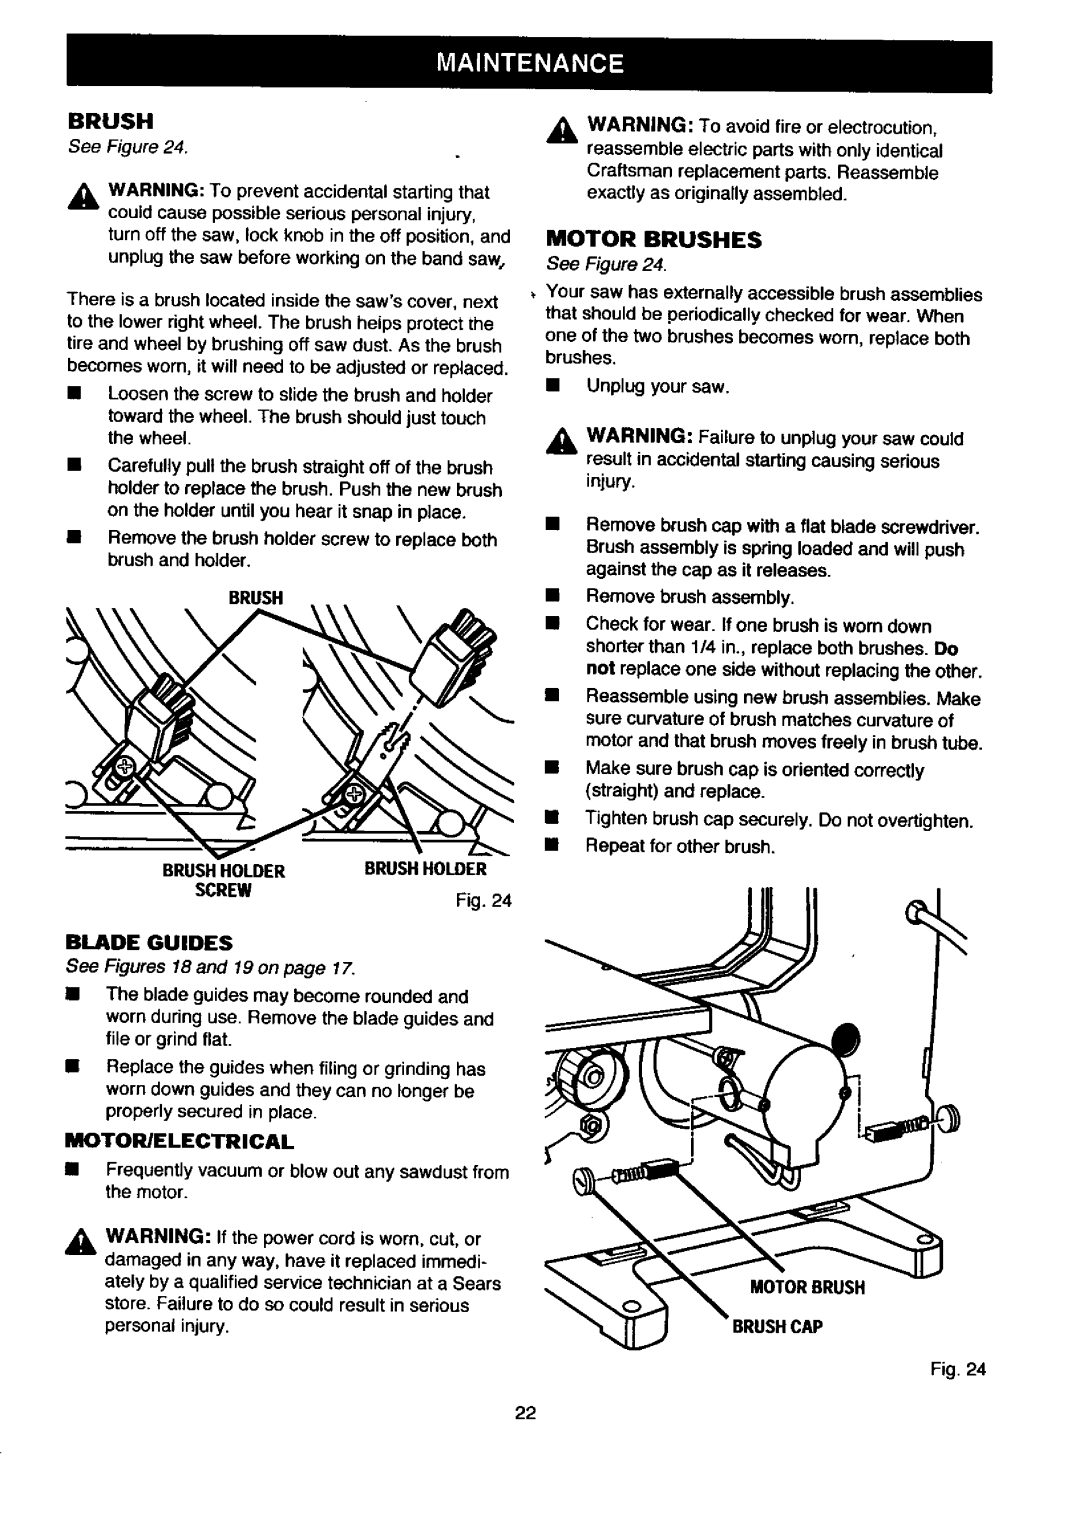
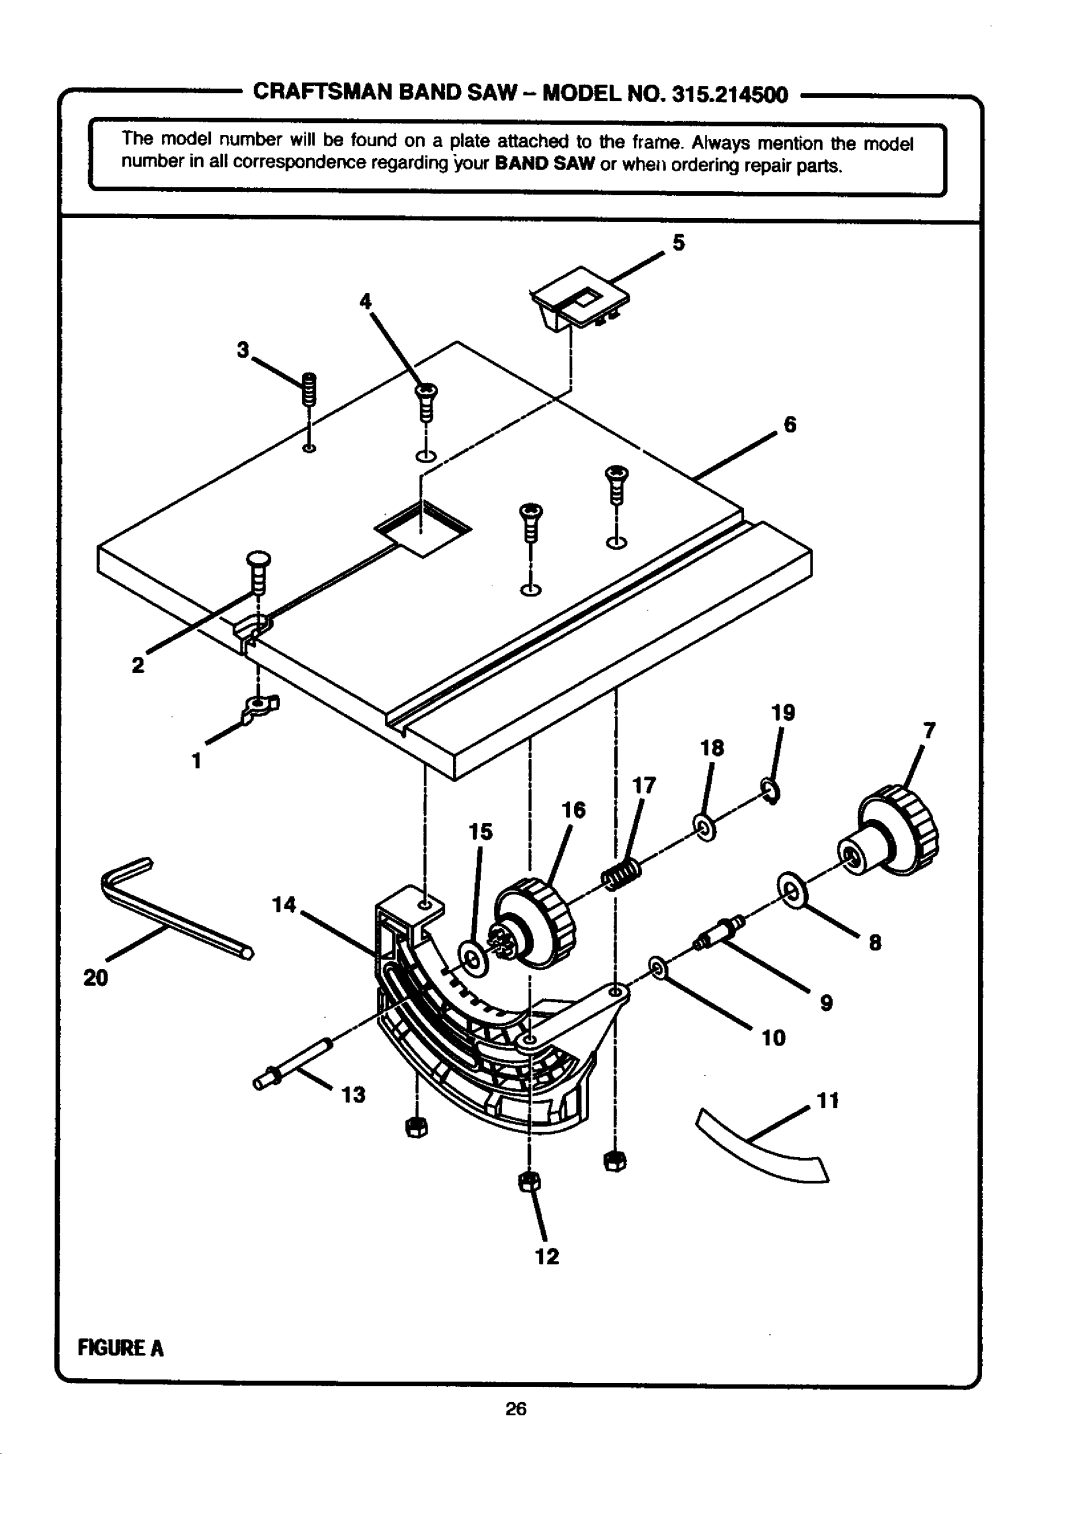
Craftsman 315.2145 Pushoff Pullon Onioefknob With Variablespeed, Toincreasespeed ON/OFFKNOB, WiTH

Page 18

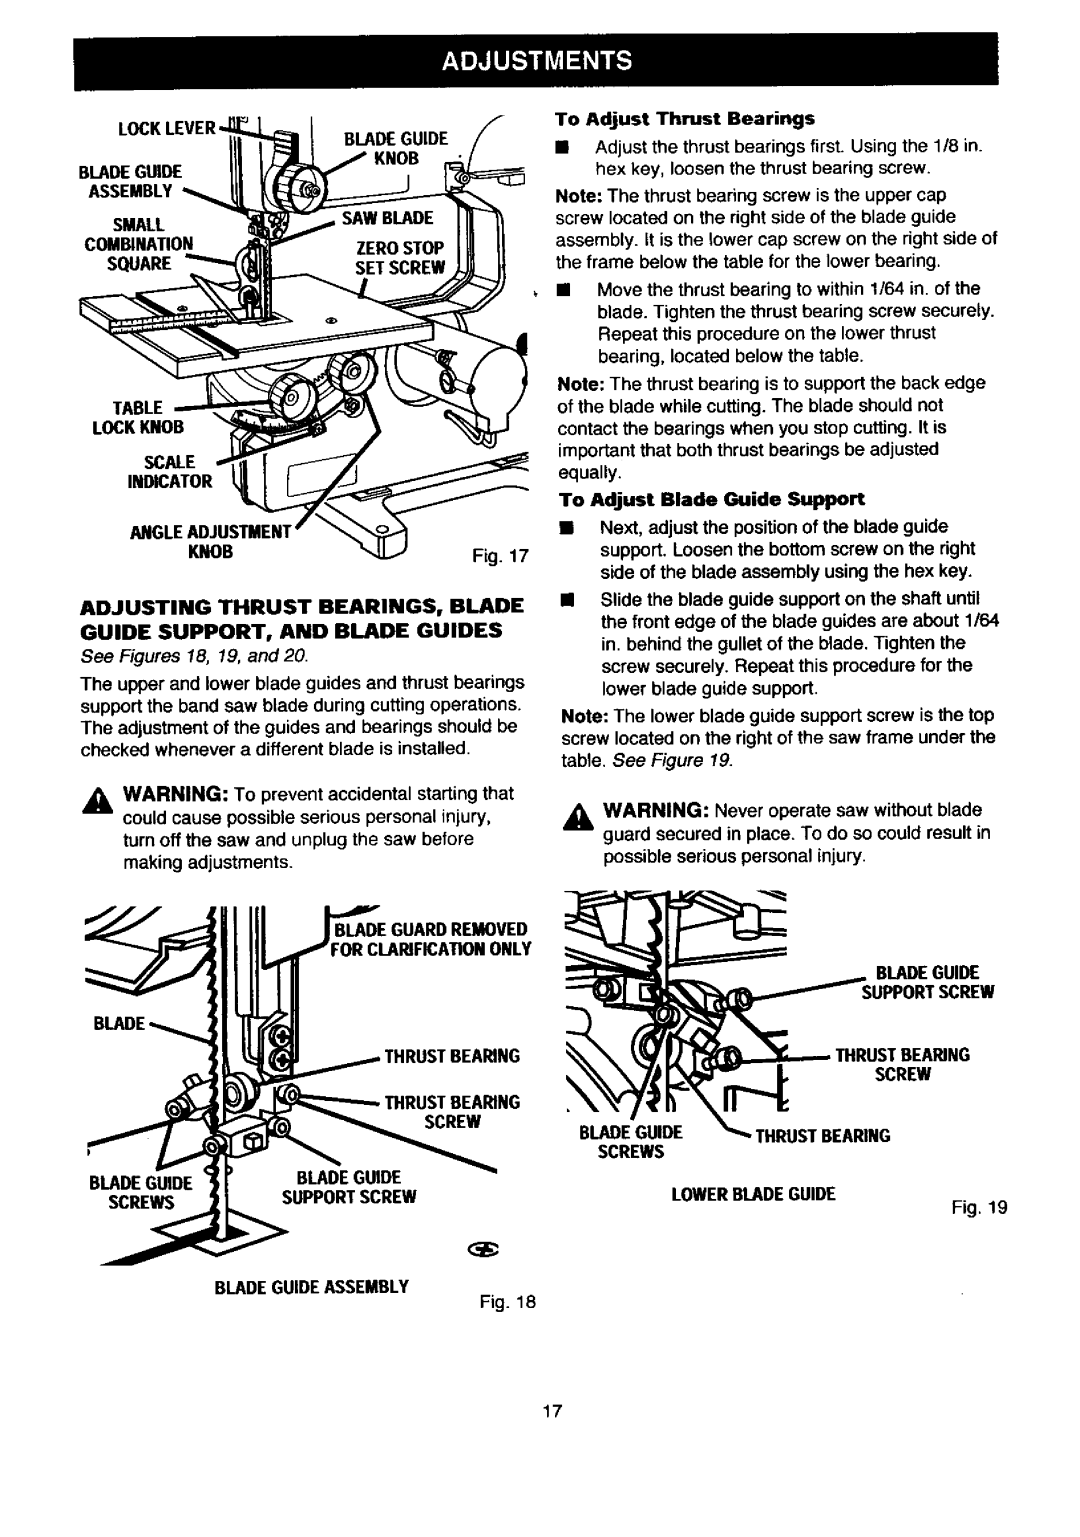
To Adjust •lade Guides

Theblade guides help keep the blade from twisting and binding. Letting the blade teeth hit the blade guides while using the band saw will ruin the blade. The set of teeth and the sharpened edge of teeth would be damaged by hitting the blade guides. Proper adjustment of the upper and lower blade guides will , prevent this from happening.

Loosen the two blade guide screws that lock the upper blade guides. Press the two guides evenly near the sides of the blade leaving about 0.004 in. from the blade. (0.004 is the thickness of a dollar bill.) Do not pinch the blade. Make sure one guide is not further away from the blade than the other. Release the guides and tighten both screws securely.

Repeat this prOcedure on the lower blade guides located under the table. See Figure 19.

This band saw is designed to cut wood, wood compo- sition prOducts, plastic, and nonferrous metals (alumi- num, brass, copper).

_1_ CAUTION: Do not cut ferrous metals (steel, iron) or hardened steel or serious damage to the saw

could result.

ON/OFF KNOB

See Figure 21.

Pull the knob out to turn the saw ON.

Note: The motor will gradually come up to speed after the saw is turned ON.

Push the knob in to turn the saw OFF.

PUSHOFF

e--

PULLON

ONIOEFKNOB

WITH

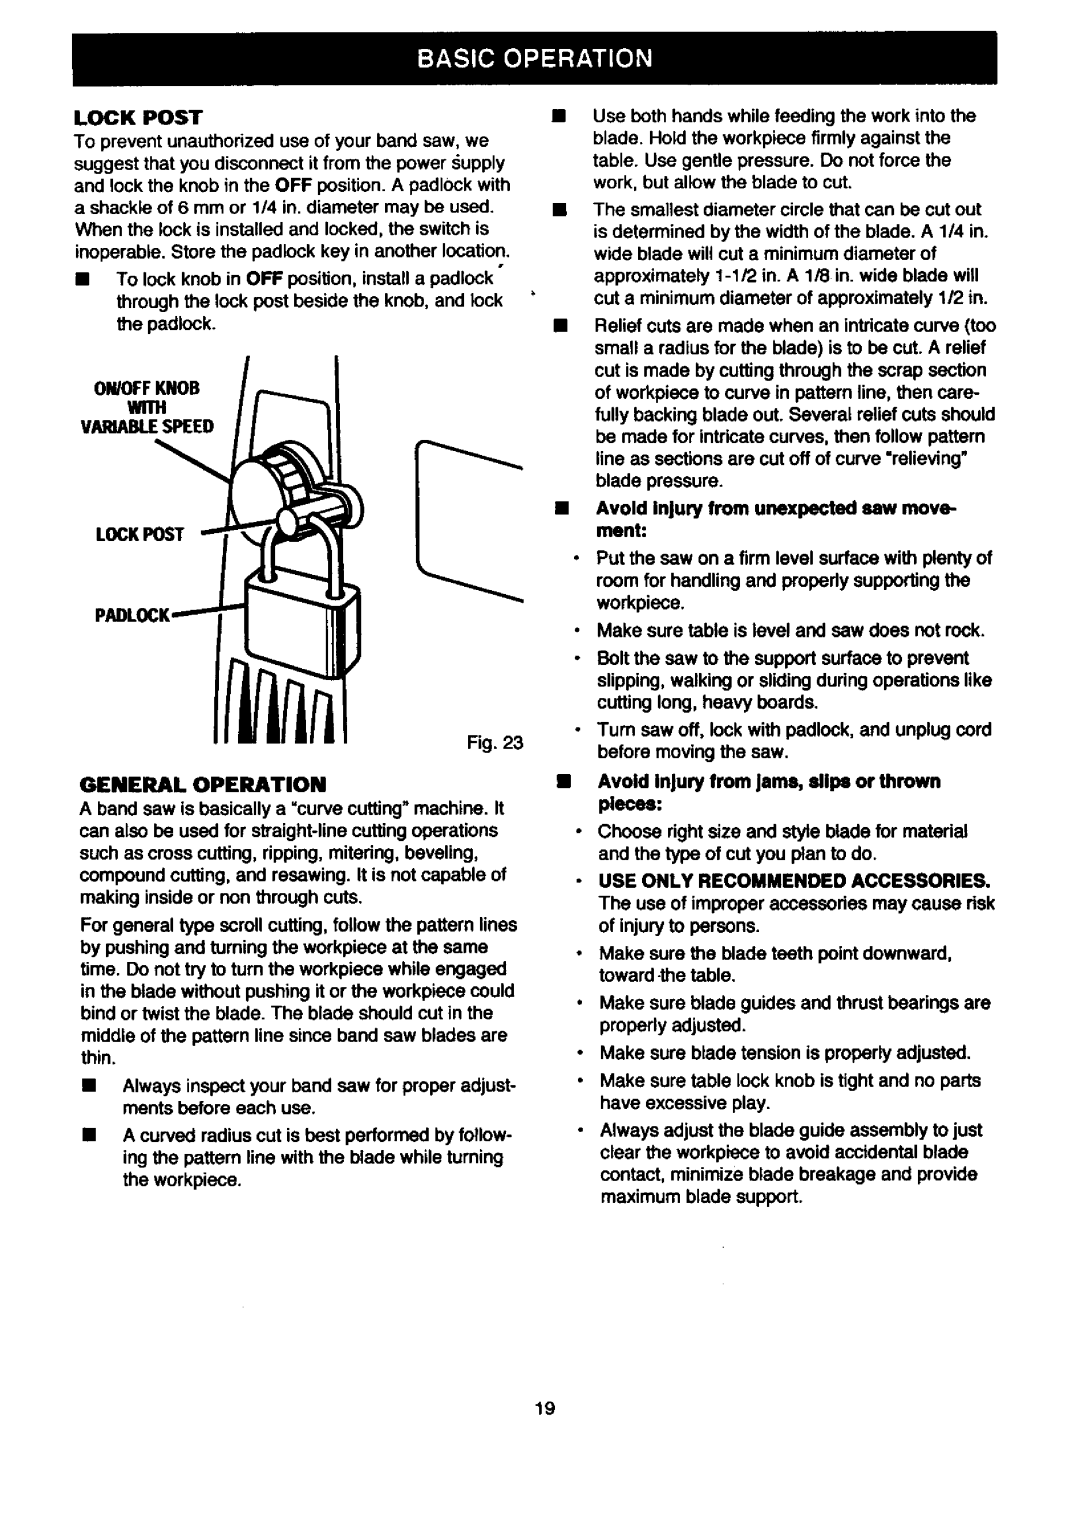
VARIABLESPEED

Fig. 21

BLADE GUARD REMOVED

FOR CLARIFICATION ONLY

THRUST

THRUST

BEARINGSCREW

BLADEGUIDE

SCREW

SCREW

BLADEGUIDES

Fig. 20

VARIABLE SPEED

See Figure 22.

The variable speed control may be adjusted to the approximate speeds identified on the On/Off knob label. Turn the knob clockwise or to the right to increase speed, up to 3000 FPM (feet per minute). Turn the knob counterclockwise or to the left to reduce speed as low as 500 FPM (feet per minute).

TOINCREASESPEED

ON/OFFKNOB

WiTH

VARIABLESPEED

SPEED

Fig. 22

18

Image 18
Contents OwnersManual Save this manual forFull ONE Year Warranty on Craftsman Band SAW Remove Adjusting Keys SymbolMeaning Safety Alert Symbol Read ALL InstructionsRules for Safe Operation Rules for Safe Operation Grounding Instructions Extension CordsElectrical Connection Grounding PIN COVER01FGROUNDED OutletboxReeaw Bevel CutFPM 118 in. to 3/8 Blade Length#2 Philupsscrewdrive Small Combination SquareSmall Combination Square 5116in. SOCKET/NUTDRIVERDvertencia Awarning I Advertencia Tracking Adjustment Screw Angle Adjustment KnobTension Adjustment Knob Angleadjustmeni Dataplate Knob8in HEX Nuts 4in In. Dia 12in` Trusshead Screw Flathead ScrewsMounting Band SAW to Workbench WingnutUnlockedbladeguide Adjusting Blade Guide AssemblyClamping Band SAW to Workbench Mounting Board Clamps WorkbenchFrontcover Installing and Adjusting BladeSAW Blade Lowerght Wheel OpenTo Increase To Decrease TensionadjustingknobAdjusting Blade Tension TensionAligning the Table Square to Blade To AdjustTracking the Blade HexkeyBladeguide Supportscrew Thrustbearing Screw Angli Knob Adjusting Thrust BEARINGS, BladeGuardremoved Blade Bladeguide Thrustbearing ScrewsPushoff Pullon Onioefknob With Variablespeed Toincreasespeed ON/OFFKNOBWiTH Lock Post ON/OFFKNOB With Variablespeed Lockpost General OperationOpen band saw cover Typesof Blades Andapproximatespeeds General MaintenanceChoice of Blade and Speed Metal CuttingBrush Brushholder Screw Blade Guides Motor BrushesBrush MOTOR/ELECTRICALWheel Motor Nuts Motorpulley Drivebelt Drive BeltLowerrightwheel Drivebelt Counterclockwiseclockwise to TightenProblem CauseSoluon Page Figure a Craftsman Band SAW- Model noCraftsman Band SAW- Model no See Back page for Parts Ordering InstructionsFigure B Craftsman Band SAW Model noParts List for Figure B Figure C Description Quan BaseFigure D Blade Guide Blade Guard Blade GuideMY-Home s