3.) Hold the RAPIDROLL RTM at a 45 degree angle and place the fill valve (a) over the fill tube. Gently push the RAPIDROLLERTM down until it bottoms | ||
on the fill tube. MAKE SURE THE ORANGE FILL CAP COVER (a) IS COMPLETELYCOVERED BY SHROUD OF CAN COVER. |
| |
NOTE: Remove cardboard spacer, and squeeze trigger to free up the plunger. |
|
|
Pull plunger (b) all the way back to draw paint into RAPIDROLLERTM . (This may take some force.) Once tube |
|
|
is full you are ready to start painting. Lift RAPIDROLLERTM slowly off fill tube. |
|
|
NOTE: If you do not receive a complete fill the first time, push plunger slowly to return paint to can and |
| a |
then pull back plunger making sure angle is correct and orange fill cap cover is fully seated. | b | |
|
| |
| APID | OLLERTM |
|
|
|
1.) Begin rolling on wall and push plunger handle or squeeze trigger to feed paint into the roller cover. |
|
|
| ||
NOTE: Initial saturation of the roller may require the full amount of paint from the first fill. Fill |
|
|
| ||
RAPIDROL ERTM as needed. |
|
|
|
|
|
HELPFUL HINTS |
|
|
|
|
|
• The trigger only needs to be squeezed when paint is needed. |
|
|
|
| |
• If you are getting a dot pattern when painting, apply more paint. |
|
|
|
| |
• If the roller is sliding on the surface, apply less paint. |
|
|
|
| |
• You may notice petroleum jelly within the handle. This is necessary and will help in its operation and will |
|
|
| ||
not affect the paint. |
|
|
| H1 |
|
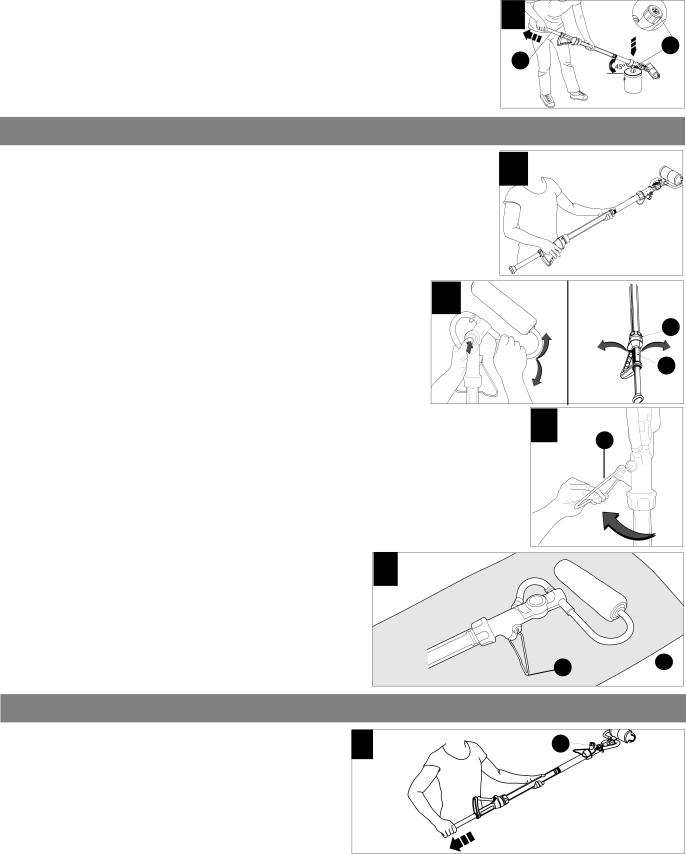
2.) The roller head can be adjusted to three different angles. Press the orange button on the |
|
|
| ||
roller head to change the angle from straight to 40 or 80 degrees. Use straight on for |
|
| b | ||
closegeneralto paintingceiling orandedging40 or(fig.80 degreeH). | angles for hard to reach places or when painting |
|
| ||
NOTE: The handle (a) can be rotated to make it more comfortable when painting with an |
|
|
| ||
angled roller frame. |
|
|
|
| a |
To rotate handle to desired position, loosen collar (b), adjust handle and retighten collar |
|
|
| ||
(fig H1). |
|
| I |
| |
3.)• WhenWhen notusingin usekickstand,rest theRRAPIDAPIDRROLLEROLLERTM shouldon thealwaysconvenientbe onkickstanda drop cloth(a).(b) or over newspaper in case of drips. | a |
| |||
| TM |
|
|
|
|
• When painting, kickstand should be pointed away from roller to avoid getting spatter on kickstand. |
|
|
| ||
• Always rotate roller to the straight position before pacing on kickstand. |
|
|
|
| |
• To prevent drips, relieve pressure on RAPIDROLLERTM by pulling plunger out slightly. |
|
|
|
| |
NOTE: Attaching the spatter guard when using the kickstand helps insure that any dripping paint is contained. |
|
|
| ||
a ![]() b
b
APID OLLERTM
1.) Pull plunger back to draw excess paint from roller frame into tube. HINT: Place thumb over orange fill cap cover (a) to help remove the most paint from the frame prior to pulling back plunger.
4