System Configuration
Note that the Volume control is active when utilizing external noise calibration.
a Dolby Digital
Subwoofer Peak Limiter
Note that +00dB=85dB, and +15dB=100dB in a properly calibrated system.
Note that the Sub Peak Limiter is sepa- rate from the Subwoofer level control in the Effect Adjust menus — one setting does not affect the other.
Dolby Digital
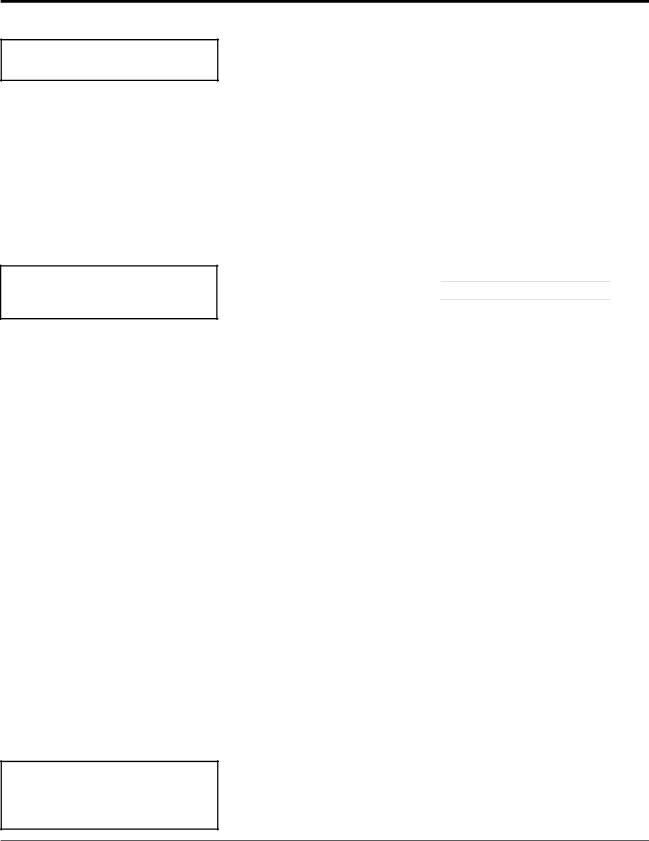
| SUB PEAK LIMITER |
| Adjust with ▲ or ▼ | |
LIMITER | ON |
| ||
ON, OFF | ||||
LIMITER ADJUST | +15dB | |||
| !WARNING! |
|
|
|
REDUCE SYSTEM VOLUME |
| |||
| BEFORE TURNING |
| ||
| LIMITER OFF |
| ||
|
|
|
|
|
The
To turn off the limiter or to change its setting, select the SUB PK LIMITER parameter in the Output Levels menu.
If you want to turn the limiter off, first turn the system volume down in order to prevent the subwoofer from overloading.
Press ▼ to select LIMITER, then press SELECT. Press ▼ to select OFF. Press DONE twice to return to the Output Levels menu. While readjusting the system volume back to a comfortable listening level, check to be sure the subwoofer or its amplifier is not overloading on passages with loud low frequency peaks.
Selecting LIMITER ADJUST in the Sub Peak Limiter menu invokes a calibration routine for setting the optimal peak level for your installation. Pressing SELECT routes low frequency calibration noise to the subwoofer output of the
27