HP VLI 8 manual Replacing the Processor, Replace the cover described in this chapter

Page 29

2How to Install and Replace Components In Your Desktop PC Replacing the Processor

Replacing the Processor

1Remove the computer’s cover (described in this chapter).

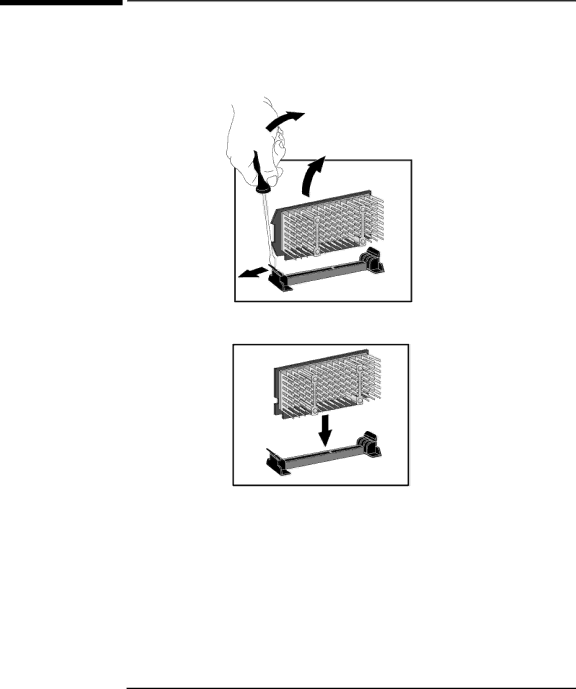
2Remove the old processor.

3Install the new processor and clip it into place.

4If the new processor is a different speed, ensure that the system board switches are correctly set for your processor speed. (The correct switch settings are indicated on the system board.)

5Replace the cover (described in this chapter).

6Ensure that the latest version of BIOS is installed on your PC. To learn which version of BIOS is currently installed on your PC, press ESC during startup. To get the latest BIOS version for your PC, connect to the web site www.hp.com/go/vectrasupport.

71

Image 29
Contents Number Drive Controller Product Hard Video Std Multi-mediaModels with Intel Pentium II Processor D7941A/TD7961A/T Product Hard Number Drive Video Controller StdD7962A/T D7963A/TVideo Displays Input DevicesMass Storage MultimediaProcessor Pentium System BoardMain Memory Clears User and Administrator passwords Switch Function Default Reserved Do Not UseSystem Frequency1 Switch 2332 MHzPart Numbers Description Repl Exchange Part Number Parts List for HP Vectra VLi 8 PCMain memory modules Description Repl Exchange Part Number System boardProcessors SECC2 package Removing the Cover Removing and Replacing the CoverReplacing the Cover Disk drive Label Inside Your PCUpgrading the Main Memory Supported HP accessories, connect to the web siteFeature is not used by this PC Drive Connectors Upgrading and Installing Mass Storage DevicesBefore Installing an IDE Hard Disk Components How to do thisUpgrading the Hard Disk Drive Appears during startup Installing a Second Hard Disk Drive Appears during startup Installing Removable Media Devices Audio Connector Optional Configuring an IDE Device After Installation Replacing the Floppy Drive Accessory Board Slots Installing Accessory BoardsPC has four accessory board slots InchesRemove the retaining bracket Installing an Accessory BoardPage Advanced menu of the Setup program to Disabled Accessory boardTo enter the Setup program, press F2 during startup Accessory boards Configuring Accessory Boards with Plug and PlayInformation about installing accessory boards AvailableConfiguring non-Plug and Play ISA Accessory Boards Replacing the Processor Replacing the System Board Page Remove all internal power supply connectors Replacing the Power SupplyPage Changing the Battery Installing a Security Cable