Maintaining Your Appliance | 25 |
Monthly Maintenance (while appliance is in use)
Make sure the appliance has fully cooled prior to conducting service.
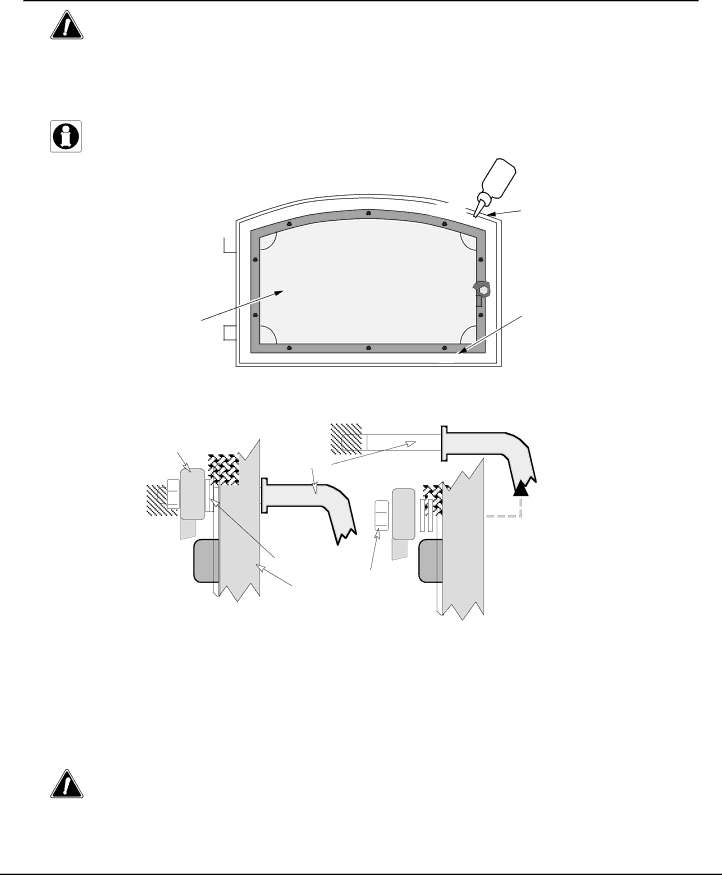
Door and Glass Inspection
The door must form an
The door can be lifted off the hinges if extensive repairs are conducted.
![]() hinges to eliminate squeaks.
hinges to eliminate squeaks.
If the glass is damaged, replace it - see “Replacement Parts” for details.
Use wood stove gasket cement to
Severely frayed or
The door latch should pull the door against the face of the stove (but not so tight as to not allow full handle rotation). If the latch requires adjustment, follow the directions below.
Side View of Door Handle | Exploded View |
Door Cam
Door
Handle
Washers
Use a 9/16"
Door Frame socket wrench to remove this nut.
Creosote - Formation and Need for Removal
Door Cam Adjustment:
To tighten, remove a washer from the inside of the door frame. To loosen, place an additional washers on the inside of the door frame or loosen the nut 1/2 turn.
When wood is burned slowly, it produces tar and other organic vapors, which combine with expelled moisture to form creosote. The creosote vapors condense in the relatively cool chimney flue of a slow- burning fire. As a result, creosote residue accumulates on the flue lining. When ignited, this creosote makes an extremely hot fire. The chimney and chimney connector should be inspected at least once every two months during the heating season to determine if a creosote buildup has occurred. If creosote has accumulated, it should be removed to reduce the risk of a chimney fire.
If you are not certain of creosote inspection, contact your dealer or local chimney sweep for a full inspection. Excess creosote buildup may cause a chimney fire, that may result in property damage, injury, or death.
© Travis Industries | 4040608 |