Operations
Note : Before operating this receiver with the supplied remote control, refer to “Universal Remote Control” on page 10 for details about operation.
ENGLISH
LISTENING TO A PROGRAM

Before operation
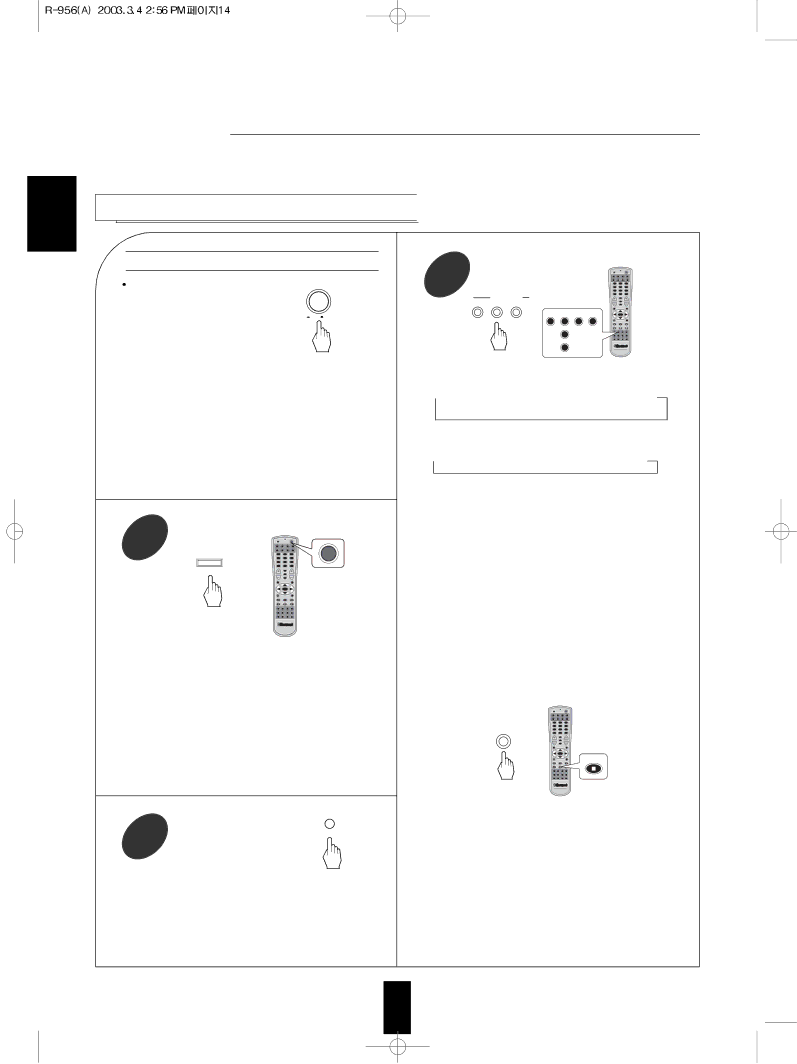
Enter the standby mode. | MAIN POWER |
| ON / OFF |
![]() The STANDBY button lights up in red.
The STANDBY button lights up in red.
This means that the receiver is connected to the AC mains and a small amount of current is retained to support the memorized contents and operation readiness.
![]() To switch the power completely off, push the POWER switch again.
To switch the power completely off, push the POWER switch again.
![]() The power is cut off and the STANDBY light goes off.
The power is cut off and the STANDBY light goes off.
In the standby mode, turn the power on.
1 | STANDBY | 41 | 52 | 63 | PWR |
|
| 7 | 8 | 9 |
|
| 0 |
ON/STANDBY | or |
|
HOME THEATER MASTER
![]() Each time the STANDBY button on the front panel or the POWER button on the remote control is pressed, the receiver turns on to enter the operating mode(the STANDBY button lights up in green) or turns off to enter the standby mode (the STANDBY button lights up in red).
Each time the STANDBY button on the front panel or the POWER button on the remote control is pressed, the receiver turns on to enter the operating mode(the STANDBY button lights up in green) or turns off to enter the standby mode (the STANDBY button lights up in red).
![]() In the standby mode, if one of the INPUT SELECTOR buttons is pressed, the receiver turns on automatically and the desired input is selected.
In the standby mode, if one of the INPUT SELECTOR buttons is pressed, the receiver turns on automatically and the desired input is selected.
Switch the speakers on. | SPEAKER |
2 | ON/OFF |
![]() The SPEAKER indicator lights up on the display and sound can be heard from the speakers connected to the speaker terminals.
The SPEAKER indicator lights up on the display and sound can be heard from the speakers connected to the speaker terminals.
![]() When using headphones for private listening, press the SPEAKER button again to switch the speakers off.
When using headphones for private listening, press the SPEAKER button again to switch the speakers off.
Select the desired input source.
3 | 1 | 2 | 3 |
4 | 5 | 6 | |
7 | 08 | 9 |
INPUT SELECTOR
AUDIO | VIDEO TAPE MON. |
|
|
| PHONO | CD | TUNER TAPE MON |
| AUX |
|
|
| or | VID SEL |
|
|
| AUX |
|
![]() Each time the “AUDIO” button is pressed, the input source changes as follows;
Each time the “AUDIO” button is pressed, the input source changes as follows;
![]() PHONO
PHONO ![]() TUNER
TUNER ![]() CD PLAYER
CD PLAYER ![]() AUX
AUX
(frequency display)
![]() Each time the “VIDEO” or “VID SEL” button is pressed, the input source changes as follows;
Each time the “VIDEO” or “VID SEL” button is pressed, the input source changes as follows;
![]() VIDEO 1
VIDEO 1 ![]() VIDEO 2
VIDEO 2 ![]()
![]() VIDEO 5
VIDEO 5
![]() When the TAPE MONITOR button is set to ON so that “TAPE MON” lights up, other inputs can not be heard from the speakers.
When the TAPE MONITOR button is set to ON so that “TAPE MON” lights up, other inputs can not be heard from the speakers.
To listen to an input source other than TAPE MONITOR, be sure to set the TAPE MONITOR button to off.
TAPE MONITOR function
You can connect either a tape deck or a graphic equalizer to the receiver’s TAPE MONITOR jacks.
To listen to the component connected to these jacks, set the TAPE MONITOR button to on.
If you connect a
For further details, refer to the operating instructions of the component connected.
![]() When selecting the 6.1 CH DIRECT as desired
When selecting the 6.1 CH DIRECT as desired
| 1 | 2 | 3 |
6.1CH DIRECT | 4 | 5 | 6 |
7 | 0 | 9 | |
| 8 |
or
6.1CH IN
![]() 6.1 CH DIRECT is displayed and the 7 separate analog signals from a decoder or DVD player connected to this unit will be heard. You can use the tone controls and volume control to adjust the signal. (If the TAPE MONITOR button is to on, it will automatically be set to off.)
6.1 CH DIRECT is displayed and the 7 separate analog signals from a decoder or DVD player connected to this unit will be heard. You can use the tone controls and volume control to adjust the signal. (If the TAPE MONITOR button is to on, it will automatically be set to off.)
![]() To cancel the 6.1 CH direct function, press the 6.1 CH DIRECT button again or select the desired input source.
To cancel the 6.1 CH direct function, press the 6.1 CH DIRECT button again or select the desired input source.
![]() These 7 separate analog signals can be heard, only. They cannot be recorded.
These 7 separate analog signals can be heard, only. They cannot be recorded.
1 4