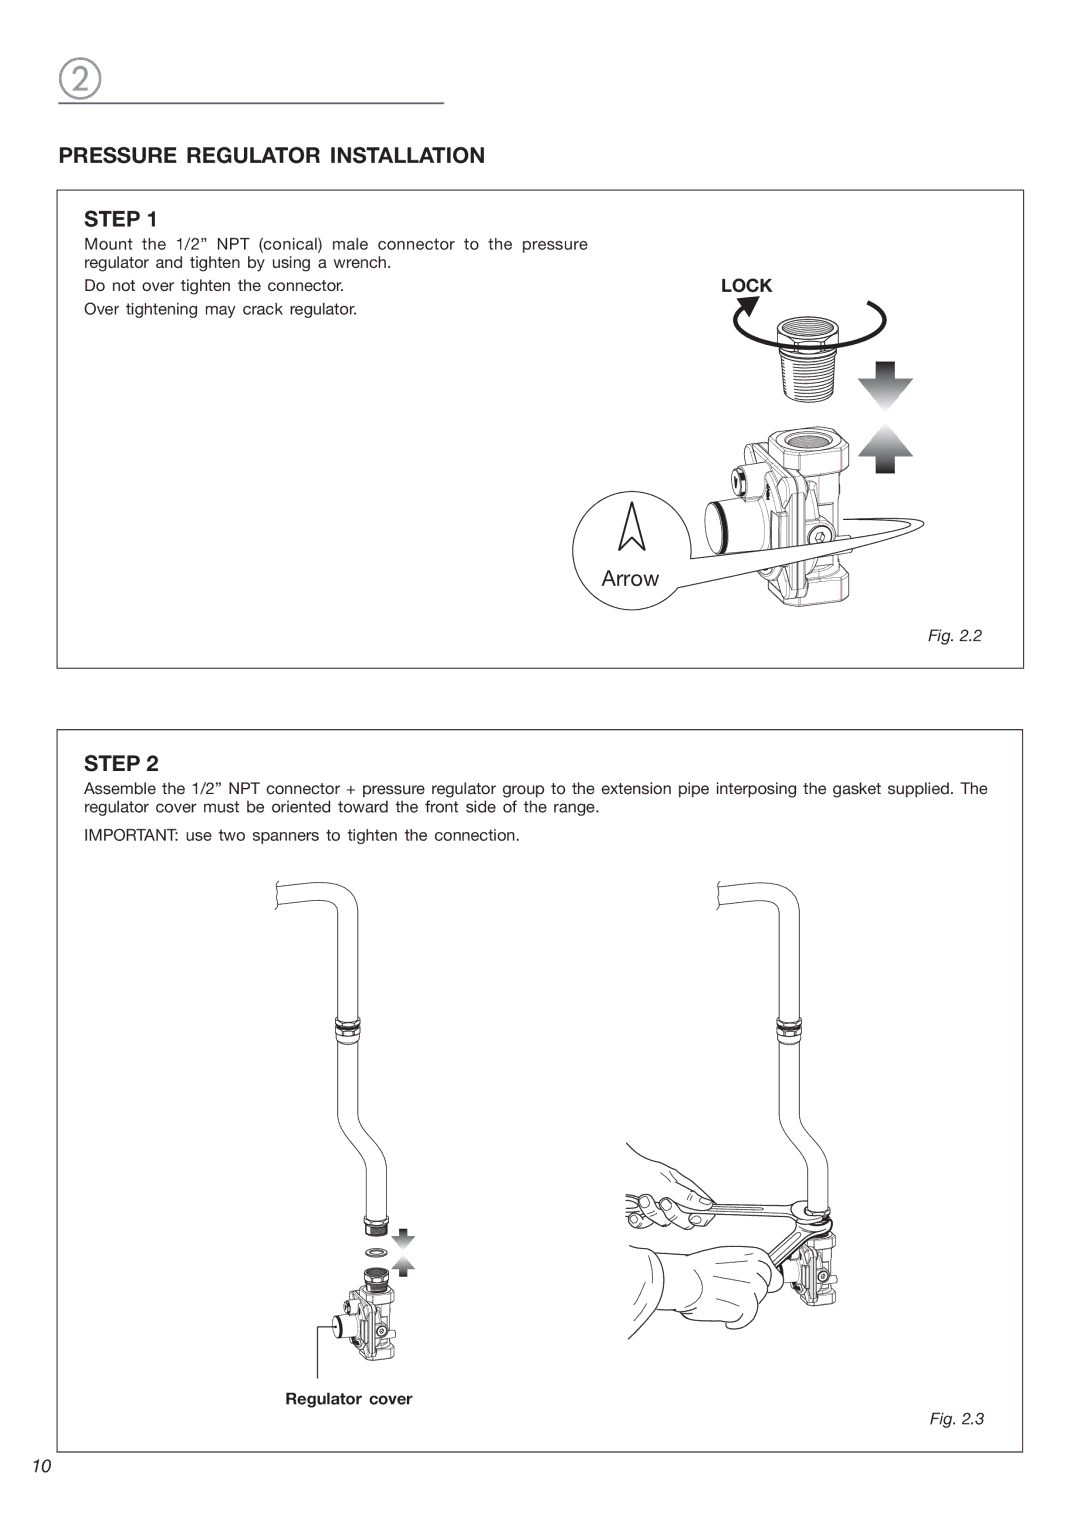
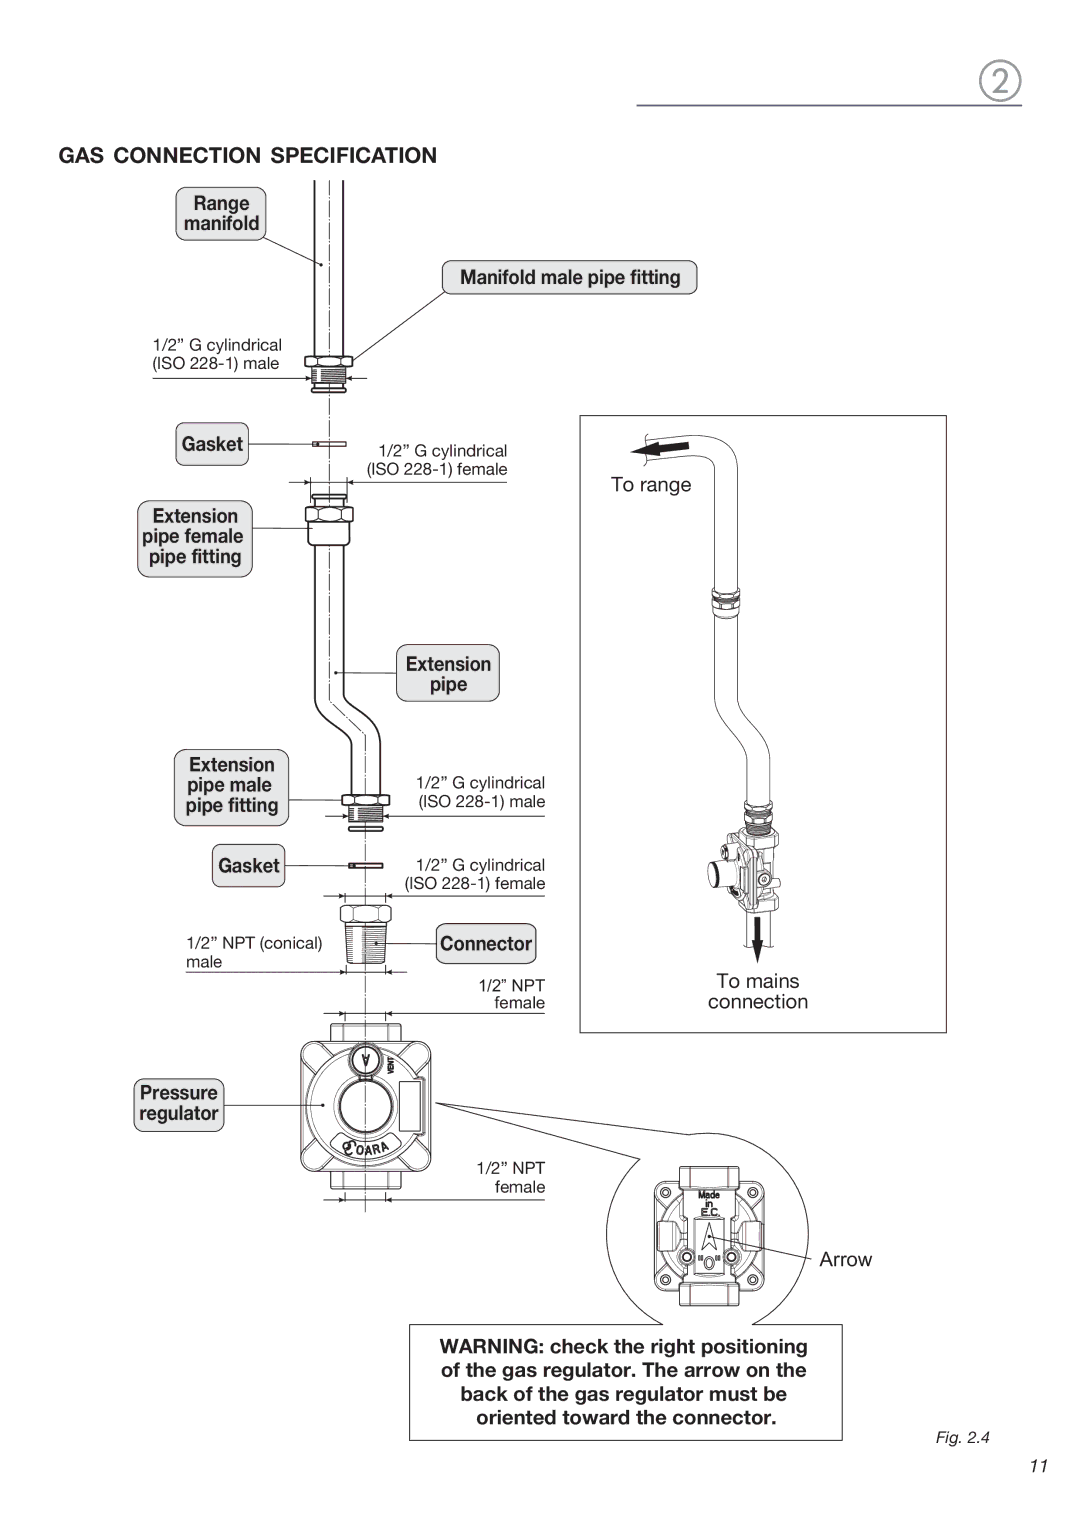
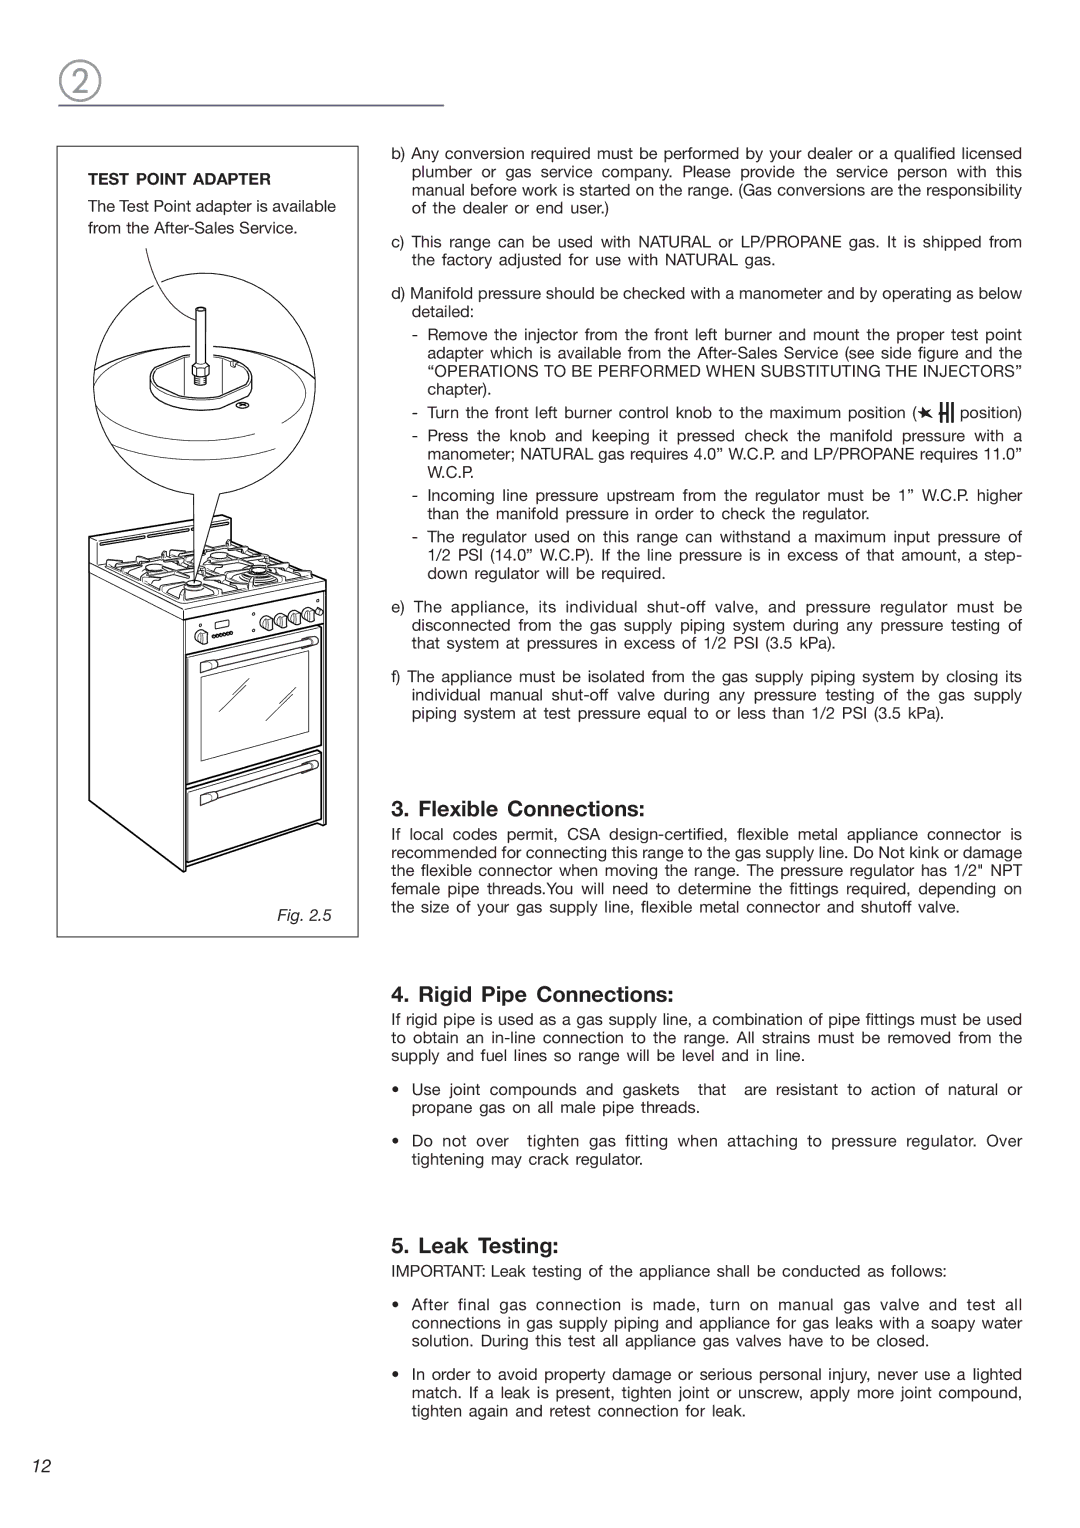
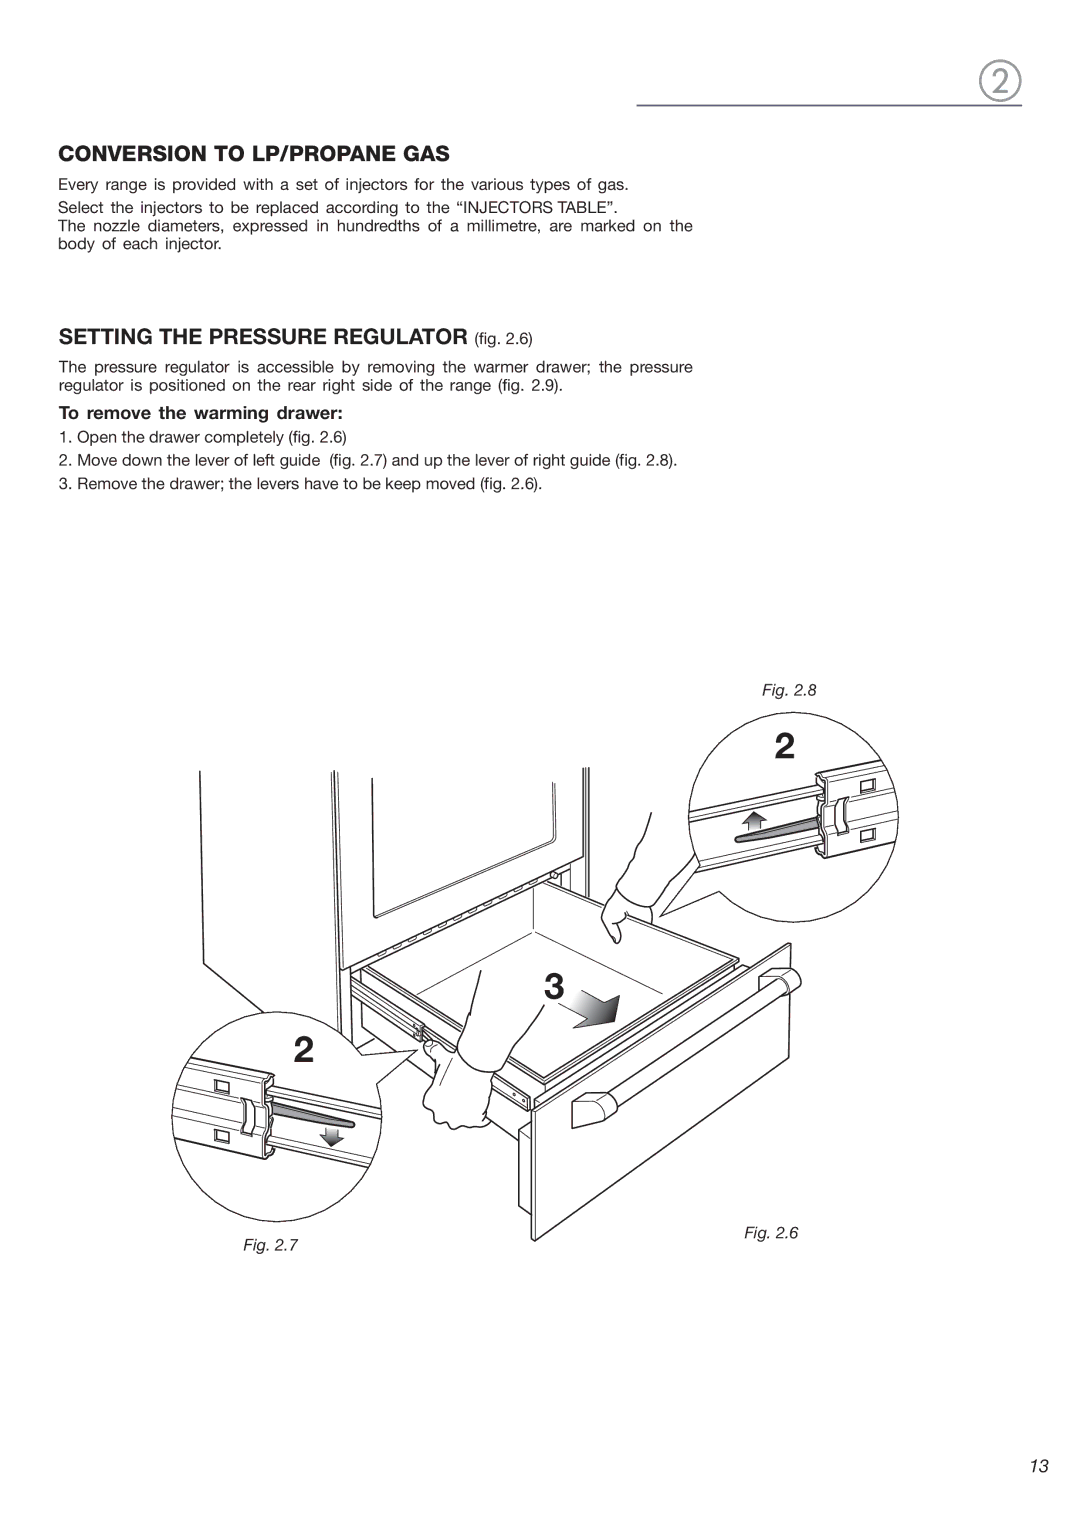
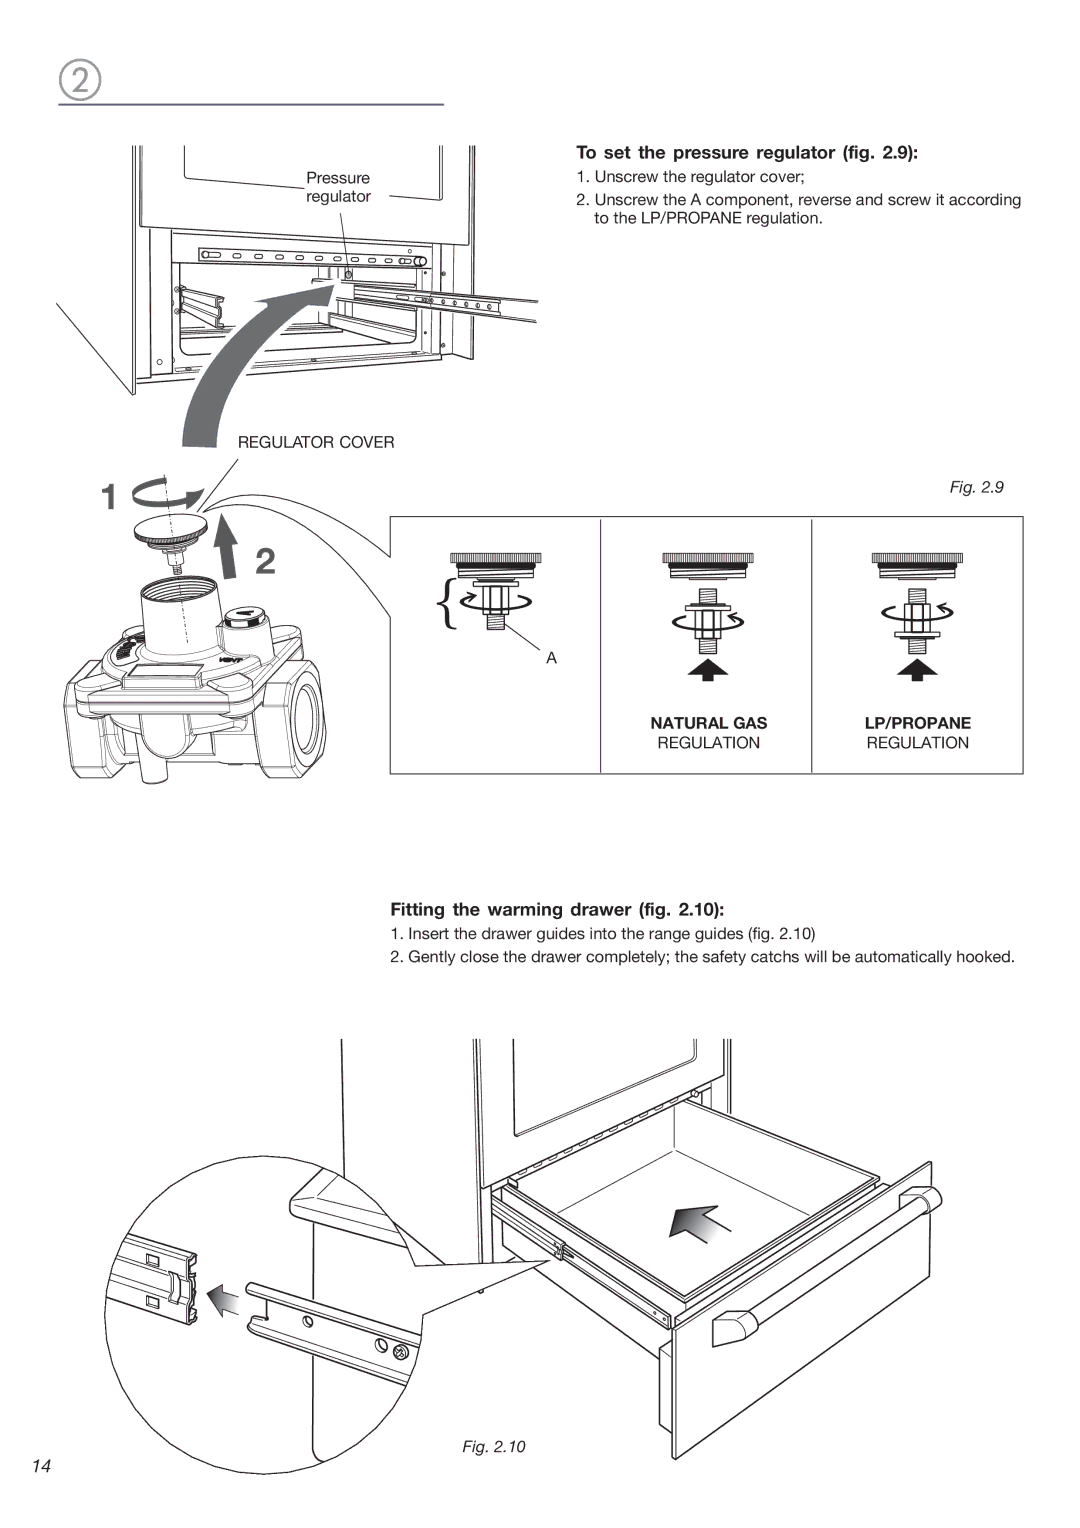
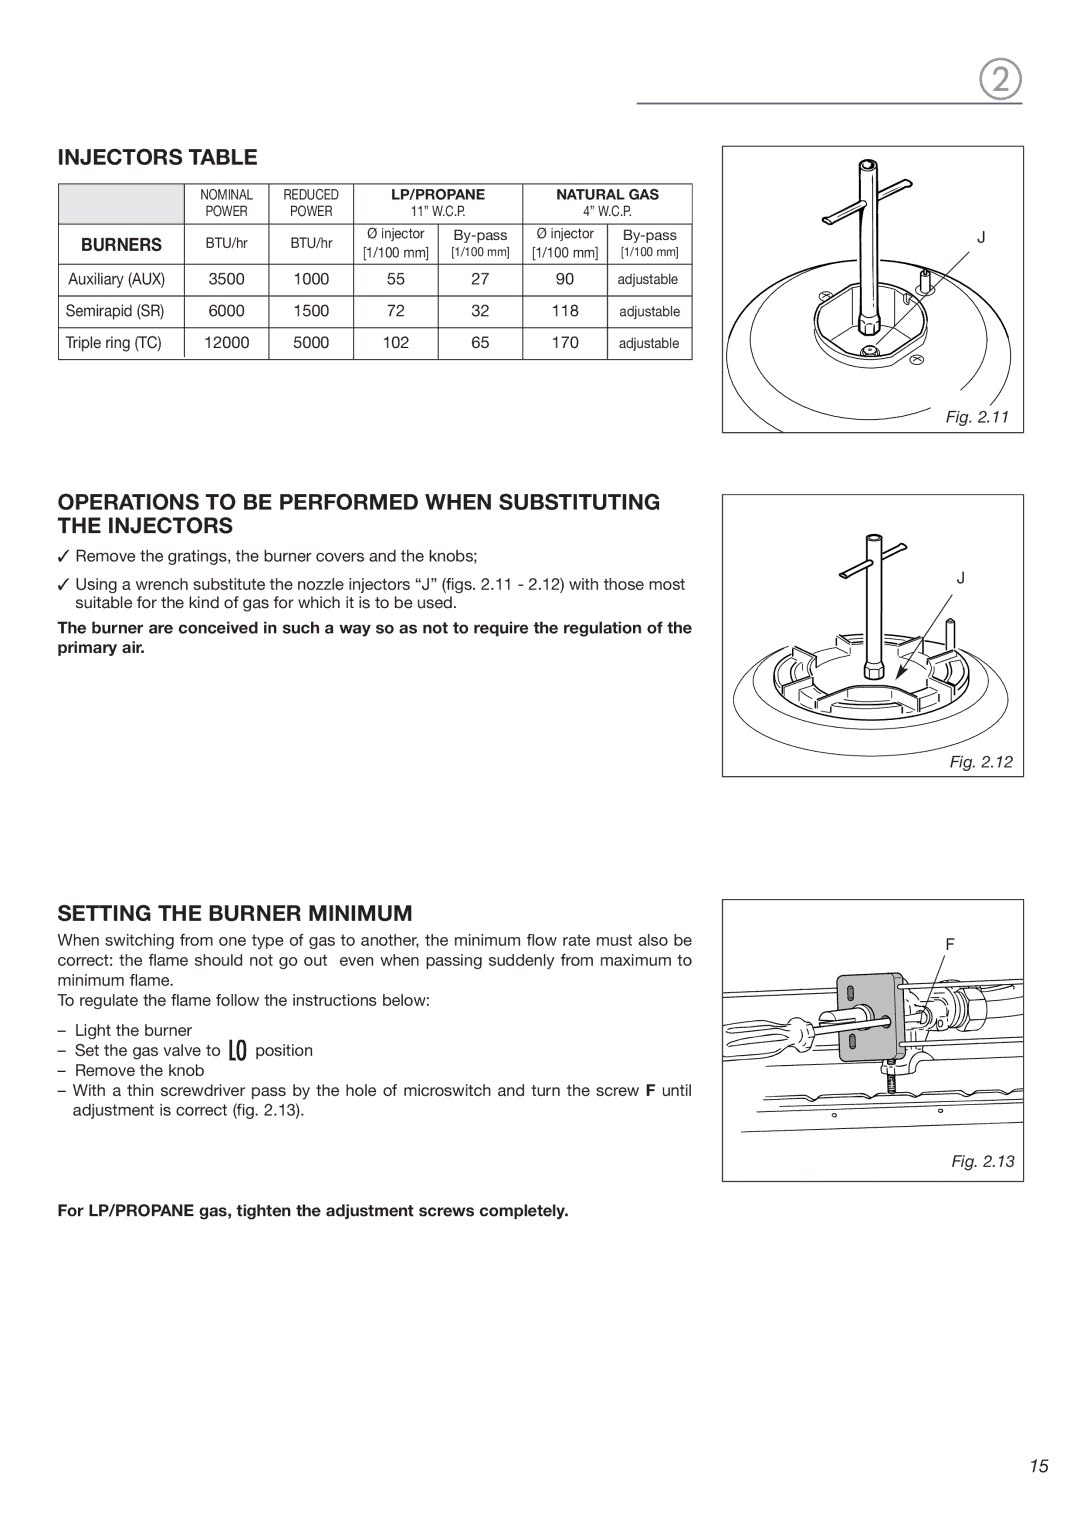
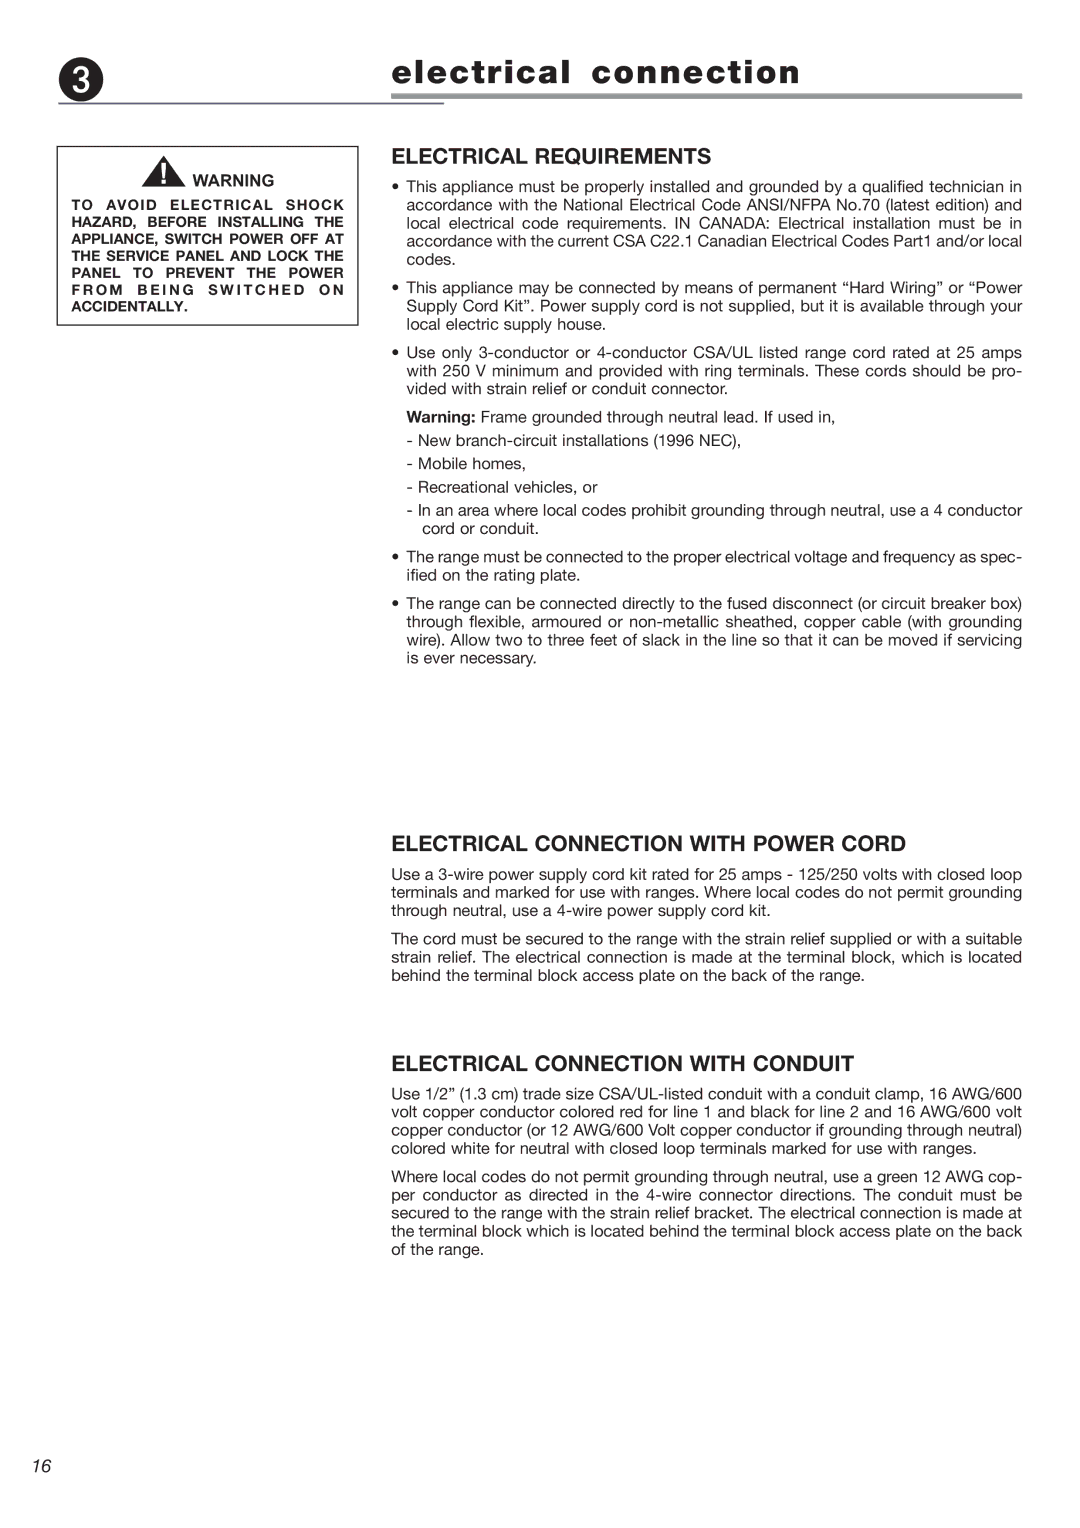
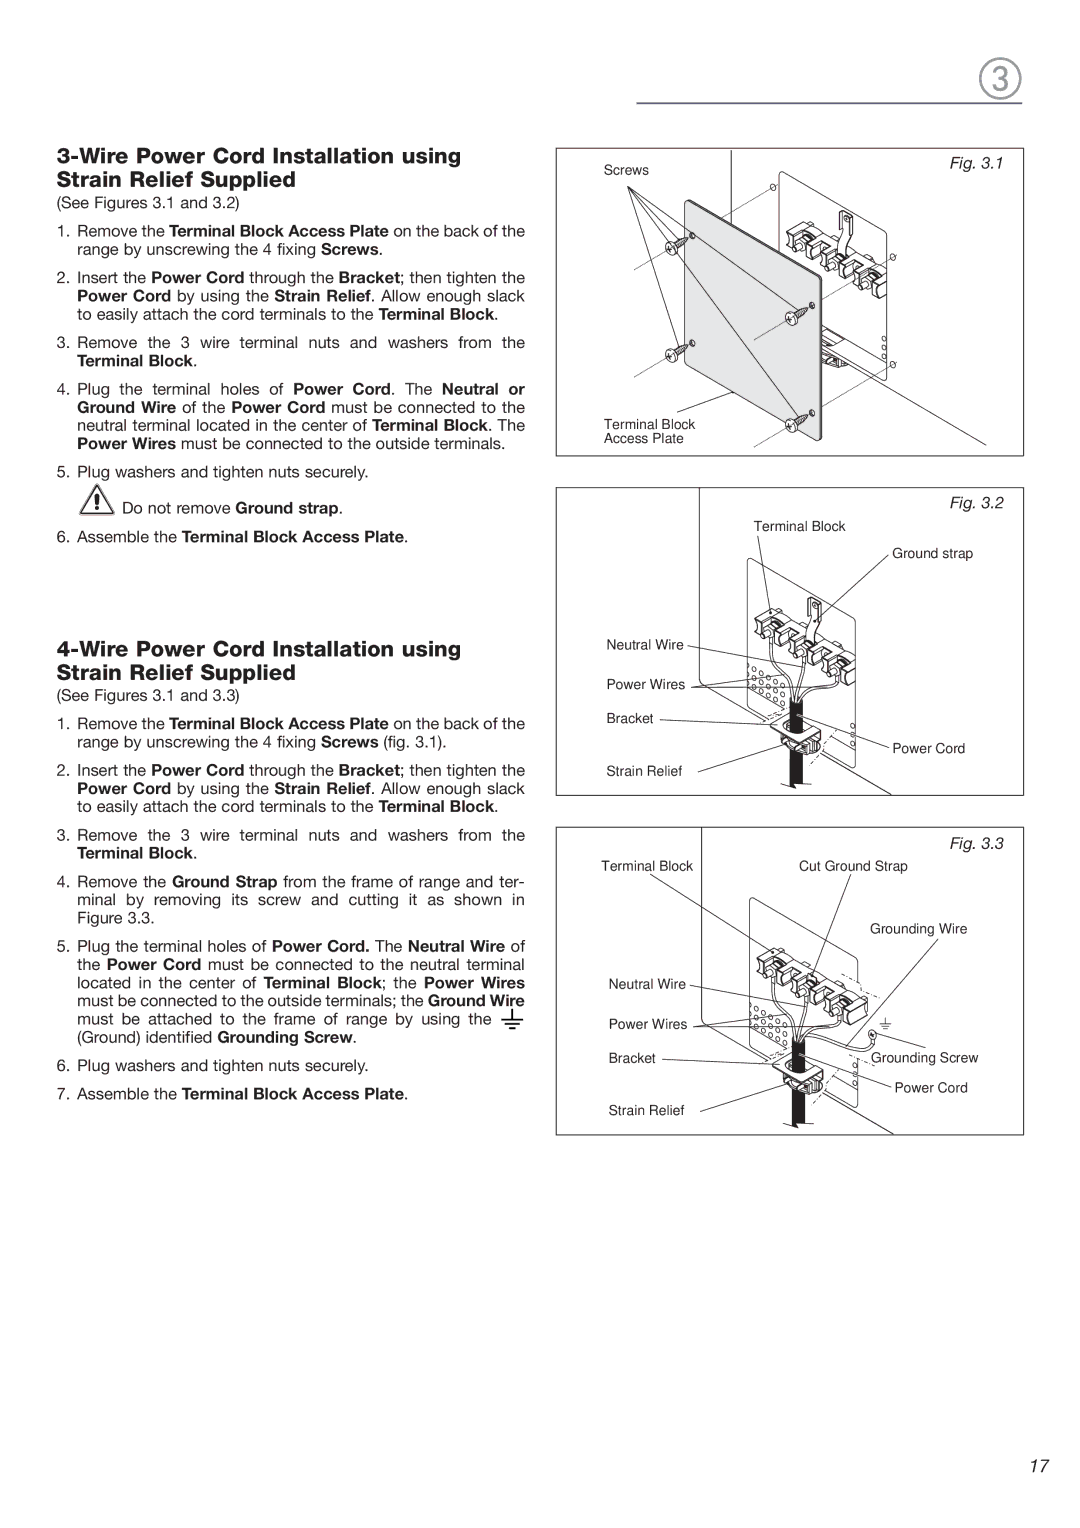
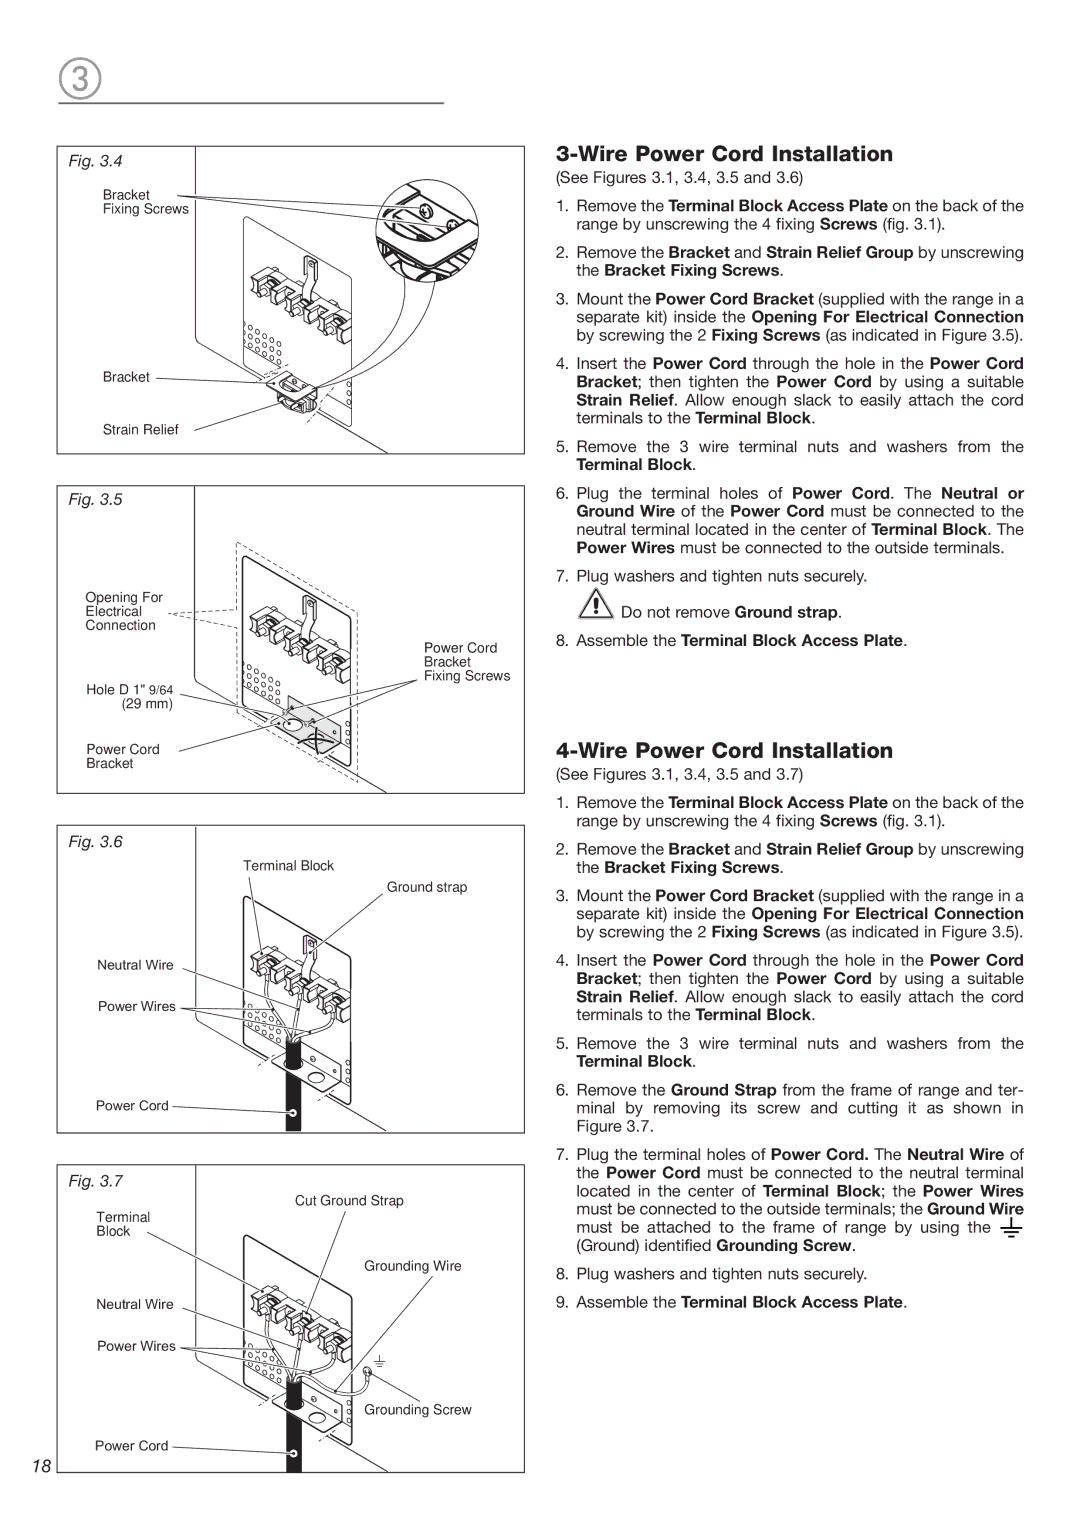
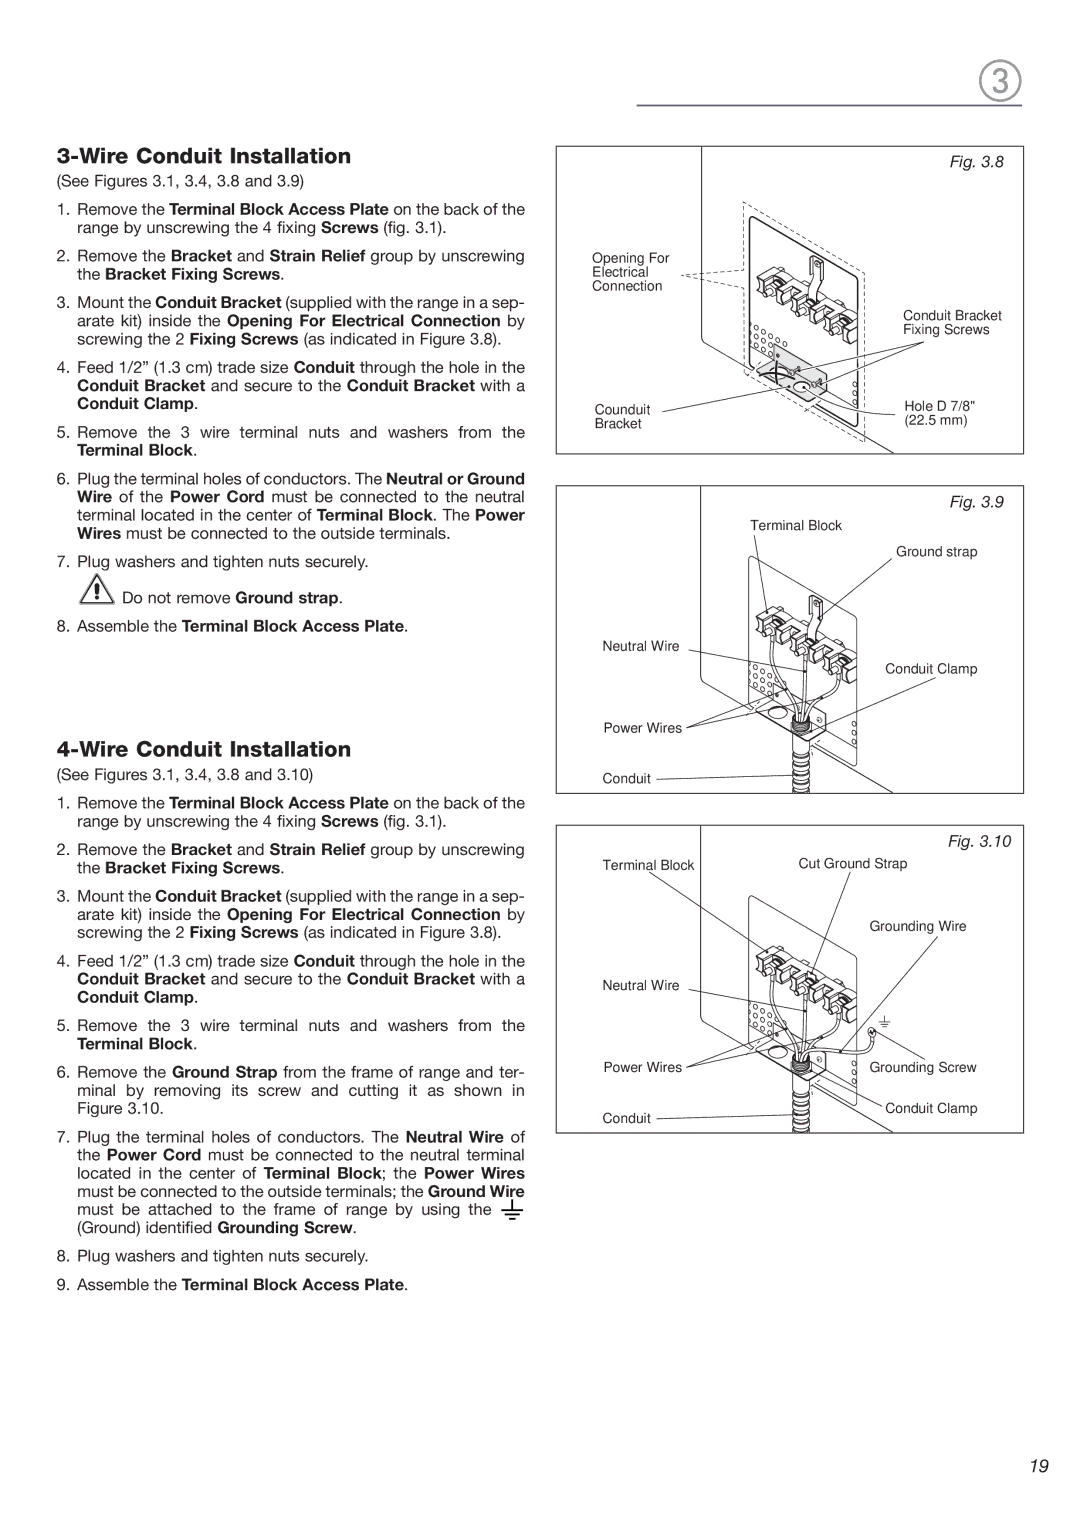
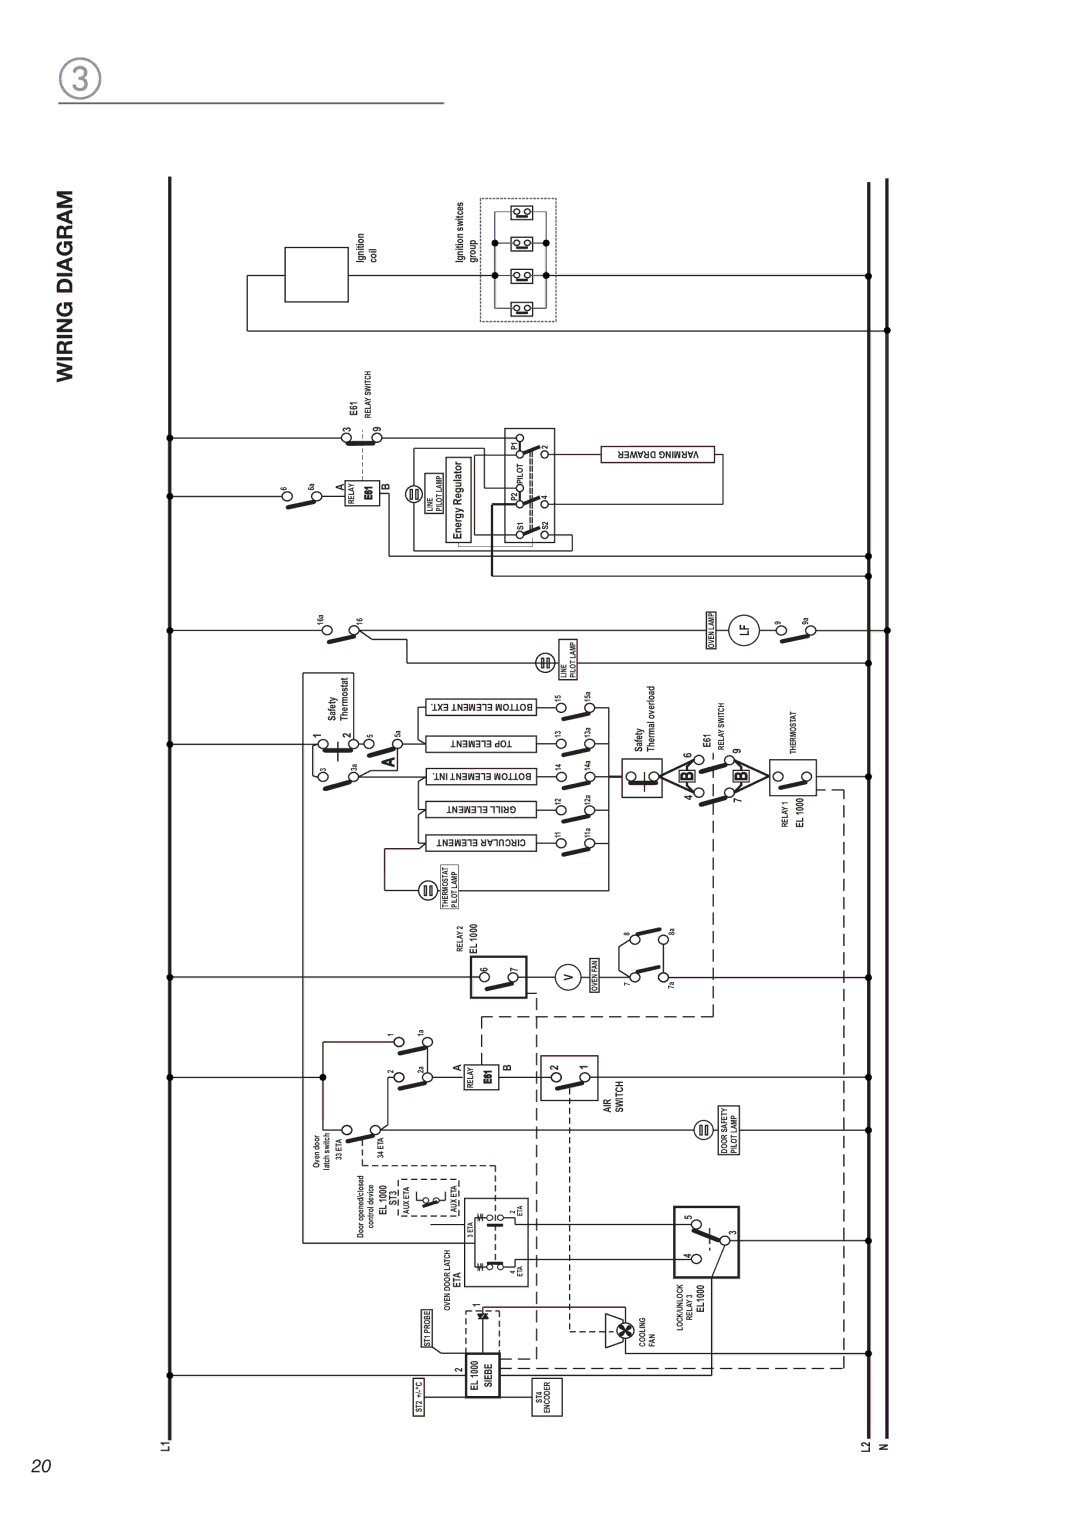
DeLonghi DEGESC24SS Levelling the Range, ANTI-TIP Stability Device Installation Instructions

Page 8

Fig. 1.6

Supplied with the range in a separate kit

0 mm


0"


+ 5/16"


+ 8 mm

Fig. 1.7a


YOU MUST USE STABILITY

ANTI TIP BRACKET TO

PREVENT UNIT FROM

TIPPING.

ANTI-TIP STABILITY

DEVICE FIXING

Anti-tip stability device

Rear left feet of range

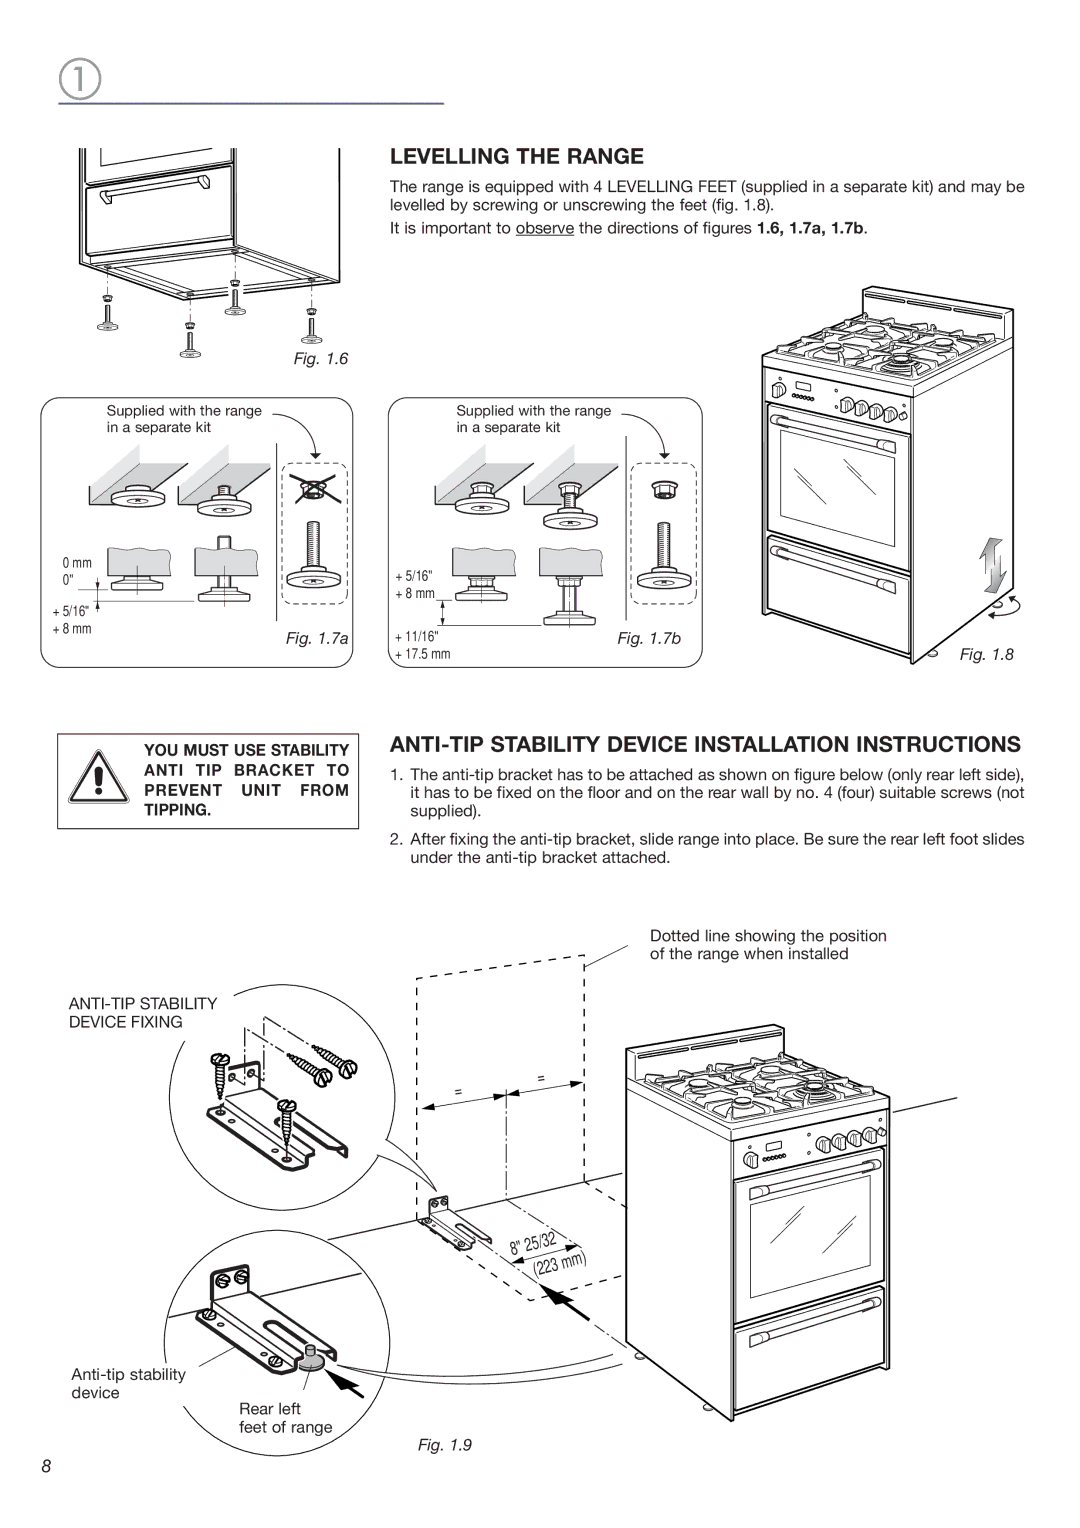
LEVELLING THE RANGE

The range is equipped with 4 LEVELLING FEET (supplied in a separate kit) and may be levelled by screwing or unscrewing the feet (fig. 1.8).

It is important to observe the directions of figures 1.6, 1.7a, 1.7b.

Supplied with the range in a separate kit

+ 5/16" + 8 mm

+ 11/16"

Fig. 1.7b

+ 17.5 mm

Fig. 1.8

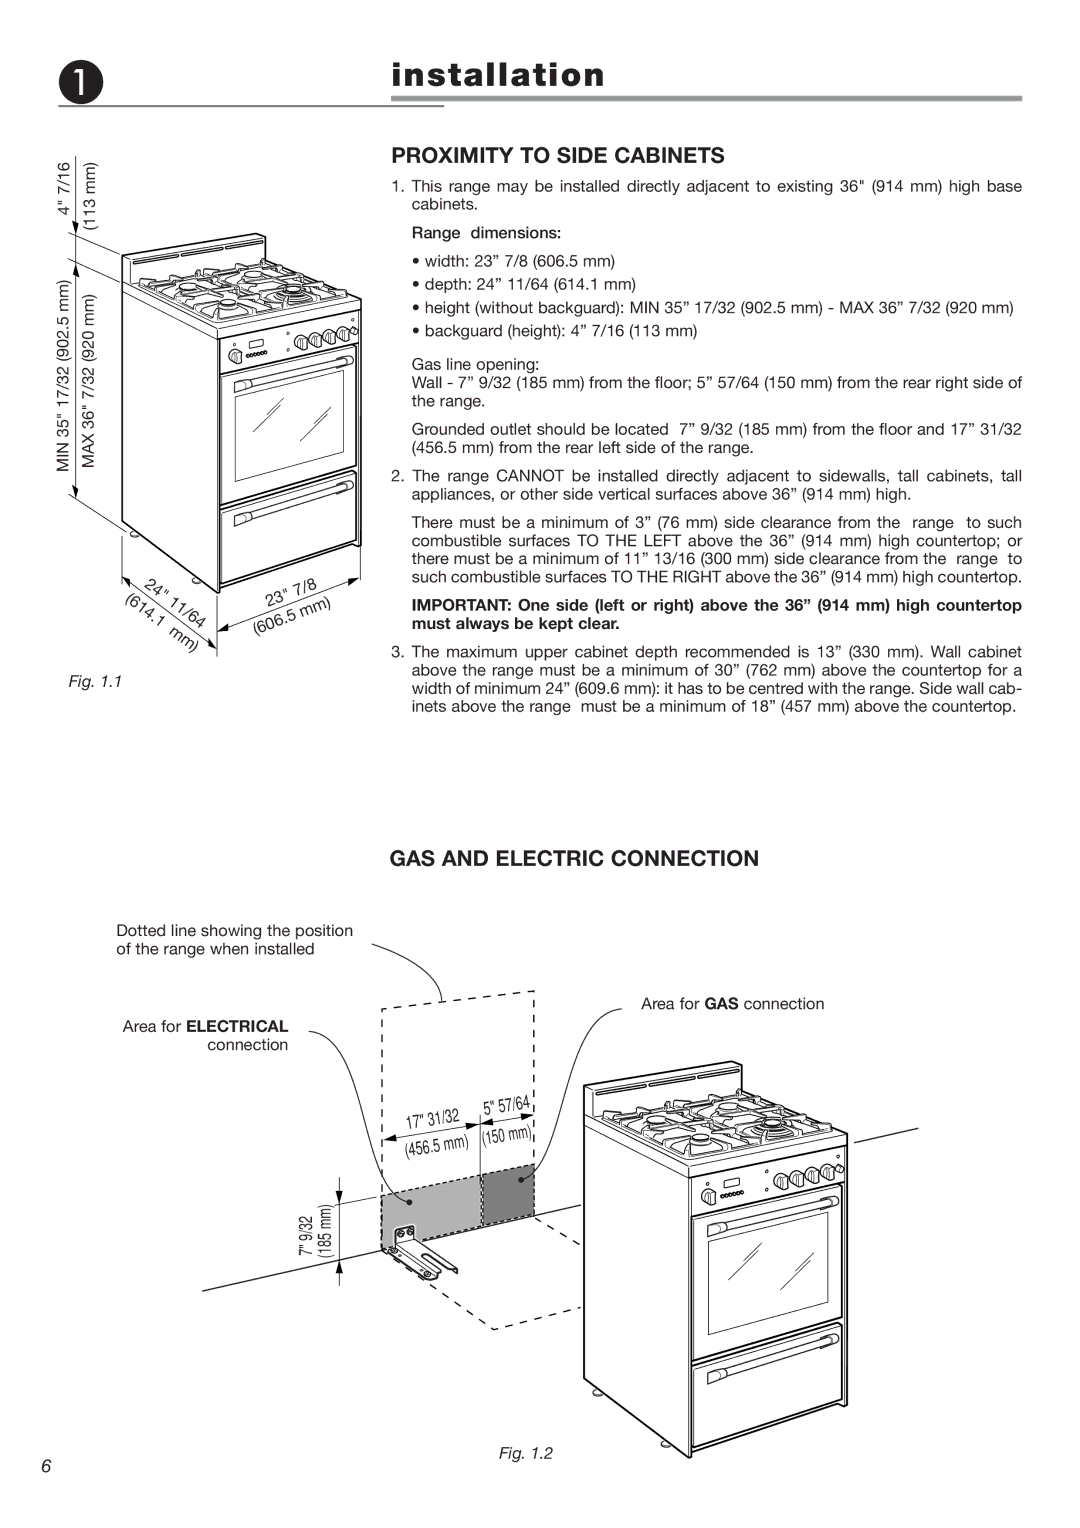
ANTI-TIP STABILITY DEVICE INSTALLATION INSTRUCTIONS

1.The anti-tip bracket has to be attached as shown on figure below (only rear left side), it has to be fixed on the floor and on the rear wall by no. 4 (four) suitable screws (not supplied).

2.After fixing the anti-tip bracket, slide range into place. Be sure the rear left foot slides under the anti-tip bracket attached.

Dotted line showing the position of the range when installed

= =

8"

25/32


)


m


(223

m


Fig. 1.9

8

Image 8
Contents GAS/ELECTRIC Range ALL Ranges can TIP Data Plate Conversion Label Installation Instructions Replacement Parts Electrical Grounding InstructionsElectrical Requirement Air Supply and VentilationProximity to Side Cabinets GAS and Electric ConnectionIt is mandatory to install the backguard Assembling the BackguardANTI-TIP Stability Device Installation Instructions Levelling the RangePressure Regulator Manual Shut-off Valve figExplosion Hazard Pressure Regulator Installation Step Pressure regulator GAS Connection SpecificationExtension Rigid Pipe Connections Leak TestingFlexible Connections To remove the warming drawer Setting the Pressure Regulator figConversion to LP/PROPANE GAS To set the pressure regulator fig Fitting the warming drawer figInjectors Table Operations to be Performed When Substituting the InjectorsSetting the Burner Minimum Electrical Connection with Conduit Electrical Connection with Power CordElectrical Requirements Wire Power Cord Installation using Strain Relief Supplied Wire Power Cord Installation Wire Conduit Installation Wiring Diagram Energy RegulatorPage Page Page Cod ß4