Configuring the Wireless Bridge Units
The 3Com Wireless Building-to-Building Bridge Manager software communicates with each wireless bridge using a non-routable protocol. Therefore, your wireless bridge units must be accessible on the local subnet to communicate with the Bridge Manager.
CAUTION: Do not try to batch-configure a set of wireless bridge units by powering up all of your units and connecting them to the same subnet at the same time. Connecting a set of bridge units to the same subnet while configuring them can produce a network loop. Avoid this situation by serially powering up, connecting, configuring, powering down, and detaching each bridge from the subnet unit one at a time.
1Remove your 3Com Wireless Building-to-Building Bridge from the packaging.
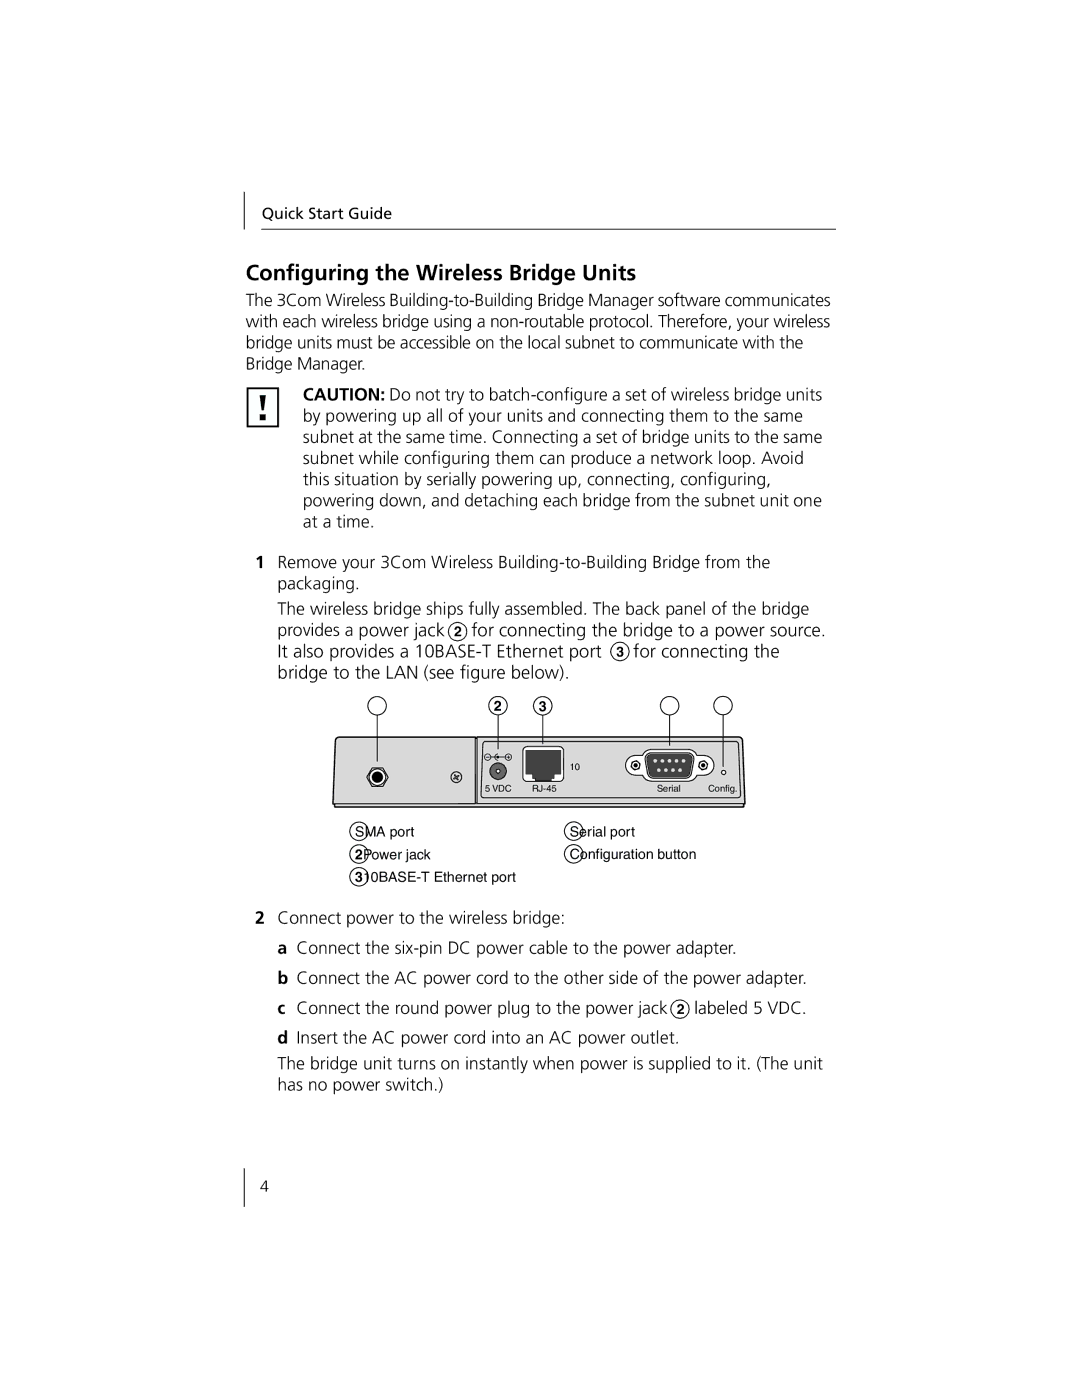
The wireless bridge ships fully assembled. The back panel of the bridge provides a power jack 2 for connecting the bridge to a power source. It also provides a 10BASE-T Ethernet port 3 for connecting the bridge to the LAN (see figure below).
2 3
| | 10 | |
5 VDC | RJ-45 | Serial | Config. |
SMA port | Serial port |
2Power jack | Configuration button |
310BASE-T Ethernet port | |
2Connect power to the wireless bridge:
a Connect the six-pin DC power cable to the power adapter.
b Connect the AC power cord to the other side of the power adapter. c Connect the round power plug to the power jack 2 labeled 5 VDC. d Insert the AC power cord into an AC power outlet.
The bridge unit turns on instantly when power is supplied to it. (The unit has no power switch.)