MODEL 2100 OVERHEAD PROJECTOR
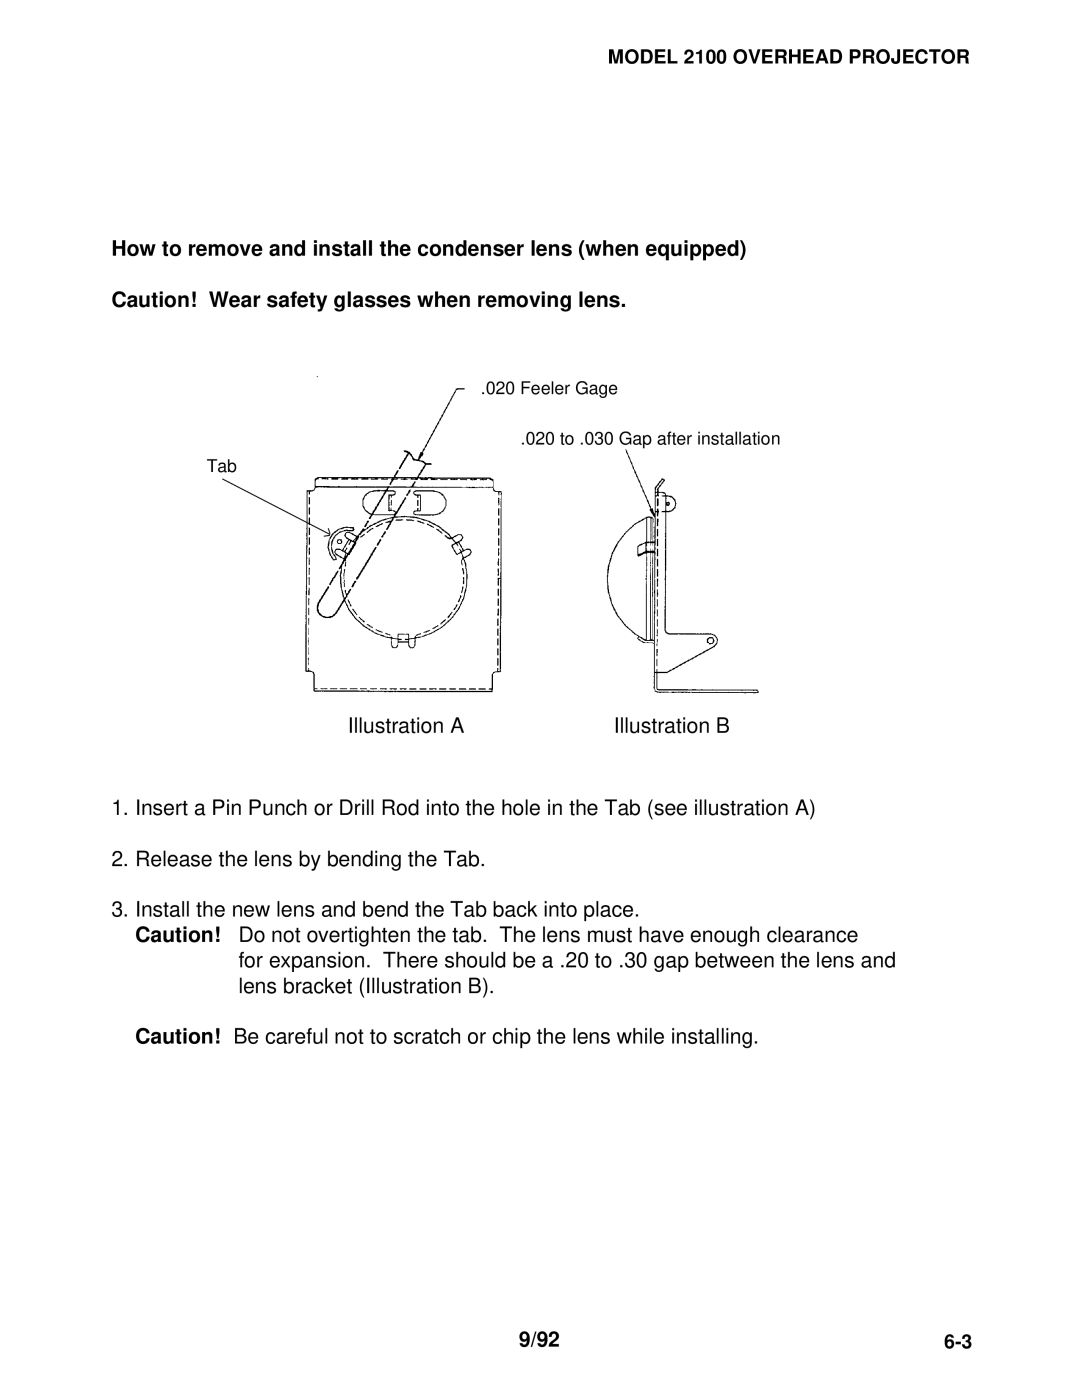
How to remove and install the condenser lens (when equipped)
Caution! Wear safety glasses when removing lens.
.020 Feeler Gage
.020 to .030 Gap after installation
Tab
Illustration A | Illustration B |
1.Insert a Pin Punch or Drill Rod into the hole in the Tab (see illustration A)
2.Release the lens by bending the Tab.
3.Install the new lens and bend the Tab back into place.
Caution! Do not overtighten the tab. The lens must have enough clearance for expansion. There should be a .20 to .30 gap between the lens and lens bracket (Illustration B).
Caution! Be careful not to scratch or chip the lens while installing.
9/92 |
