8
Operating
Operating QUESTempº 48N
View
Operating QUESTempº 48N
From a powered on mode, the main menu will appear (after the
Figure 1-9: Main menu example
View
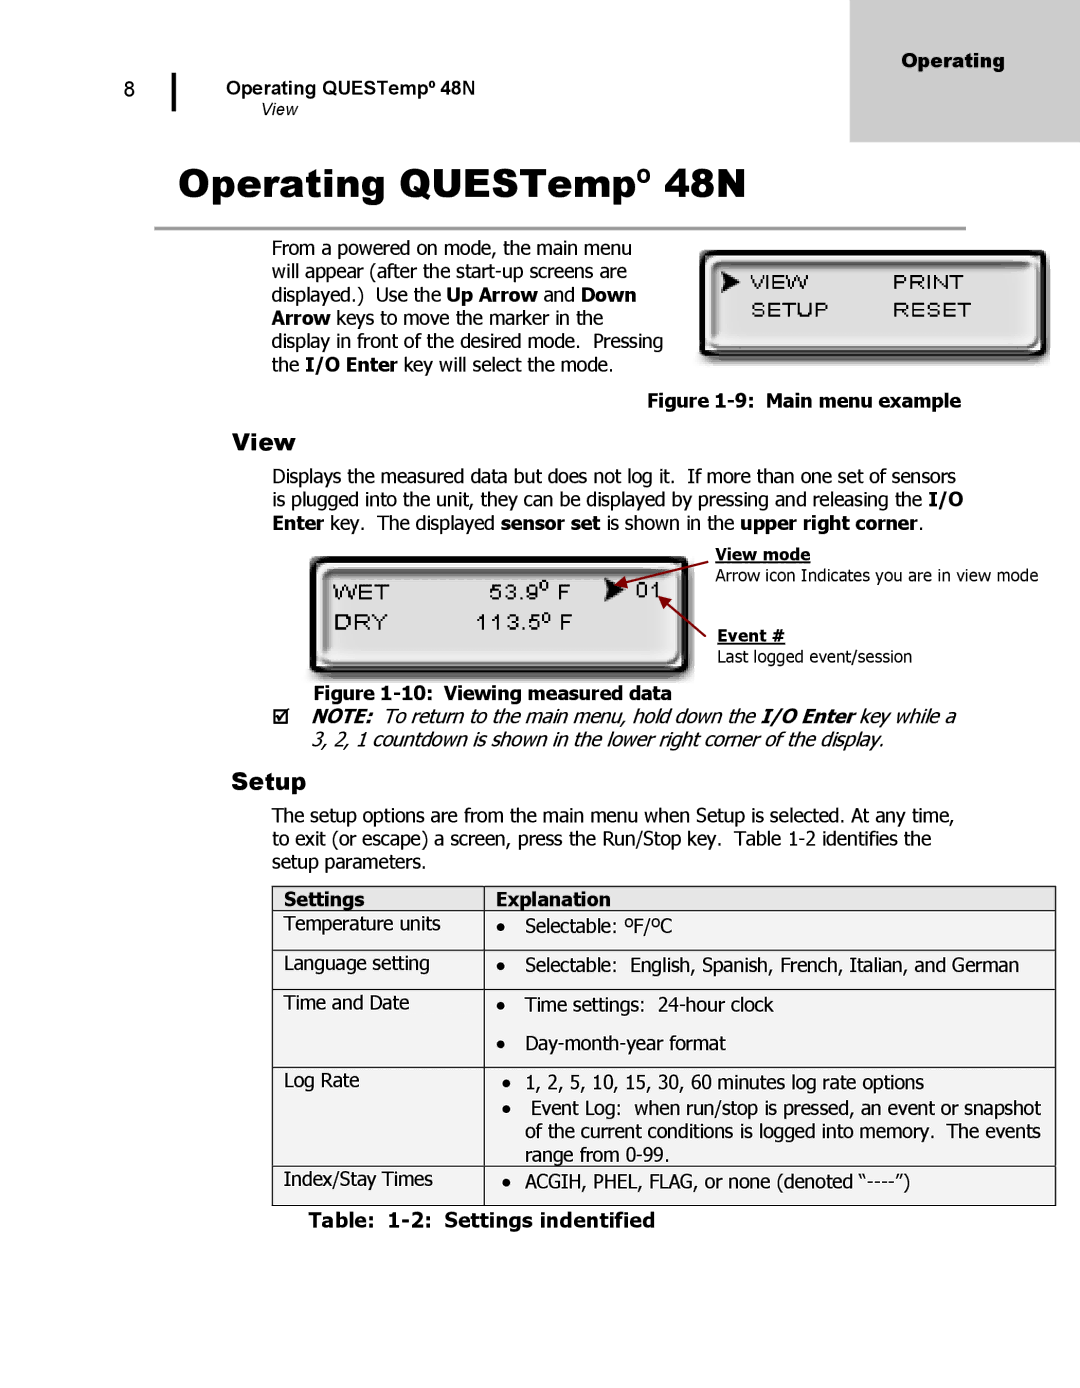
Displays the measured data but does not log it. If more than one set of sensors is plugged into the unit, they can be displayed by pressing and releasing the I/O Enter key. The displayed sensor set is shown in the upper right corner.
View mode
Arrow icon Indicates you are in view mode
Event #
Last logged event/session
Figure 1-10: Viewing measured data
NOTE: To return to the main menu, hold down the I/O Enter key while a 3, 2, 1 countdown is shown in the lower right corner of the display.
Setup
The setup options are from the main menu when Setup is selected. At any time, to exit (or escape) a screen, press the Run/Stop key. Table
Settings |
| Explanation |
| |
Temperature units |
| ∙ | Selectable: ºF/ºC |
|
|
|
|
|
|
Language setting |
| ∙ | Selectable: English, Spanish, French, Italian, and German |
|
|
|
|
|
|
Time and Date |
| ∙ | Time settings: |
|
|
| ∙ |
| |
|
|
| ||
|
|
|
|
|
Log Rate |
| ∙ | 1, 2, 5, 10, 15, 30, 60 minutes log rate options |
|
|
| ∙ Event Log: when run/stop is pressed, an event or snapshot |
| |
|
|
| ||
|
|
| of the current conditions is logged into memory. The events |
|
|
|
| range from |
|
Index/Stay Times |
| ∙ | ACGIH, PHEL, FLAG, or none (denoted |
|
|
|
|
|
|
