3M 7624-T-110, 7626-T-110, 7622-T-110, 7623-T-110, 7625-T-110 manual 9 229 mm

Models: 7625-T-110 7623-T-110 7624-T-110 7622-T-110 7626-T-110

1 20
Download 20 pages 50.98 Kb
Page 12
Image 12
Manual background

12.4Remove constant force spring. Bend shield wires back upon cable jacket 1-1/2" (38 mm). Cut excess shield wire and discard (Figure 17).

Depth Of Terminal Lug + Growth Allowance

9" (229 mm)

1-1/2" (38 mm)

Semi-Conductive Jacket

Fold Back Shield Wires

Figure 17

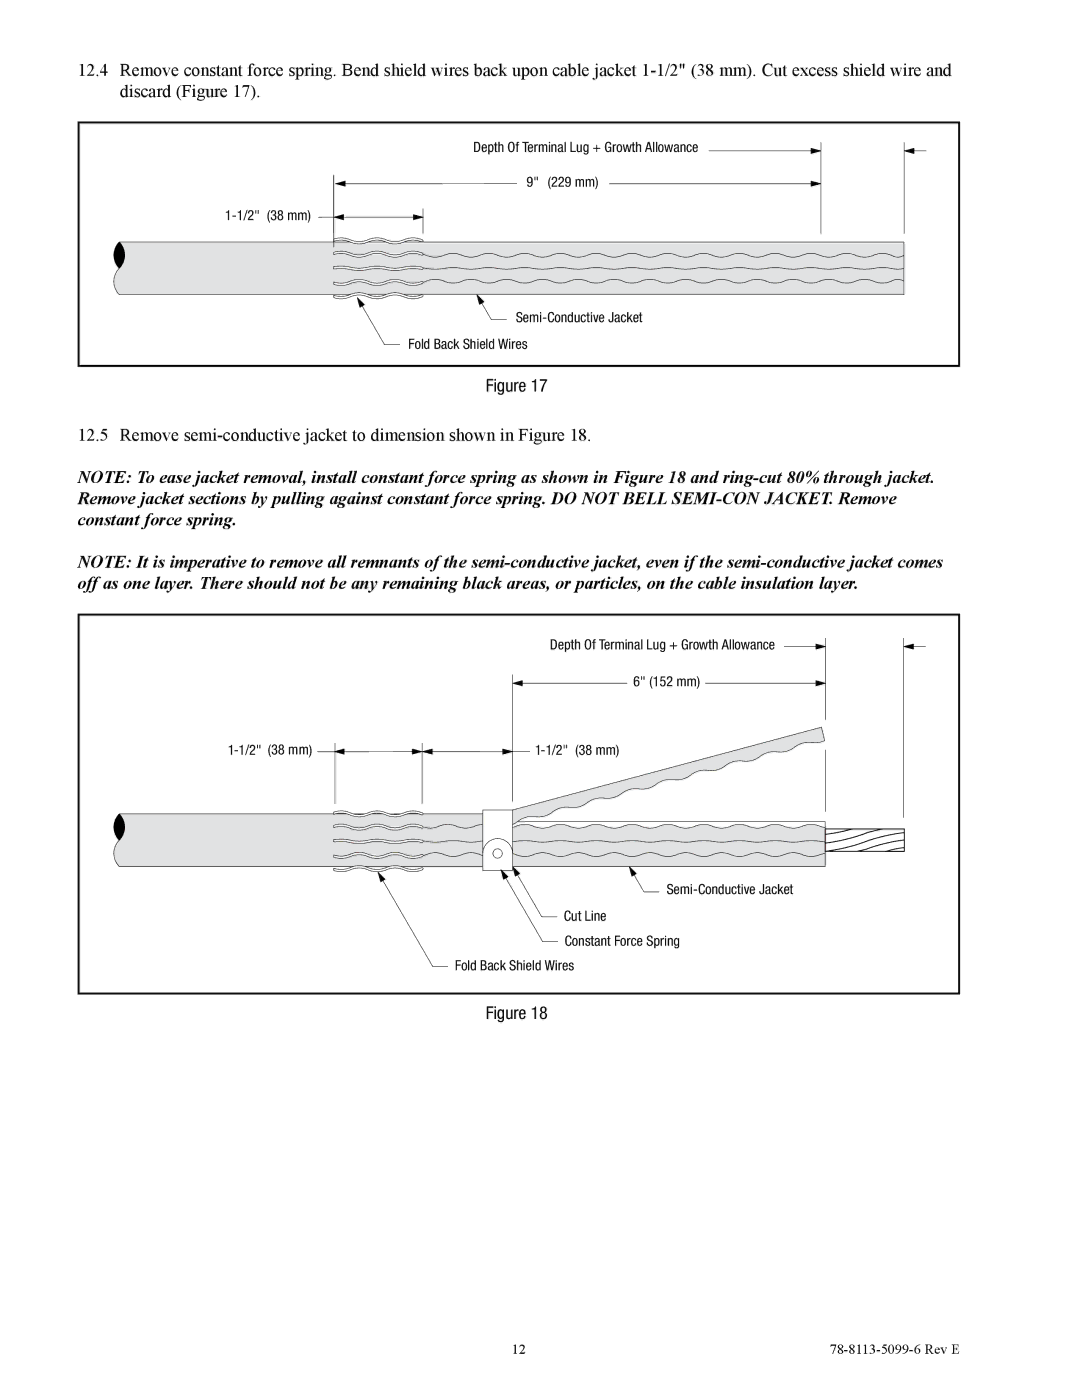
12.5 Remove semi-conductive jacket to dimension shown in Figure 18.

NOTE: To ease jacket removal, install constant force spring as shown in Figure 18 and ring-cut 80% through jacket. Remove jacket sections by pulling against constant force spring. DO NOT BELL SEMI-CON JACKET. Remove constant force spring.

NOTE: It is imperative to remove all remnants of the semi-conductive jacket, even if the semi-conductive jacket comes off as one layer. There should not be any remaining black areas, or particles, on the cable insulation layer.


Depth Of Terminal Lug + Growth Allowance


6" (152 mm)

1-1/2"

(38 mm)

1-1/2" (38 mm)


Semi-Conductive Jacket


Cut Line


Constant Force Spring


Fold Back Shield Wires

Figure 18

12

78-8113-5099-6 Rev E

Page 12
Image 12
3M 7624-T-110, 7626-T-110, 7622-T-110, 7623-T-110, 7625-T-110 manual 9 229 mm