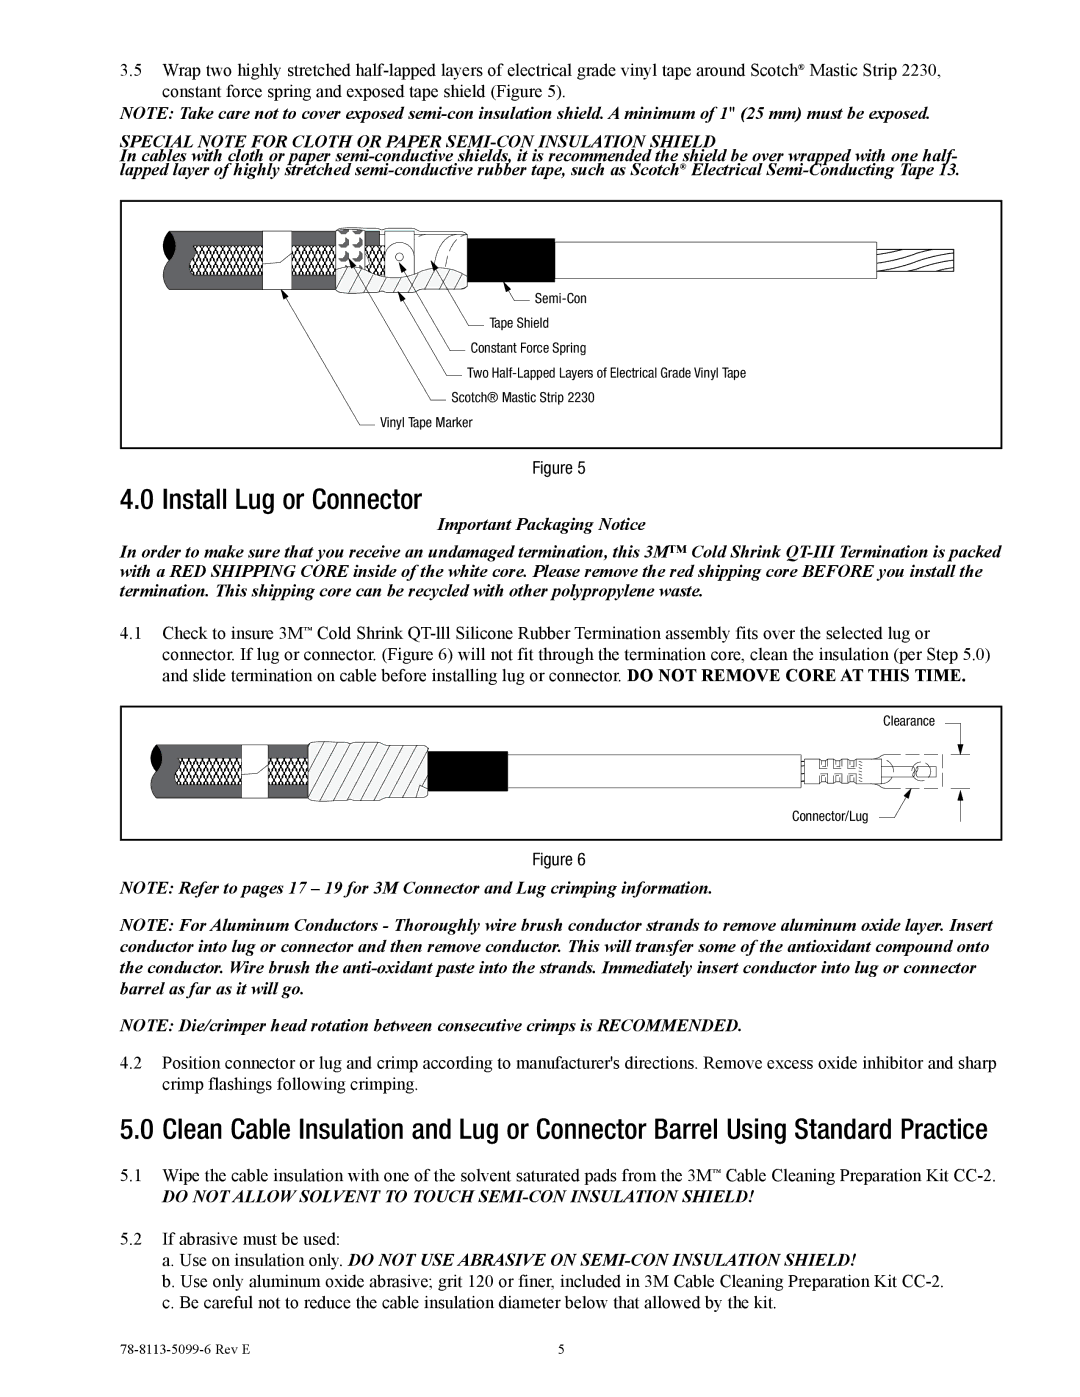
3.5Wrap two highly stretched
NOTE: Take care not to cover exposed
SPECIAL NOTE FOR CLOTH OR PAPER SEMI-CON INSULATION SHIELD
In cables with cloth or paper
Tape Shield |
Constant Force Spring |
Two |
Scotch® Mastic Strip 2230 |
Vinyl Tape Marker |
Figure 5
4.0 Install Lug or Connector
Important Packaging Notice
In order to make sure that you receive an undamaged termination, this 3M™ Cold Shrink
4.1Check to insure 3M™ Cold Shrink
Clearance |
Connector/Lug |
Figure 6
NOTE: Refer to pages 17 – 19 for 3M Connector and Lug crimping information.
NOTE: For Aluminum Conductors - Thoroughly wire brush conductor strands to remove aluminum oxide layer. Insert conductor into lug or connector and then remove conductor. This will transfer some of the antioxidant compound onto the conductor. Wire brush the
NOTE: Die/crimper head rotation between consecutive crimps is RECOMMENDED.
4.2Position connector or lug and crimp according to manufacturer's directions. Remove excess oxide inhibitor and sharp crimp flashings following crimping.
5.0Clean Cable Insulation and Lug or Connector Barrel Using Standard Practice
5.1Wipe the cable insulation with one of the solvent saturated pads from the 3M™ Cable Cleaning Preparation Kit
DO NOT ALLOW SOLVENT TO TOUCH SEMI-CON INSULATION SHIELD!
5.2If abrasive must be used:
a.Use on insulation only. DO NOT USE ABRASIVE ON
b.Use only aluminum oxide abrasive; grit 120 or finer, included in 3M Cable Cleaning Preparation Kit
c.Be careful not to reduce the cable insulation diameter below that allowed by the kit.
5 |