4.0Fiber Insertion and Connector Activation
4.1Grip the back of the fiber holder. Do not grip the front
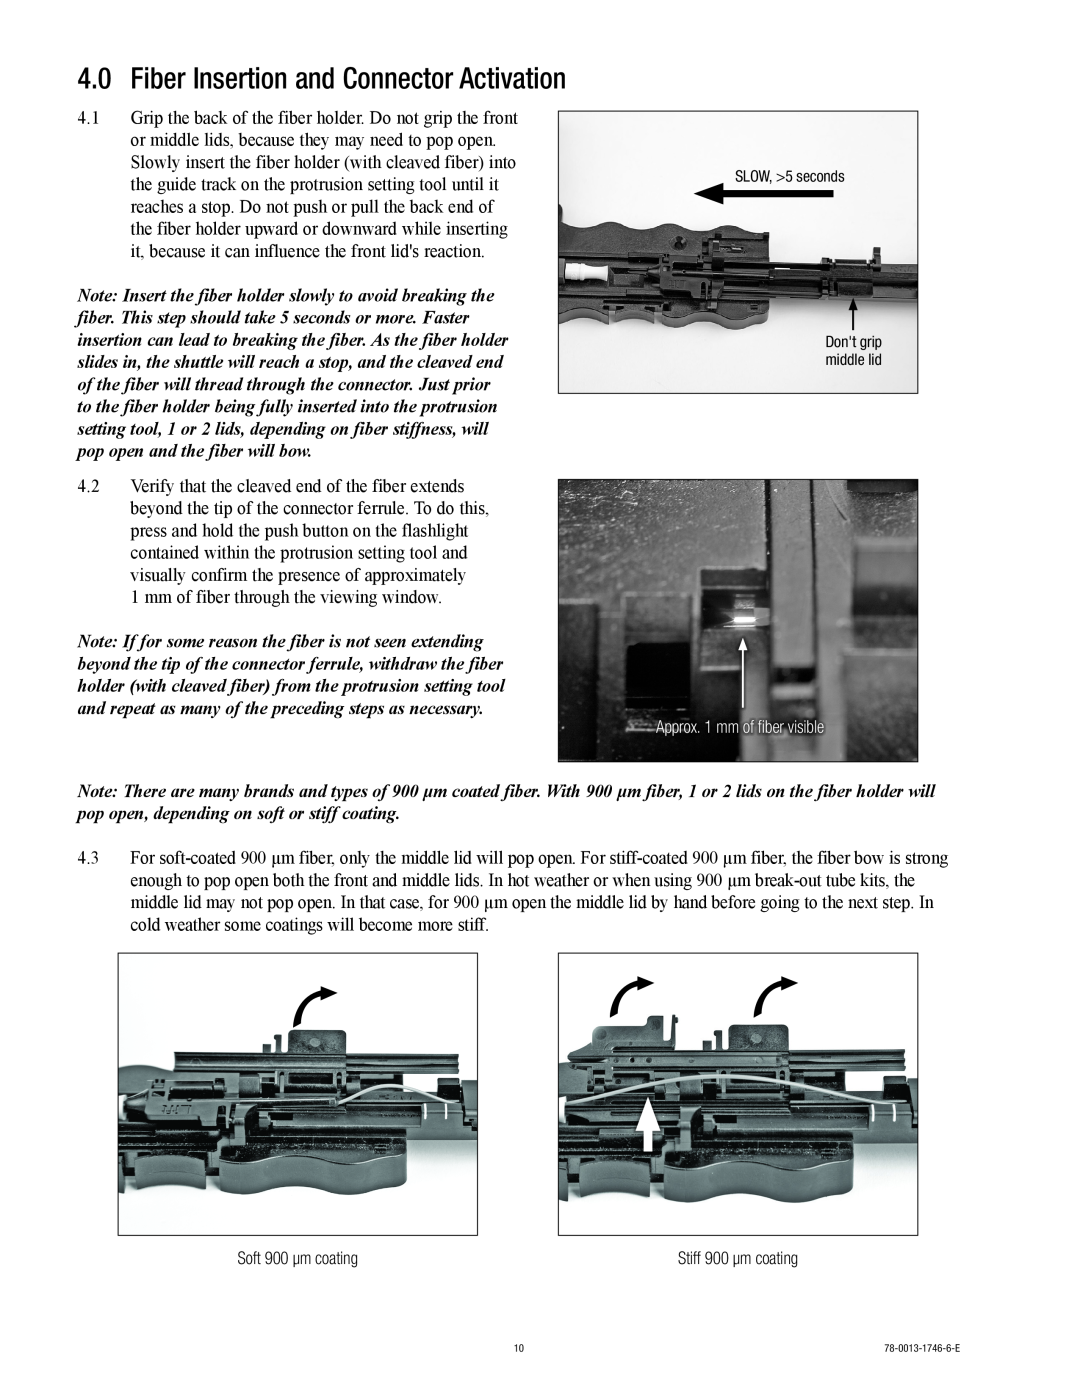
or middle lids, because they may need to pop open. Slowly insert the fiber holder (with cleaved fiber) into the guide track on the protrusion setting tool until it reaches a stop. Do not push or pull the back end of the fiber holder upward or downward while inserting it, because it can influence the front lid's reaction.
Note: Insert the fiber holder slowly to avoid breaking the fiber. This step should take 5 seconds or more. Faster insertion can lead to breaking the fiber. As the fiber holder slides in, the shuttle will reach a stop, and the cleaved end of the fiber will thread through the connector. Just prior to the fiber holder being fully inserted into the protrusion setting tool, 1 or 2 lids, depending on fiber stiffness, will pop open and the fiber will bow.
4.2Verify that the cleaved end of the fiber extends beyond the tip of the connector ferrule. To do this, press and hold the push button on the flashlight contained within the protrusion setting tool and visually confirm the presence of approximately 1 mm of fiber through the viewing window.
Note: If for some reason the fiber is not seen extending beyond the tip of the connector ferrule, withdraw the fiber holder (with cleaved fiber) from the protrusion setting tool and repeat as many of the preceding steps as necessary.
SLOW, >5 seconds
Don't grip middle lid
Approx. 1 mm of fiber visible
Note: There are many brands and types of 900 µm coated fiber. With 900 µm fiber, 1 or 2 lids on the fiber holder will pop open, depending on soft or stiff coating.
4.3For
Soft 900 µm coating | Stiff 900 µm coating |
10 |