Section 3: Quick Set Up
3-1. Projector Set Up
The Quick Set Up instructions are intended to get you going in a hurry. If you have any difficulty, refer to Appendix
!Caution
To prevent damage to equipment, all power to MP8610 and input sources must be turned OFF during cable hook up.
1.Place the projector on a rigid,
2.Connect the power cord. (Section
3.Connect the audio and video input cables to the
4.For mouse emulation, connect the mouse cable. (Section
5.Power up the projector then the computer and the video sources. (Section
6.Move the projector nearer or further away from the screen to obtain the best image size (Section
3-2. Cable Connections
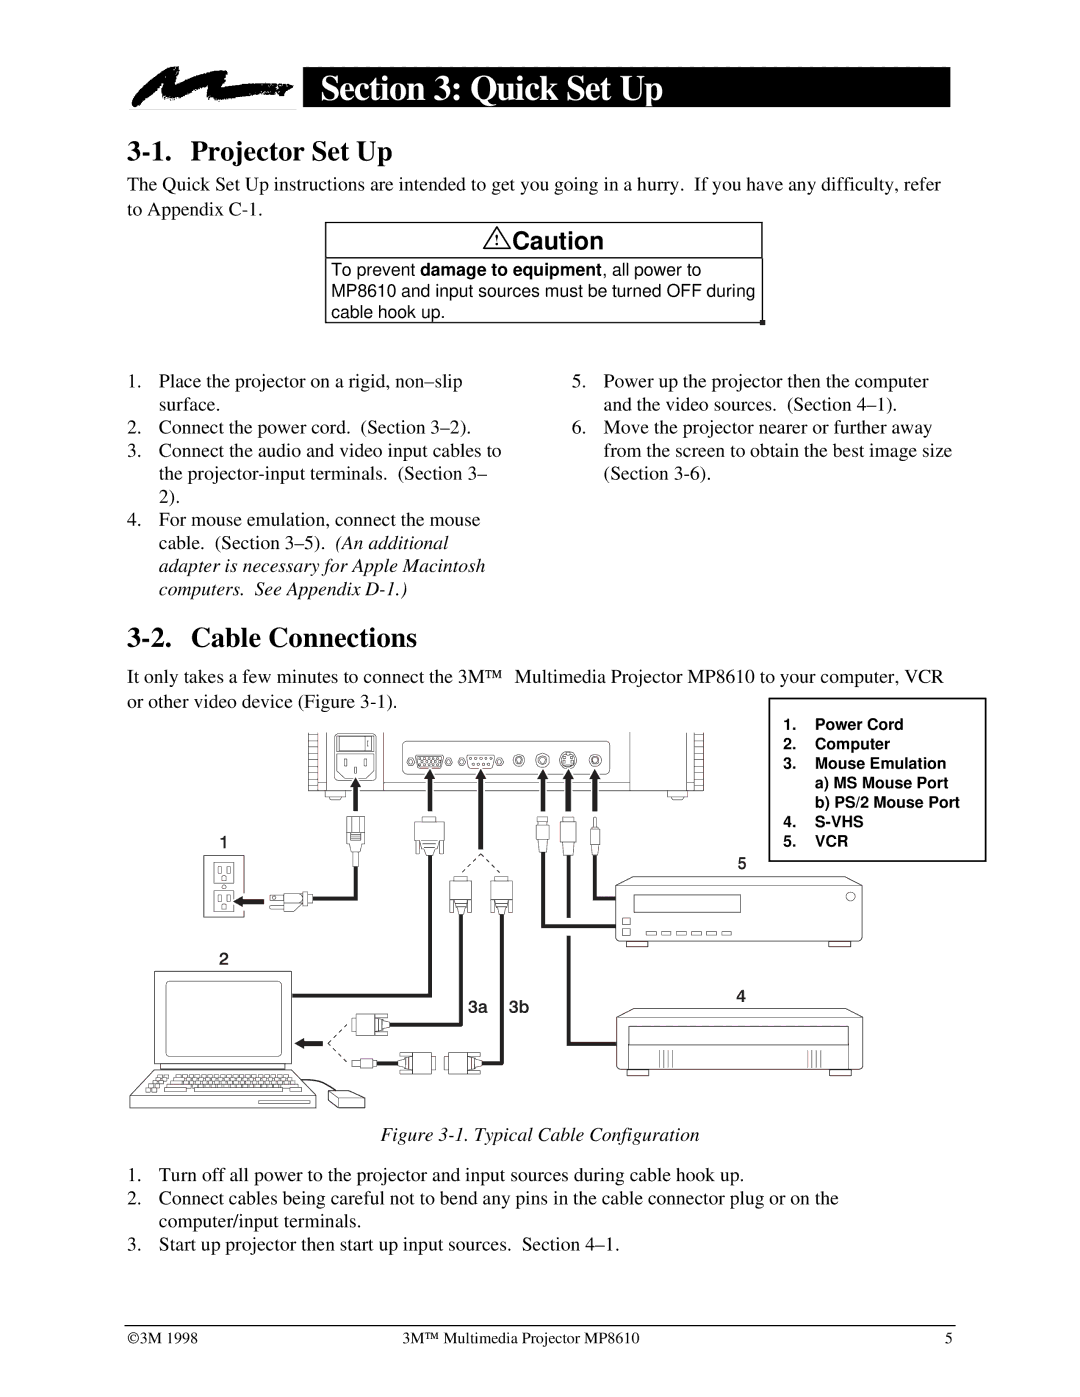
It only takes a few minutes to connect the 3M™ Multimedia Projector MP8610 to your computer, VCR or other video device (Figure
1. Power Cord
2. Computer
3. Mouse Emulation a) MS Mouse Port b) PS/2 Mouse Port
4.
5. VCR
Figure 3-1. Typical Cable Configuration
1.Turn off all power to the projector and input sources during cable hook up.
2.Connect cables being careful not to bend any pins in the cable connector plug or on the computer/input terminals.
3.Start up projector then start up input sources. Section
©3M 1998 | 3M™ Multimedia Projector MP8610 | 5 |