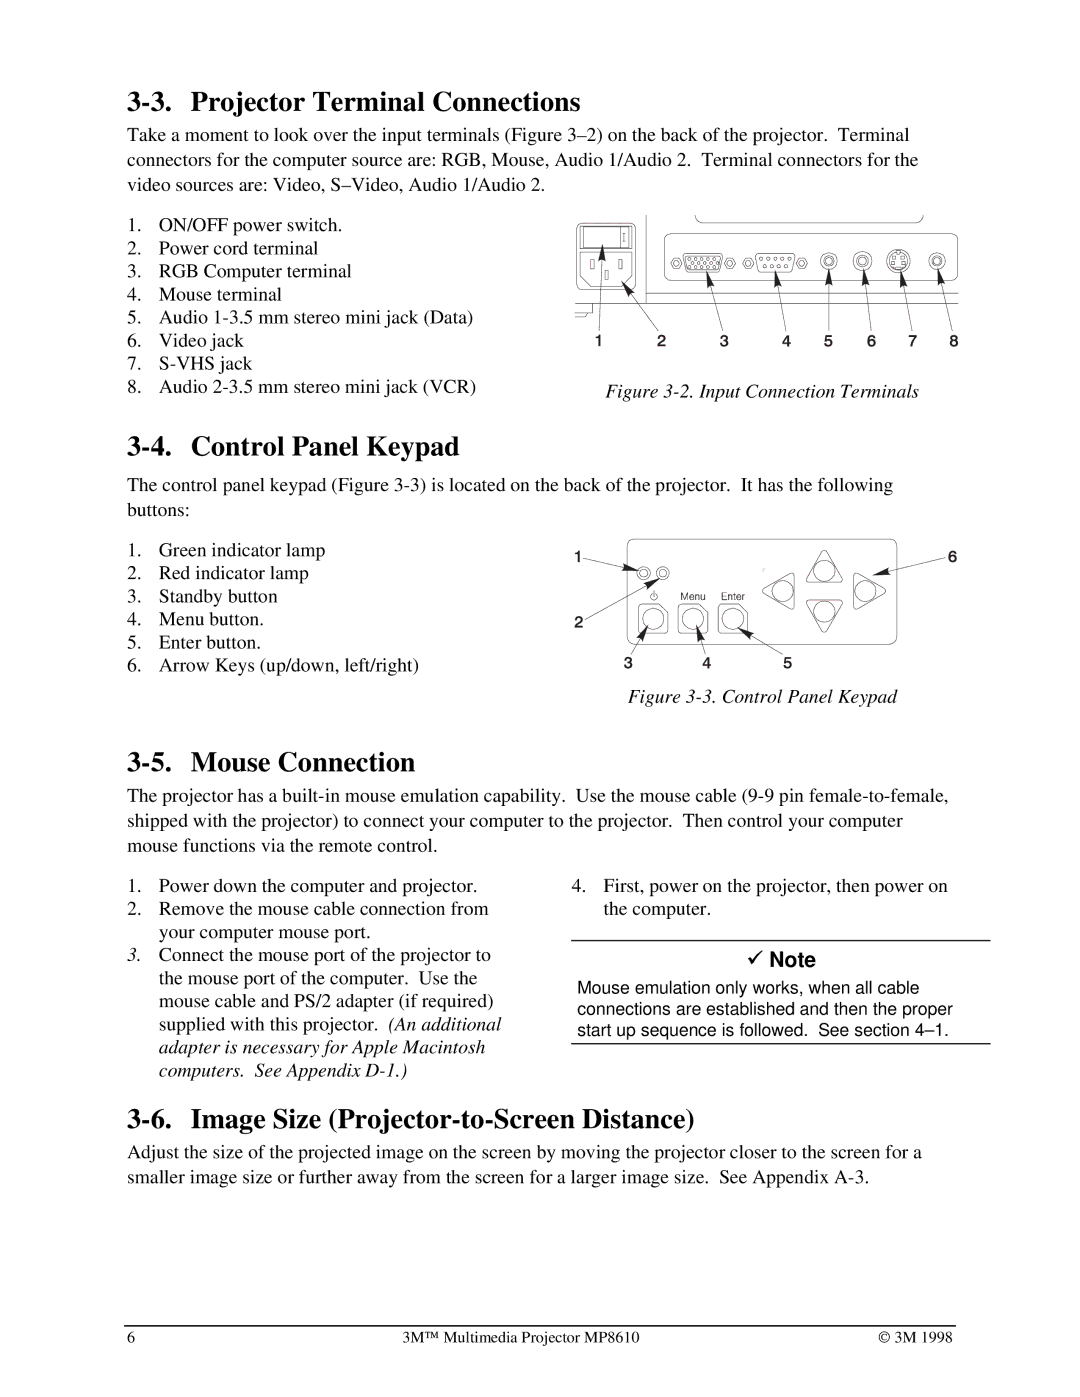
3-3. Projector Terminal Connections
Take a moment to look over the input terminals (Figure
1. ON/OFF power switch.
2. Power cord terminal
3. RGB Computer terminal
4. Mouse terminal
5.Audio
6.Video jack
7. |
| |
8. | Audio | Figure |
3-4. Control Panel Keypad
The control panel keypad (Figure
1. Green indicator lamp
2. Red indicator lamp
3. Standby button
4. Menu button.
5. Enter button.
6. Arrow Keys (up/down, left/right)
Figure 3-3. Control Panel Keypad
3-5. Mouse Connection
The projector has a
1.Power down the computer and projector.
2.Remove the mouse cable connection from your computer mouse port.
3.Connect the mouse port of the projector to the mouse port of the computer. Use the mouse cable and PS/2 adapter (if required) supplied with this projector. (An additional adapter is necessary for Apple Macintosh computers. See Appendix
4.First, power on the projector, then power on the computer.
9Note
Mouse emulation only works, when all cable connections are established and then the proper start up sequence is followed. See section
3-6. Image Size (Projector-to-Screen Distance)
Adjust the size of the projected image on the screen by moving the projector closer to the screen for a smaller image size or further away from the screen for a larger image size. See Appendix
6 | 3M™ Multimedia Projector MP8610 | © 3M 1998 |