Table of Contents
Introduction | 3 |
Positioning the projector | 5 |
Projector and device connector guide | 6 |
Connecting a computer source | 9 |
Required computer connections | 9 |
Optional computer connections | 9 |
Displaying an image | 10 |
Adjusting the image | 11 |
Connecting a video device | 12 |
Composite video connection | 13 |
13 | |
VESA connection | 13 |
Component video connection | 13 |
Shutting down the projector | 14 |
Troubleshooting your setup | 14 |
Using the remote control | 22 |
Using the audio | 23 |
Using the keypad buttons | 24 |
Optimizing computer images | 25 |
Presentation features | 25 |
Optimizing video images | 26 |
Customizing the projector | 26 |
Using the menus | 27 |
Basic Picture menu | 28 |
Advanced Picture menu | 29 |
Setup menu | 30 |
Status and Service menu | 32 |
Maintenance | 33 |
Cleaning the lens | 33 |
Using the security lock | 33 |
Replacing the projection lamp | 34 |
Important Operating Considerations for Safety
•Place the projector in a horizontal position no greater than 15 degrees off axis.
•Locate the projector in a
•Locate the projector at least 4' (1.2 m) away from any heating or cooling vents.
•Use only
•Only genuine InFocus lamps are tested for use in this projector. InFocus is not liable for the performance, safety or certification of any other lamps. The use of other lamps violates the projector warranty and voids all certification marks on this projector.
•Use only the power cord provided. A
•Refer to this guide for proper startup and shutdown procedures.
•Hg – Lamp contains mercury. Manage in accordance with local disposal laws. See www.lamprecycle.org.
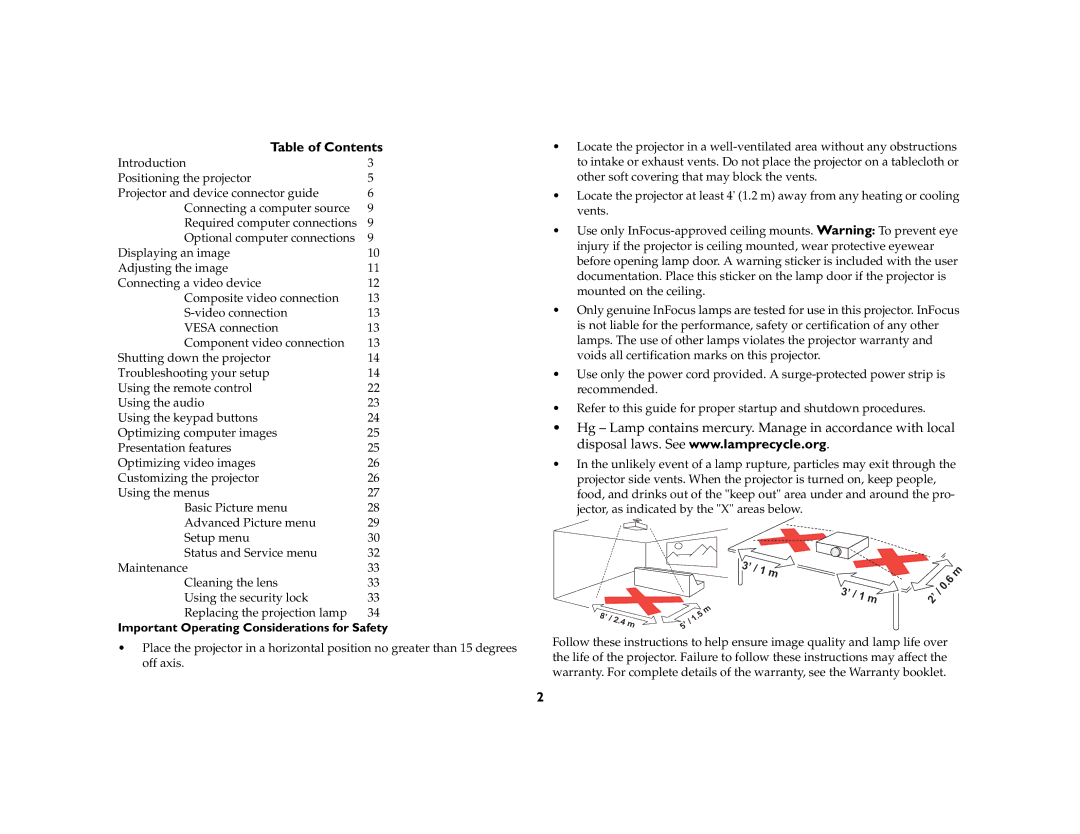
•In the unlikely event of a lamp rupture, particles may exit through the projector side vents. When the projector is turned on, keep people, food, and drinks out of the "keep out" area under and around the pro- jector, as indicated by the "X" areas below.
|
|
|
|
| 3’ |
|
|
|
|
|
|
|
|
|
|
| / 1 | m |
|
|
|
| m |
|
|
|
|
|
|
|
|
| .6 | ||
|
|
|
|
|
|
|
|
|
|
| |
|
|
|
|
|
| 3’ | / |
| / | 0 |
|
|
|
|
|
|
|
| 1 | m | ’ |
|
|
|
|
|
|
|
|
|
| 2 |
|
| |
|
|
|
|
| m |
|
|
|
|
|
|
8’ |
|
|
| 5 |
|
|
|
|
|
| |
| / | 2.4 |
| 1 |
|
|
|
|
|
|
|
|
| m | / |
|
|
|
|
|
|
| |
|
|
| ’ |
|
|
|
|
|
|
| |
|
|
|
| 5 |
|
|
|
|
|
|
|
Follow these instructions to help ensure image quality and lamp life over the life of the projector. Failure to follow these instructions may affect the warranty. For complete details of the warranty, see the Warranty booklet.
2