•Be extremely careful when removing the lamp module. In the unlikely event that the lamp ruptures, small glass fragments may be generated.
The lamp module is designed to contain most of these fragments, but
use caution when removing it. Before replacing a ruptured lamp, cleanloosen three screws the lamp compartment and dispose of cleaning materials. Wash hands
after lamp replacement. If replacing the lamp while the projector is ceil-
Hg – Lamp contains mercury. Manage in accordance with local disposal laws. See www.lamprecycle.org.
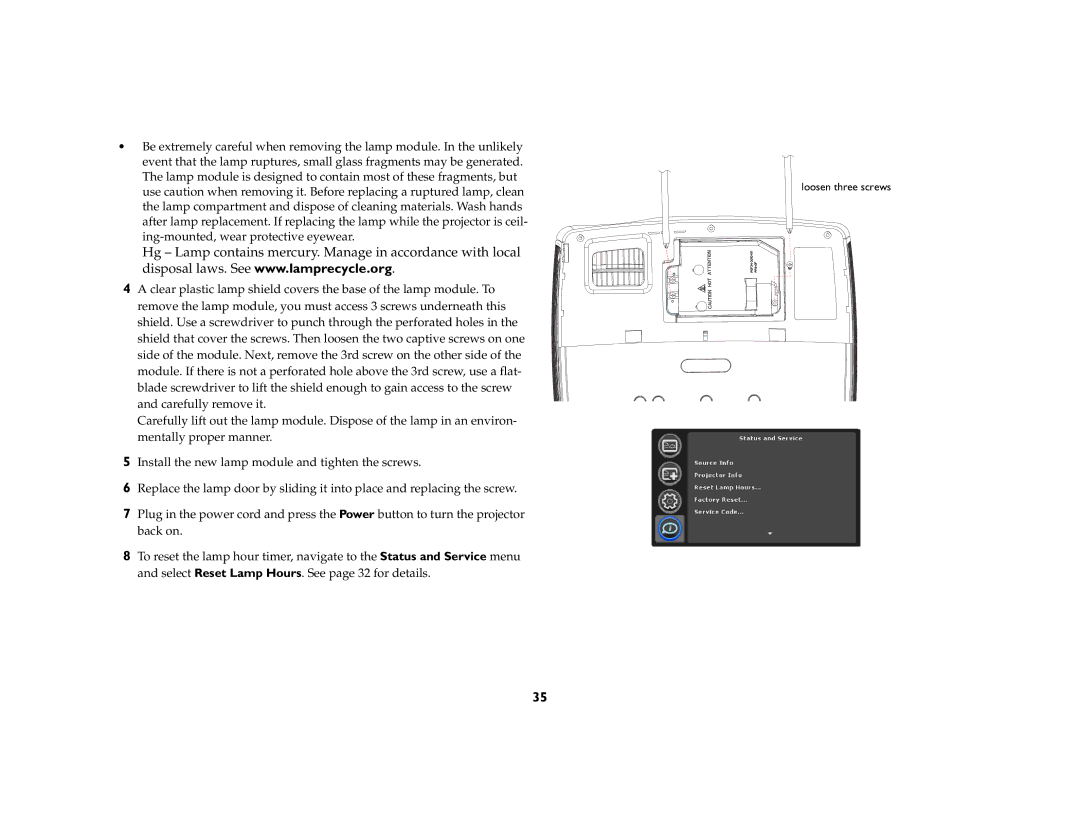
4A clear plastic lamp shield covers the base of the lamp module. To remove the lamp module, you must access 3 screws underneath this shield. Use a screwdriver to punch through the perforated holes in the shield that cover the screws. Then loosen the two captive screws on one side of the module. Next, remove the 3rd screw on the other side of the module. If there is not a perforated hole above the 3rd screw, use a flat- blade screwdriver to lift the shield enough to gain access to the screw and carefully remove it.
Carefully lift out the lamp module. Dispose of the lamp in an environ- mentally proper manner.
5Install the new lamp module and tighten the screws.
6Replace the lamp door by sliding it into place and replacing the screw.
7Plug in the power cord and press the Power button to turn the projector back on.
8To reset the lamp hour timer, navigate to the Status and Service menu and select Reset Lamp Hours. See page 32 for details.
35