Abit IP-95 manual Installing Hardware, CPU Socket

Models: IP-95

1 40
Download 40 pages 57.45 Kb
Page 14
Image 14

1.7 Installing Hardware

DO NOT scratch the motherboard when installing hardware. An accidentally scratch of a tiny surface-mount component may seriously damage the motherboard.

In order to protect the contact pins, please pay attention to these notices:

1.A maximum 20 cycles of CPU installation is recommended.

2.Never touch the contact pins with fingers or any object.

3.Always put on the cap when the CPU is not in use.

1.7.1 CPU Socket 775

The installation procedures vary with different types of CPU fan-and-heatsink assembly. The one shown here is served for demo only. For detailed information on how to install the one you bought, refer to its installation guidelines.

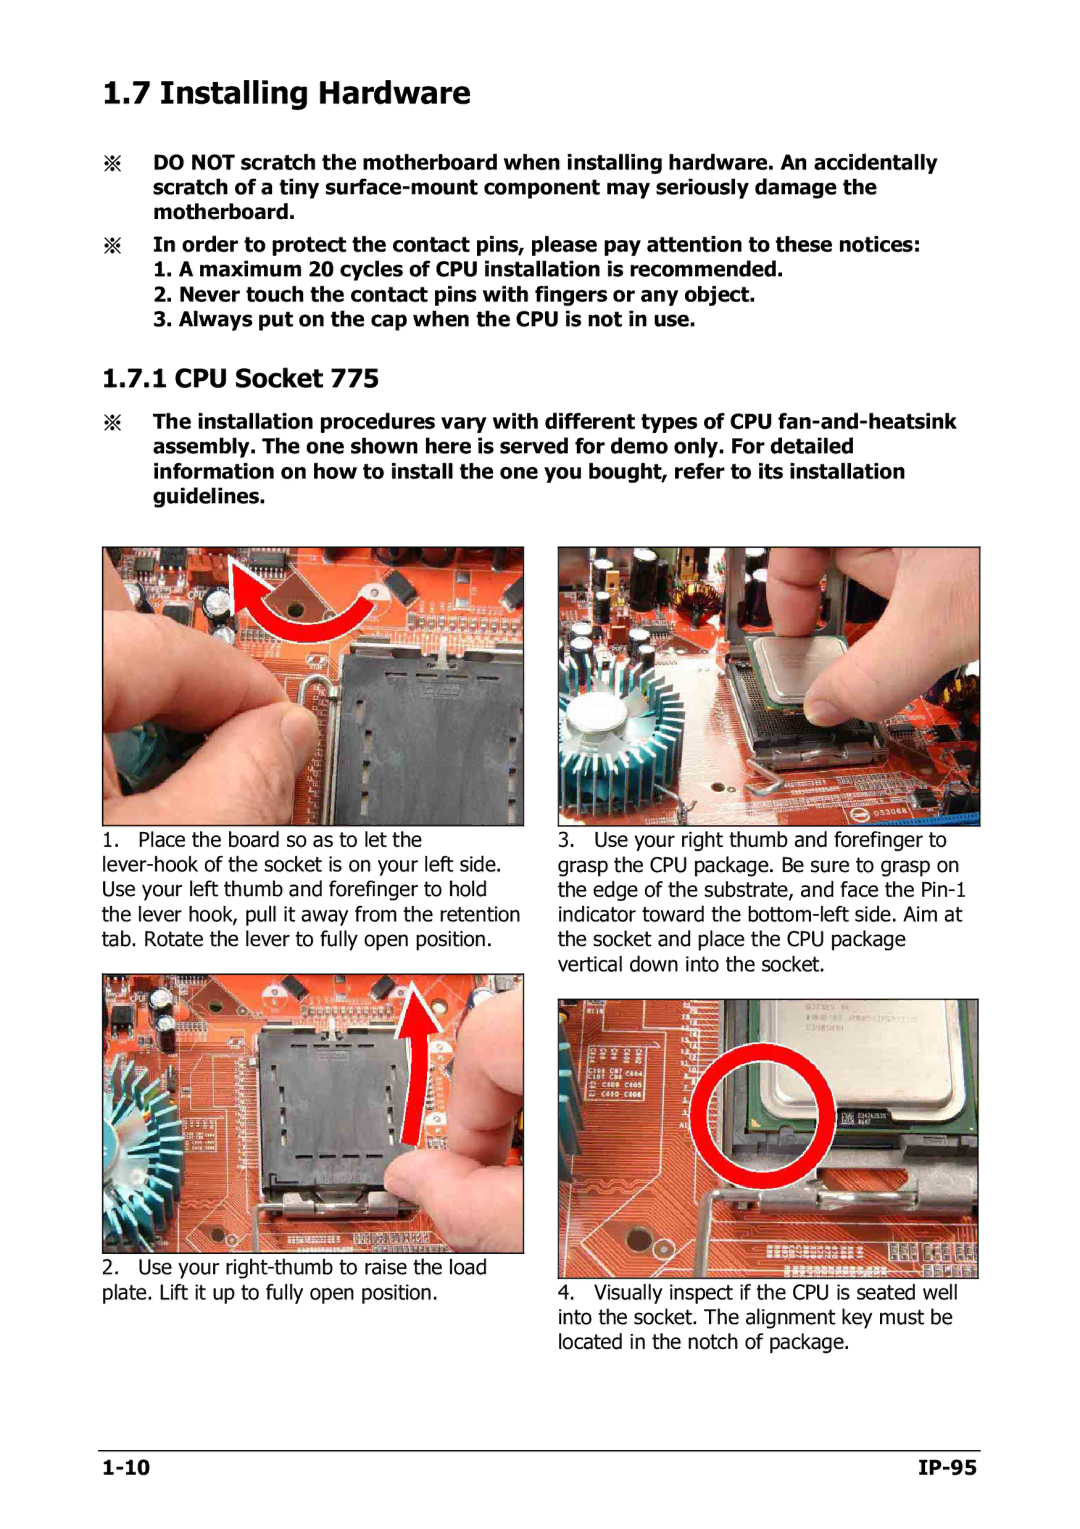
1. Place the board so as to let the lever-hook of the socket is on your left side. Use your left thumb and forefinger to hold the lever hook, pull it away from the retention tab. Rotate the lever to fully open position.

3.Use your right thumb and forefinger to grasp the CPU package. Be sure to grasp on the edge of the substrate, and face the Pin-1 indicator toward the bottom-left side. Aim at the socket and place the CPU package vertical down into the socket.

2.Use your right-thumb to raise the load plate. Lift it up to fully open position.

4.Visually inspect if the CPU is seated well into the socket. The alignment key must be located in the notch of package.

1-10

IP-95

Page 14
Image 14
Abit IP-95 manual Installing Hardware, CPU Socket