CAUTION
Ensure all grounds are securely connected to the cabinet ground buss and the ground lug connected to the most direct path to ground.
The following procedures describe wiring connections for both the stubbed and module connection models:
1.Unscrew the security screws on the front and rear doors using a 7/16 inch nut driver or equivalent tool. While loosening the security screws, alternate between the top and bottom screws to allow even pressure release.
2.Open the door and allow the door retainer to engage. The door retainer can be disengaged by pulling up slightly on the door retainer arm.
3.Manually disable both door alarm switches by centering the rod and pulling outward.
4.For
NOTE
For
I.CABLE STUB ENTRY
a.Verify contents of the Cable Stub Entry Kit per Table 4. The kit is located inside the mounting kit.
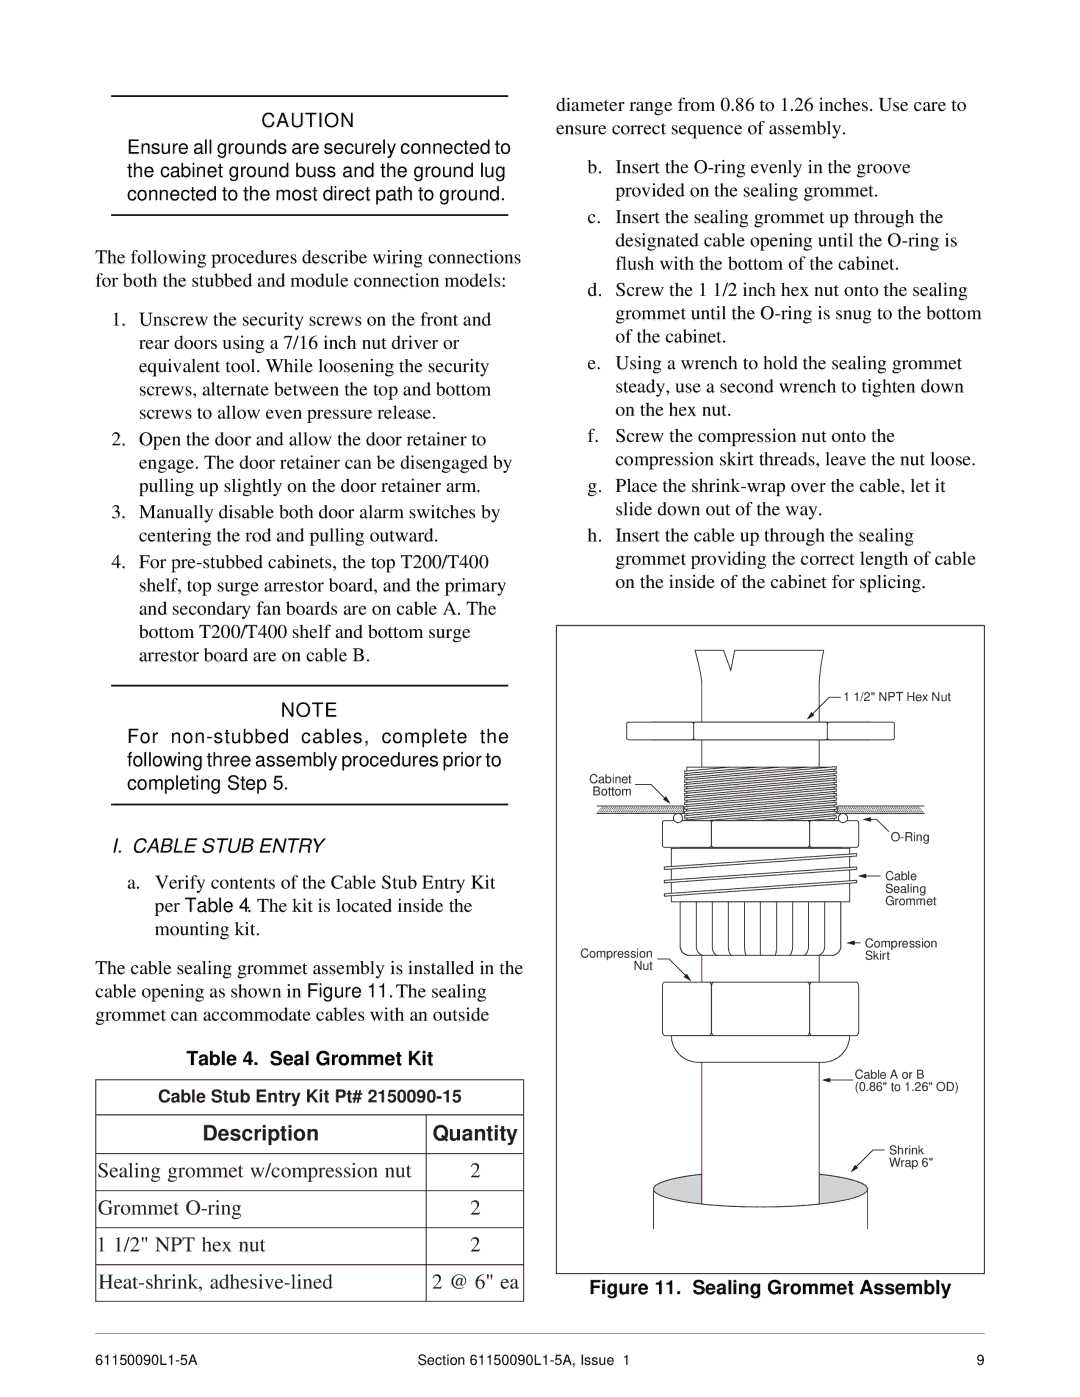
The cable sealing grommet assembly is installed in the cable opening as shown in Figure 11. The sealing grommet can accommodate cables with an outside
Table 4. Seal Grommet Kit
Cable Stub Entry Kit Pt#
Description | Quantity |
|
|
Sealing grommet w/compression nut | 2 |
|
|
Grommet | 2 |
|
|
1 1/2" NPT hex nut | 2 |
|
|
2 @ 6" ea | |
|
|
diameter range from 0.86 to 1.26 inches. Use care to ensure correct sequence of assembly.
b.Insert the
c.Insert the sealing grommet up through the designated cable opening until the
d.Screw the 1 1/2 inch hex nut onto the sealing grommet until the
e.Using a wrench to hold the sealing grommet steady, use a second wrench to tighten down on the hex nut.
f.Screw the compression nut onto the compression skirt threads, leave the nut loose.
g.Place the
h.Insert the cable up through the sealing grommet providing the correct length of cable on the inside of the cabinet for splicing.
| 1 1/2" NPT Hex Nut |
Cabinet |
|
Bottom |
|
| |
| Cable |
| Sealing |
| Grommet |
Compression | Compression |
Skirt | |
Nut |
|
| Cable A or B |
| (0.86" to 1.26" OD) |
| Shrink |
| Wrap 6" |
Figure 11. Sealing Grommet Assembly
Section | 9 |
