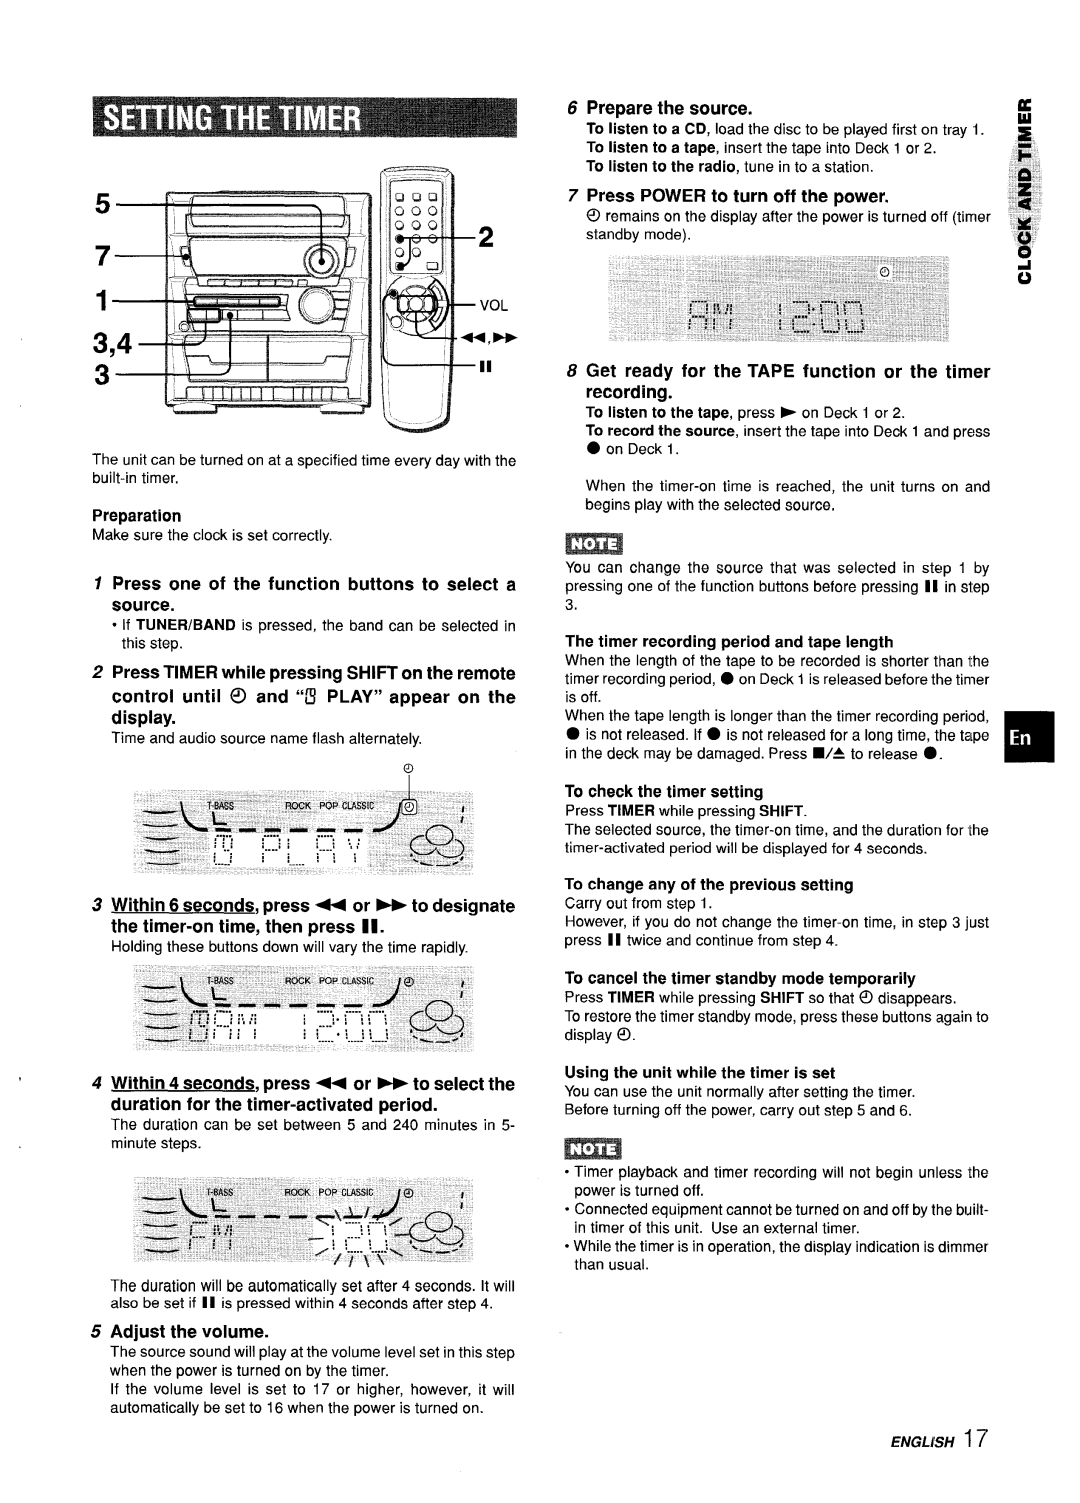
6 Prepare the source.

To listen to a CD, load the disc to be played first on tray 1. To listen to a tape, insert the tape into Deck 1 or 2.

To listen to the radio, tune in to a station.

7 Press POWER to turn off the power.

@remains on the display after the power is turned olf (timer standby mode).

a

w

~

;,;;r

,,

:5’

~

g “

The unit can be turned on at a specified time every day with the built-in timer.

Preparation

Make sure the clock is set correctly.

1 Press one of the function buttons to select a source.

If TUNER/BAND is pressed, the band can be selected in this step.

2Press TIMER while pressing SHIFT on the remote control until @ and “D PLAY” appear on the display.

Time and audio source name flash alternately.

3 Within 6 seconds, press - or -to designate the timer-on time, then press Il.

Holding these buttons down will vary the time rapidly.

4 Within 4 seconds, press< or -to select the duration for the timer-activated period.

The duration can be set between 5 and 240 minutes in 5- minute steps.

The duration will be automatically set after 4 seconds. It will also be set if II is pressed within 4 seconds after step 4.

5 Adjust the volume.

The source sound will play at the volume level set in this step when the power is turned on by the timer.

If the volume level is set to 17 or higher, however, it will automatically be set to 16 when the power is turned on.

8 Get ready for the TAPE function or the timer recording.

To listen to the tape, press P on Deck 1 or 2.

To record the source, insert the tape into Deck 1 and press

on Deck 1.

When the timer-on time is reached, the unit turns on and begins play with the selected source,

You can change the source that was selected in step 1 by pressing one of the function buttons before pressing 11 in slep 3.

The timer recording period and tape length

When the length of the tape to be recorded is shorter than the timer recording period, on Deck 1 is released before the timer is off.

is not released. If is not released for a long time, the tape in the deck may be damaged. Press W4 to release .When the tape length is longer than the timer recording period,

To check the timer setting

Press TIMER while pressing SHIFT.

The selected source, the timer-on time, and the duration for the timer-activated period will be displayed for 4 seconds.

To change any of the previous setting

Carry out from step 1.

However, if you do not change the timer-on time, in step 3 just press II twice and continue from step 4.

To cancel the timer standby mode temporarily

Press TIMER while pressing SHIFT so that @ disappears.

To restore the timer standby mode, press these buttons again to display 0.

Using the unit while the timer is set

You can use the unit normally after setting the timer.

Before turning off the power, carry out step 5 and 6.

0Timer playback and timer recording will not begin unless the power is turned off.

“Connected equipment cannot be turned on and off by the built- in timer of this unit. Use an external timer.

While the timer is in operation, the display indication is dimmer than usual.

ENGLISH 17

Page 17
Image 17
Aiwa CX-ZL10 Prepare the source, Press Power to turn off the power, Press one of the function buttons to select a source

CX-ZL10 specifications

The Aiwa CX-ZL10 is a dynamic and versatile compact stereo system, known for its impressive audio performance and user-friendly features. It seamlessly combines style, functionality, and technology, making it a desirable choice for music enthusiasts.

One of the standout features of the CX-ZL10 is its advanced audio system. Equipped with a powerful amplifier, it produces clear and dynamic sound across a wide frequency range. The system supports various audio formats, allowing users to play CDs, tapes, and radio with ease. The built-in CD player, compatible with CD-R/RW discs, ensures high-quality playback, while the cassette deck allows for the enjoyment of vintage tapes.

The CX-ZL10 also incorporates modern digital technology with its preset equalizer settings, enabling users to customize their listening experience according to their preferences. The bass and treble controls further enhance sound quality, making it suitable for different music genres. Additionally, the stereo system features a digital tuner with a memory function for storing favorite radio stations, ensuring that users can access their preferred channels with just the touch of a button.

Another notable characteristic of the Aiwa CX-ZL10 is its sleek and compact design. The system's modern aesthetic is complemented by an easy-to-read LCD display, which provides essential information such as track number and playback time. Its compact size makes it an ideal addition to any space, whether in a living room, bedroom, or office.

In terms of connectivity, the CX-ZL10 comes with multiple input options, allowing users to connect various external devices. The auxiliary input jack makes it easy to hook up smartphones, tablets, or other media players. Furthermore, headphone and microphone jacks enhance privacy and versatility, catering to diverse listening preferences.

The system’s user-friendly interface ensures that even those who are not tech-savvy can navigate through its features with ease. With straightforward buttons and controls, setting it up and adjusting the volume or track selection is simple.

Overall, the Aiwa CX-ZL10 is a well-rounded compact stereo system that excels in sound quality, design, and connectivity options. Its combination of classic audio playback capabilities and modern technology makes it a rewarding choice for anyone looking to enrich their audio experience.