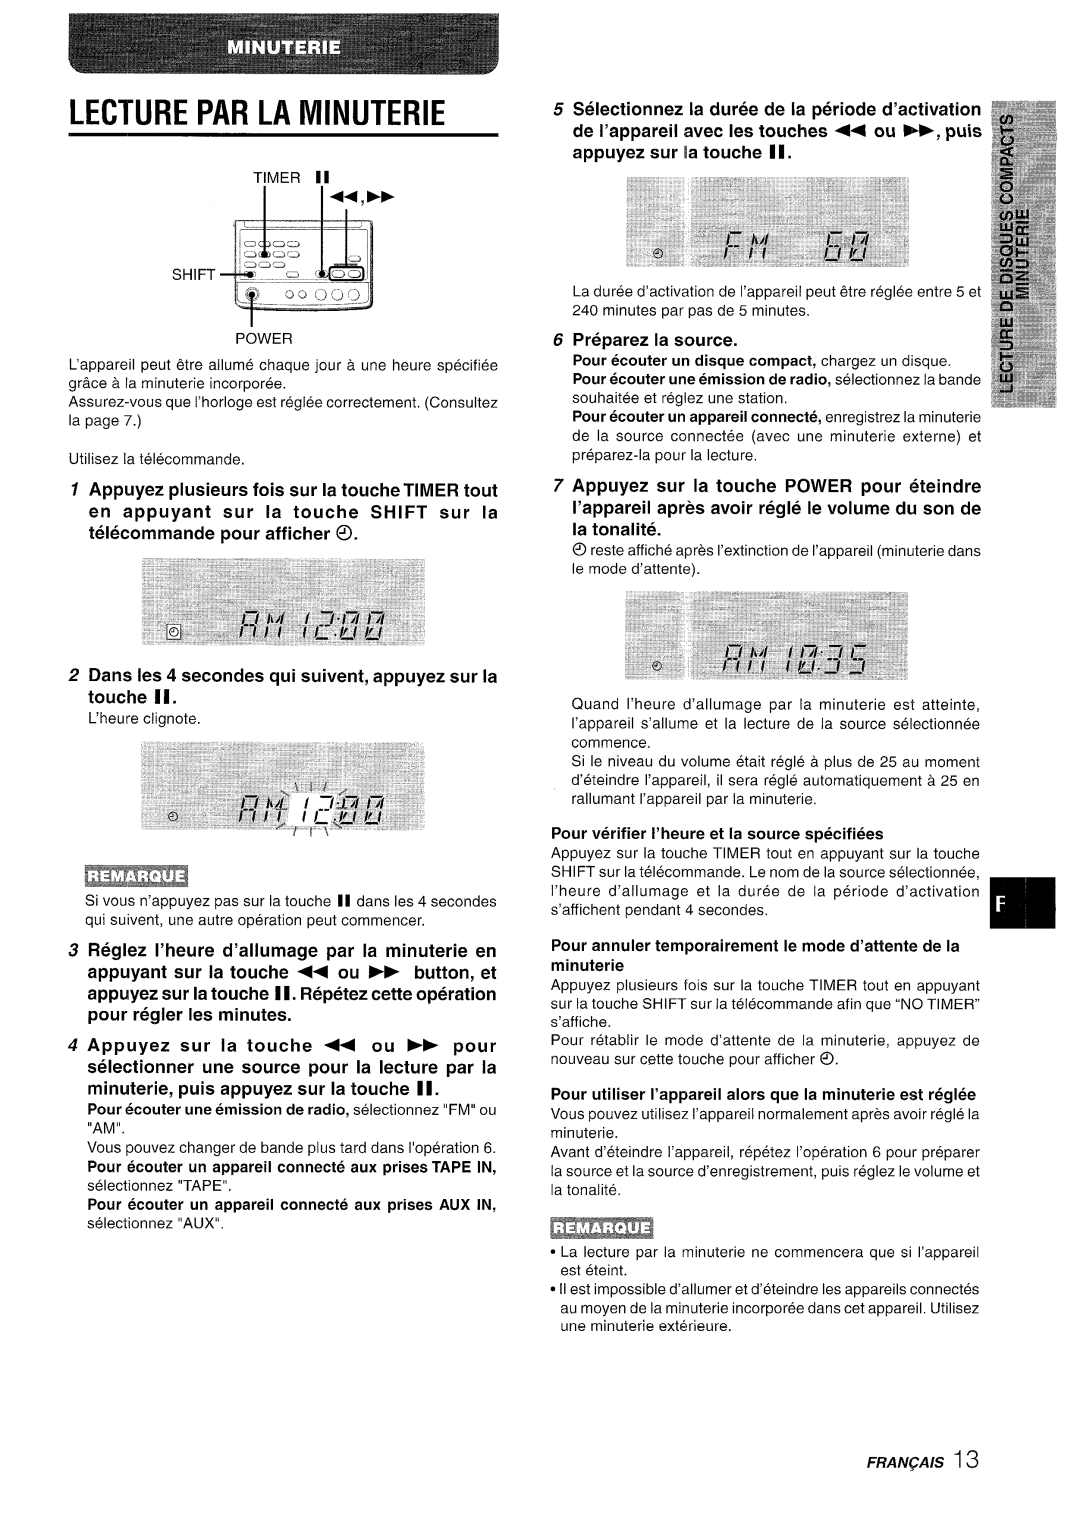
LECTURE PAR LA MINUTERIE

POWER

L’appareil peut etre allume chaque jour a une heure specifiee grace a la minuterie incorporee.

Assurez-vous que [’horloge est reglee correctement, (Consultez la page 7.)

Utilisez la telecommande.

1 Appuyez plusieurs fois sur la touche TIMER tout

en appuyant sur la touche SHIFT sur la telecommande pour afficher 0.

2 Dans Ies 4 secondes qui suivent, appuyez sur la touche Il.

L’heure clignote.

Si vous n’appuyez pas sur la touche II clans Ies 4 secondes qui suivent, une autre operation peut commencer.

3 Reglez I’heure d’allumage par la minuterie en

appuyant sur la touche <+ ou - button, et appuyez sur la touche 11.Repetez cette operation pour regler Ies minutes.

4 Appuyez sur la touche +4 ou b pour selectionner une source pour la lecture par la minuterie, puis appuyez sur la touche Il.

Pour ecouter une emission de radio, selectionnez “FM” ou

“AM”.

Vous pouvez changer de bande plus tard clans I’operation 6.

Pour ecouter un appareil connecte aux prises TAPE IN,

selectionnez “TAPE”.

Pour ecouter un appareil connecte aux prises AUX IN,

selectionnez “AUX”.

5 Selectionnez la duree de la periode deactivation

de I’appareil avec Ies touches - ou F>, puis appuyez sur la touche Il.

La duree deactivation de I’appareil peut 6tre reglee entre 5 et 240 minutes par pas de 5 minutes,

6 Preparez la source.

Pour ecouter un disque compact, chargez un disque. Pour ecouter une emission de radio, selectionnez la bande

souhaitee et reglez une station,

Pour ecouter un appareil connecte, enregistrez la minuterie de la source connectee (avec une minuterie externe) et preparez-la pour la lecture,

7 Appuyez sur la touche POWER pour 6teindre I’appareil apres avoir regle Ie volume du son de la tonalite.

@reste affiche apres I’extinction de I’appareil (minuterie clans Ie mode d’attente).

Quand I’heure d’allumage par la minuterie est atteinte, I’appareil s’allume et la lecture de la source selectionnee commence

Si Ie niveau du volume etait regle a plus de 25 au moment

d’eteindre I’appareil, il sera regle automatiquement a 25 en rallumant I’appareil par la minuterie,

Pour verifier I’heure et la source specifiers

Appuyez sur la touche TIMER tout en appuyant sur la touche

SHIFT sur la telecommande. Le nom de la source selectionnee,

I’heure d’allumage et la duree de la periode deactivation s’affichent pendant 4 secondes,

Pour annuler temporairement Ie mode d’attente de la minuterie

Appuyez plusieurs fois sur la touche TIMER tout en appuyant

sur la touche SHIFT sur la telecommande afin que “NOTIMER” s’affiche.

Pour retablir Ie mode d’attente de la minuterie, appuyez de nouveau sur cette touche pour afficher ~.

Pour utiliser I’appareil alors que la minuterie est reglee

Vous pouvez utilisez I’appareil normalement apres avoir regle la minuterie.

Avant d’eteindre I’appareil, repetez I’operation 6 pour preparer

la source et la source d’enregistrement, puis reglez Ie volume et la tonalite,

~

La lecture par la minuterie ne commencera que si I’appareil est eteint.

II est impossible d’allumer et d’eteindre Ies appareils connectes au moyen de la minuterie incorporee clans cet appareil. Utilisez une minuterie exterieure.

FRAN~AIS 13

Page 49
Image 49
Aiwa XR-M70 manual Lecture PAR LA Minuterie, Preparez la source, Pour verifier I’heure et la source specifiers

XR-M70 specifications

The Aiwa XR-M70 is a compact yet powerful mini audio system that was a staple in home entertainment for music lovers in the 1990s. Renowned for its versatile functionality, robust sound, and user-friendly design, the XR-M70 encapsulates the essence of consumer electronics from that era.

One of the standout features of the Aiwa XR-M70 is its dual cassette deck, which allows users to both play and record audio cassettes. This functionality was particularly appealing during a time when cassette tapes were a dominant format for music. The recorder supports high-speed dubbing, enabling users to create copies of their favorite tapes quickly, as well as normal and micro speeds for more sensitive recordings. Additionally, the auto-reverse feature lets listeners indulge in uninterrupted playback.

The XR-M70 boasts a powerful built-in amplifier, delivering clear and dynamic sound output. With a total power output of around 40 watts, it can fill a medium-sized room with quality audio, making it excellent for parties or casual listening. The system is equipped with a six-band graphic equalizer, which allows users to fine-tune their listening experience according to their music genre or personal taste. This level of customization enhances the overall audio performance.

Another key characteristic of this model is its CD player, which accommodates various disc formats, including CD-R and CD-RW. The anti-shock technology integrated into the CD mechanism ensures smooth playback, even while the unit is in motion. This feature was particularly advantageous for audiophiles who appreciated the fidelity of CDs but wanted the peace of mind that comes with modern technology.

The Aiwa XR-M70 also includes FM/AM radio capabilities, complete with a digital tuner for easy station selection. Its presets allow listeners to save their favorite channels, offering quick access to their desired radio stations without the hassle of manual tuning.

Aesthetically, the Aiwa XR-M70 showcases a sleek, modern design characterized by a user-friendly interface. The multi-function remote control enhances usability, allowing users to manage playback from a distance.

In summary, the Aiwa XR-M70 stands out in the world of mini audio systems for its combination of classic cassette functionality, reliable CD playback, customizable audio settings, and user-friendly design. It serves as a nostalgic reminder of a time when music was enjoyed through tangible media, while still offering the features that made it a favorite among consumers.