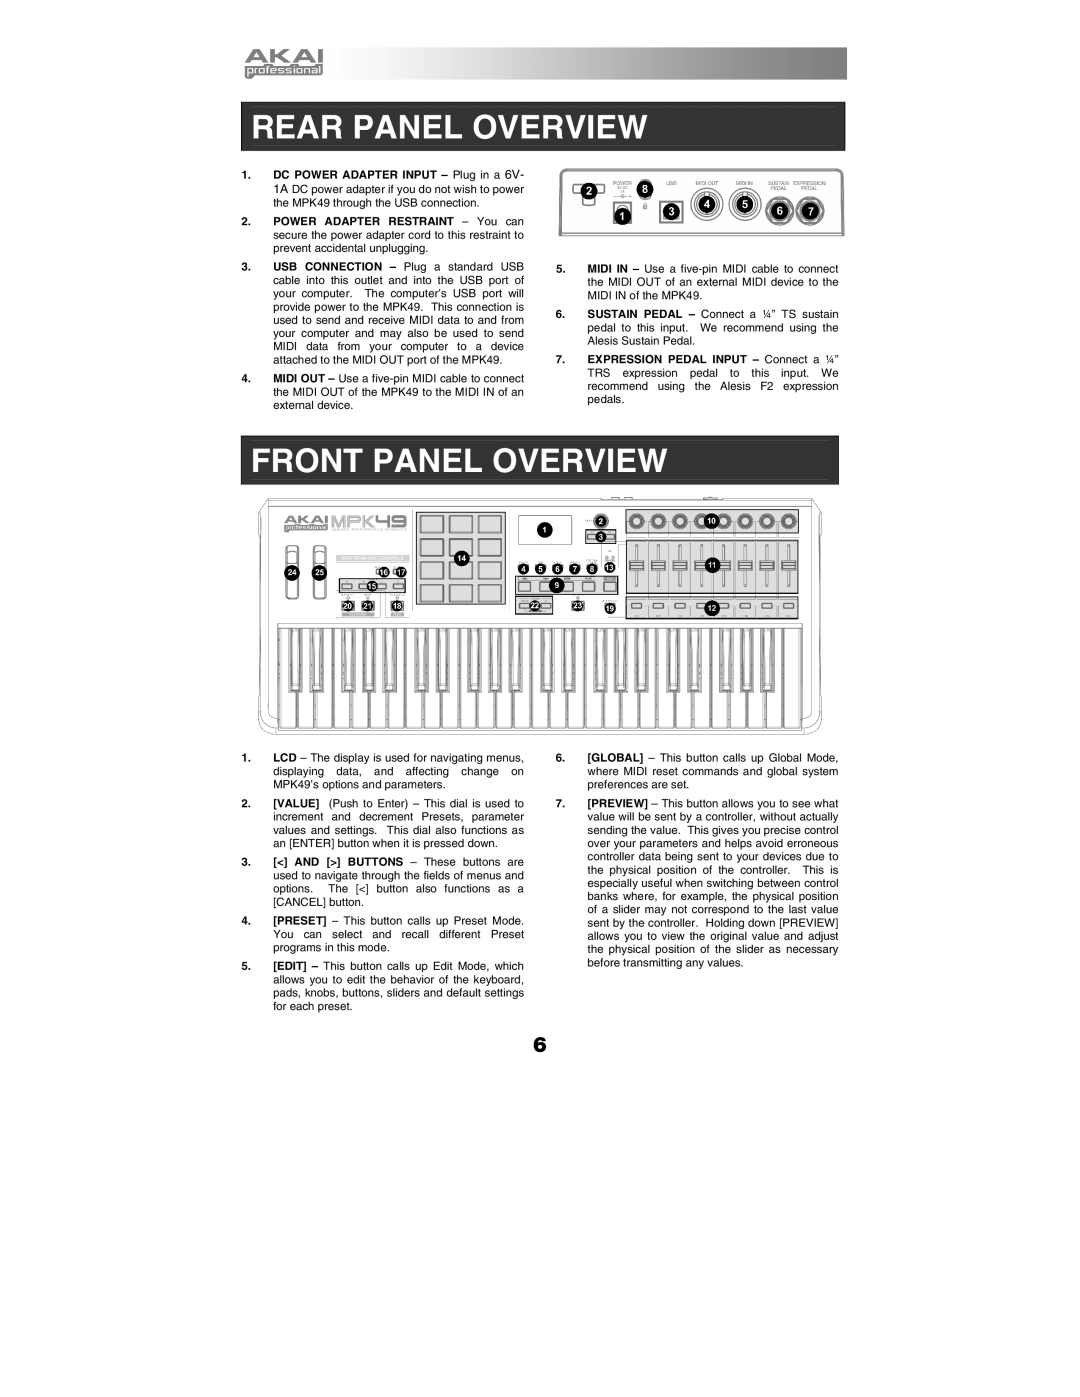
REAR PANEL OVERVIEW
1.DC POWER ADAPTER INPUT – Plug in a 6V- 1A DC power adapter if you do not wish to power the MPK49 through the USB connection.
2.POWER ADAPTER RESTRAINT – You can secure the power adapter cord to this restraint to prevent accidental unplugging.
3.USB CONNECTION – Plug a standard USB cable into this outlet and into the USB port of your computer. The computer’s USB port will provide power to the MPK49. This connection is used to send and receive MIDI data to and from your computer and may also be used to send MIDI data from your computer to a device attached to the MIDI OUT port of the MPK49.
4.MIDI OUT – Use a
5.MIDI IN – Use a
6.SUSTAIN PEDAL – Connect a ¼” TS sustain pedal to this input. We recommend using the Alesis Sustain Pedal.
7.EXPRESSION PEDAL INPUT – Connect a ¼” TRS expression pedal to this input. We recommend using the Alesis F2 expression pedals.
FRONT PANEL OVERVIEW
1.LCD – The display is used for navigating menus, displaying data, and affecting change on MPK49’s options and parameters.
2.[VALUE] (Push to Enter) – This dial is used to increment and decrement Presets, parameter values and settings. This dial also functions as an [ENTER] button when it is pressed down.
3.[<] AND [>] BUTTONS – These buttons are used to navigate through the fields of menus and options. The [<] button also functions as a [CANCEL] button.
4.[PRESET] – This button calls up Preset Mode. You can select and recall different Preset programs in this mode.
5.[EDIT] – This button calls up Edit Mode, which allows you to edit the behavior of the keyboard, pads, knobs, buttons, sliders and default settings for each preset.
6.[GLOBAL] – This button calls up Global Mode, where MIDI reset commands and global system preferences are set.
7.[PREVIEW] – This button allows you to see what value will be sent by a controller, without actually sending the value. This gives you precise control over your parameters and helps avoid erroneous controller data being sent to your devices due to the physical position of the controller. This is especially useful when switching between control banks where, for example, the physical position of a slider may not correspond to the last value sent by the controller. Holding down [PREVIEW] allows you to view the original value and adjust the physical position of the slider as necessary before transmitting any values.
6