MAINTENANCE
MAINTENANCE
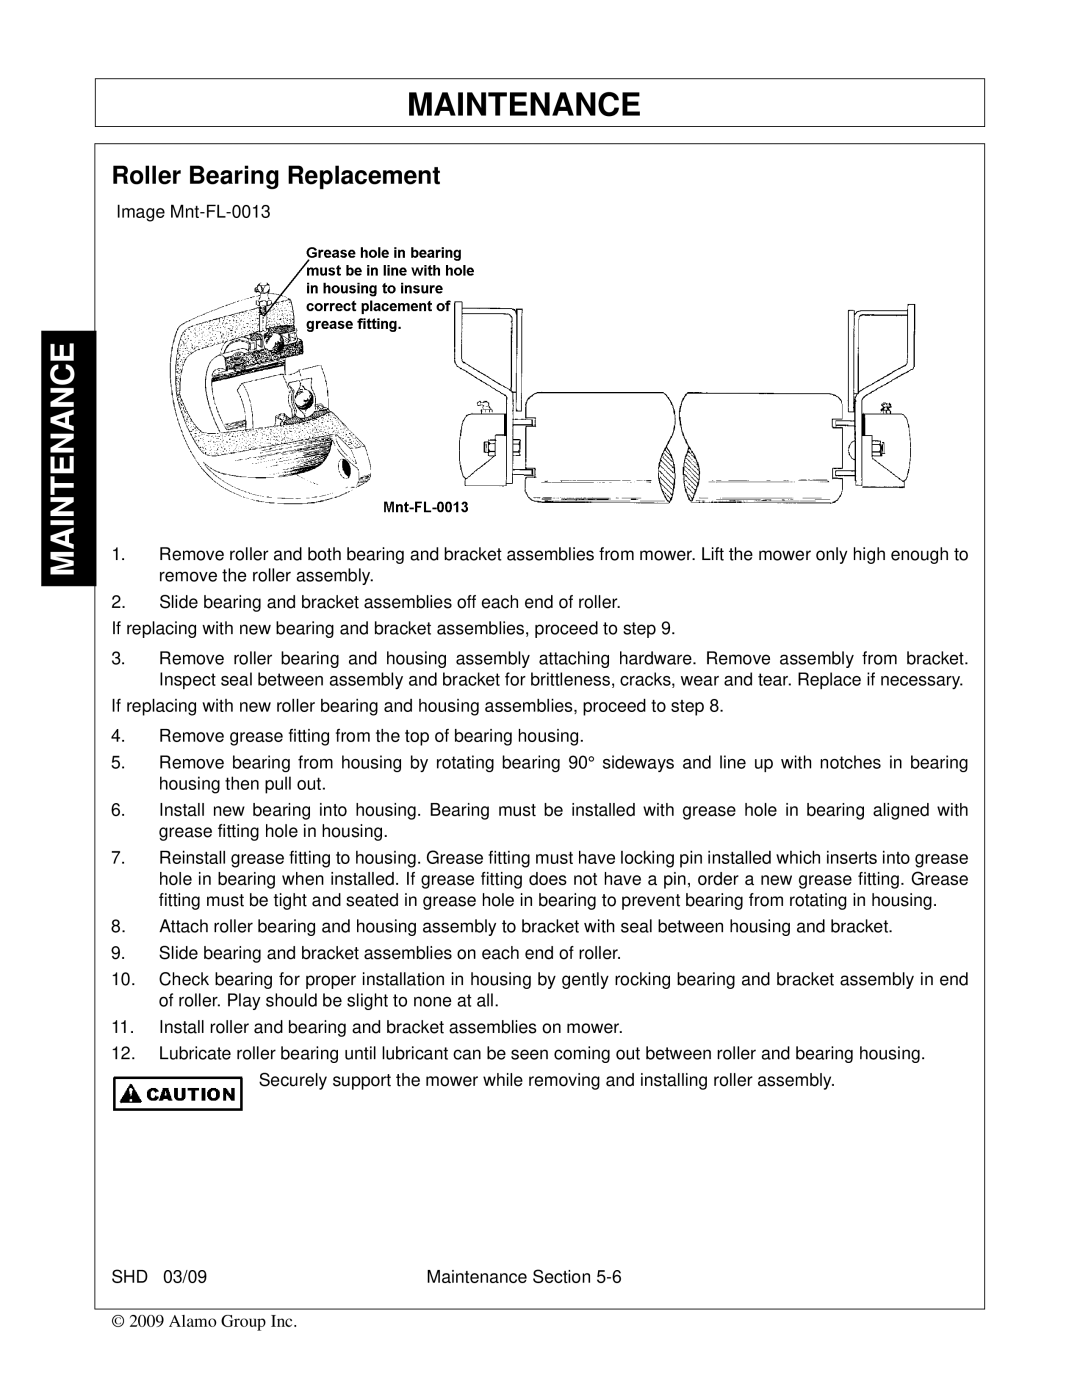
Roller Bearing Replacement
Image
1.Remove roller and both bearing and bracket assemblies from mower. Lift the mower only high enough to remove the roller assembly.
2.Slide bearing and bracket assemblies off each end of roller.
If replacing with new bearing and bracket assemblies, proceed to step 9.
3.Remove roller bearing and housing assembly attaching hardware. Remove assembly from bracket. Inspect seal between assembly and bracket for brittleness, cracks, wear and tear. Replace if necessary.
If replacing with new roller bearing and housing assemblies, proceed to step 8.
4.Remove grease fitting from the top of bearing housing.
5.Remove bearing from housing by rotating bearing 90° sideways and line up with notches in bearing housing then pull out.
6.Install new bearing into housing. Bearing must be installed with grease hole in bearing aligned with grease fitting hole in housing.
7.Reinstall grease fitting to housing. Grease fitting must have locking pin installed which inserts into grease hole in bearing when installed. If grease fitting does not have a pin, order a new grease fitting. Grease fitting must be tight and seated in grease hole in bearing to prevent bearing from rotating in housing.
8.Attach roller bearing and housing assembly to bracket with seal between housing and bracket.
9.Slide bearing and bracket assemblies on each end of roller.
10.Check bearing for proper installation in housing by gently rocking bearing and bracket assembly in end of roller. Play should be slight to none at all.
11.Install roller and bearing and bracket assemblies on mower.
12.Lubricate roller bearing until lubricant can be seen coming out between roller and bearing housing.
Securely support the mower while removing and installing roller assembly.
SHD 03/09 | Maintenance Section |
© 2009 Alamo Group Inc.