Installation and Safety Guide
Installing the switch using the 19-inch rack-mount kit
1.Ensure the rack has sufficient space for the switch and its cables.
2.If necessary, install cage nuts at the front and rear of the rack.
3.Unpack the switch and remove the rubber feet.
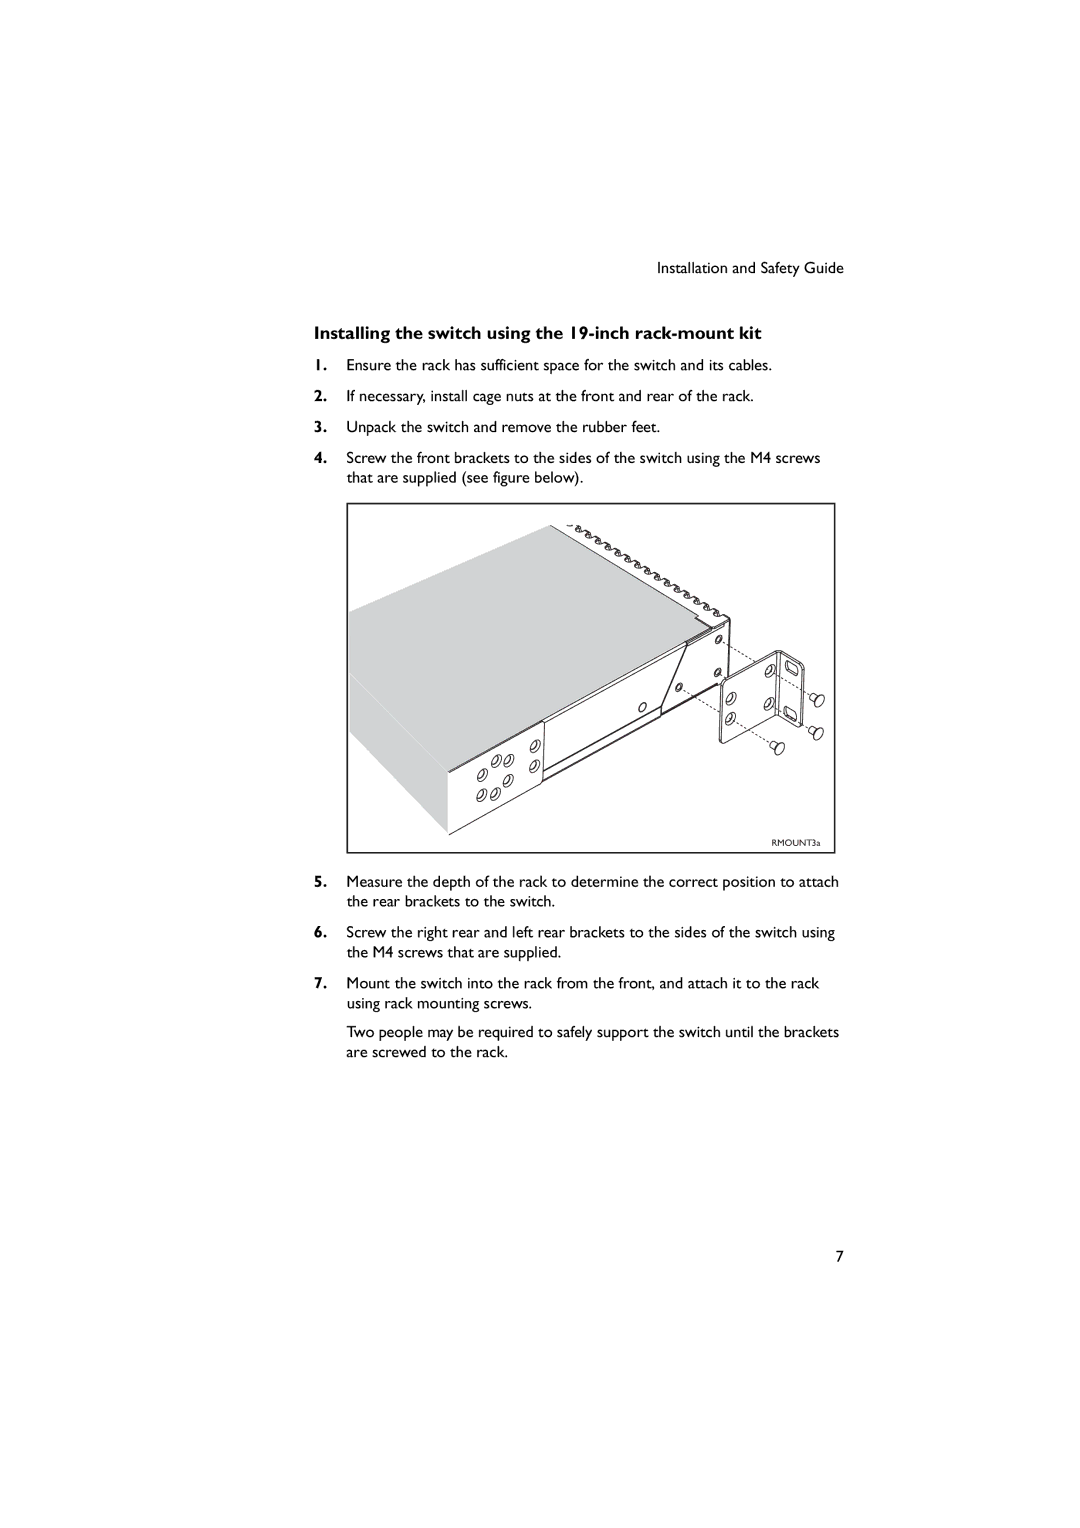
4.Screw the front brackets to the sides of the switch using the M4 screws that are supplied (see figure below).
RMOUNT3a |
5.Measure the depth of the rack to determine the correct position to attach the rear brackets to the switch.
6.Screw the right rear and left rear brackets to the sides of the switch using the M4 screws that are supplied.
7.Mount the switch into the rack from the front, and attach it to the rack using rack mounting screws.
Two people may be required to safely support the switch until the brackets are screwed to the rack.
7