Installation
Mounting the control unit (Sold Separately)
CAUTION:
Do not install the control unit near the
•Confirm the installation location will be safe.
•Determine the mounting position on the dashboard. The area should be large enough to centre the unit and reasonably flat.
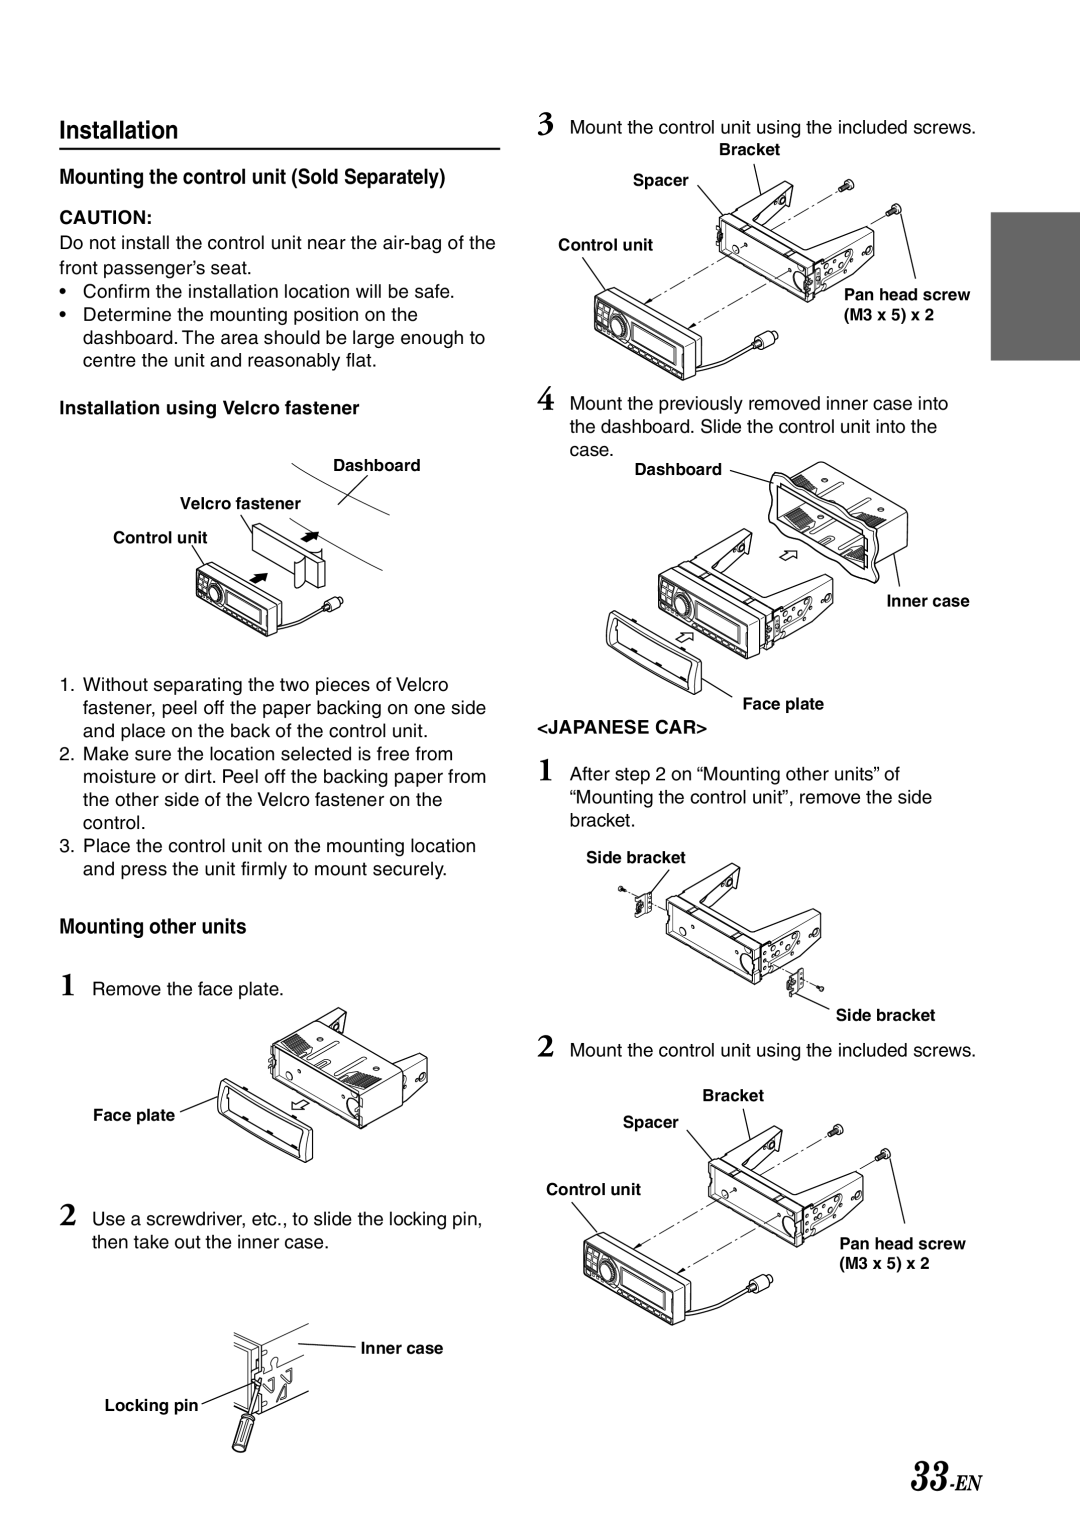
Installation using Velcro fastener
Dashboard
Velcro fastener
Control unit
1.Without separating the two pieces of Velcro fastener, peel off the paper backing on one side and place on the back of the control unit.
2.Make sure the location selected is free from moisture or dirt. Peel off the backing paper from the other side of the Velcro fastener on the control.
3.Place the control unit on the mounting location and press the unit firmly to mount securely.
Mounting other units
1 Remove the face plate.
Face plate
2 Use a screwdriver, etc., to slide the locking pin, then take out the inner case.
Inner case
Locking pin
3 Mount the control unit using the included screws.
Bracket
Spacer
Control unit
Pan head screw (M3 x 5) x 2
4 Mount the previously removed inner case into the dashboard. Slide the control unit into the case.
Dashboard
Inner case
Face plate
<JAPANESE CAR>
1 After step 2 on “Mounting other units” of “Mounting the control unit”, remove the side bracket.
Side bracket
Side bracket
2 Mount the control unit using the included screws.
Bracket
Spacer
Control unit
Pan head screw (M3 x 5) x 2