5. Remove tumbler (basket) belts.
6. Remove tumbler (basket) pulley.
7. Remove tumbler (basket) assembly and support.
a. Loosen the two (2) set screws on both the pillow block bearing collars.
b. Remove the retaining rings from the grooves of the tumbler (basket) shaft.
c. Remove the tumbler (basket) and support assembly from the front of the dryer. If the tumbler (basket) cannot be removed freely, clean the shaft area and spray
IMPORTANT: Never strike the shaft directly with a hammer.
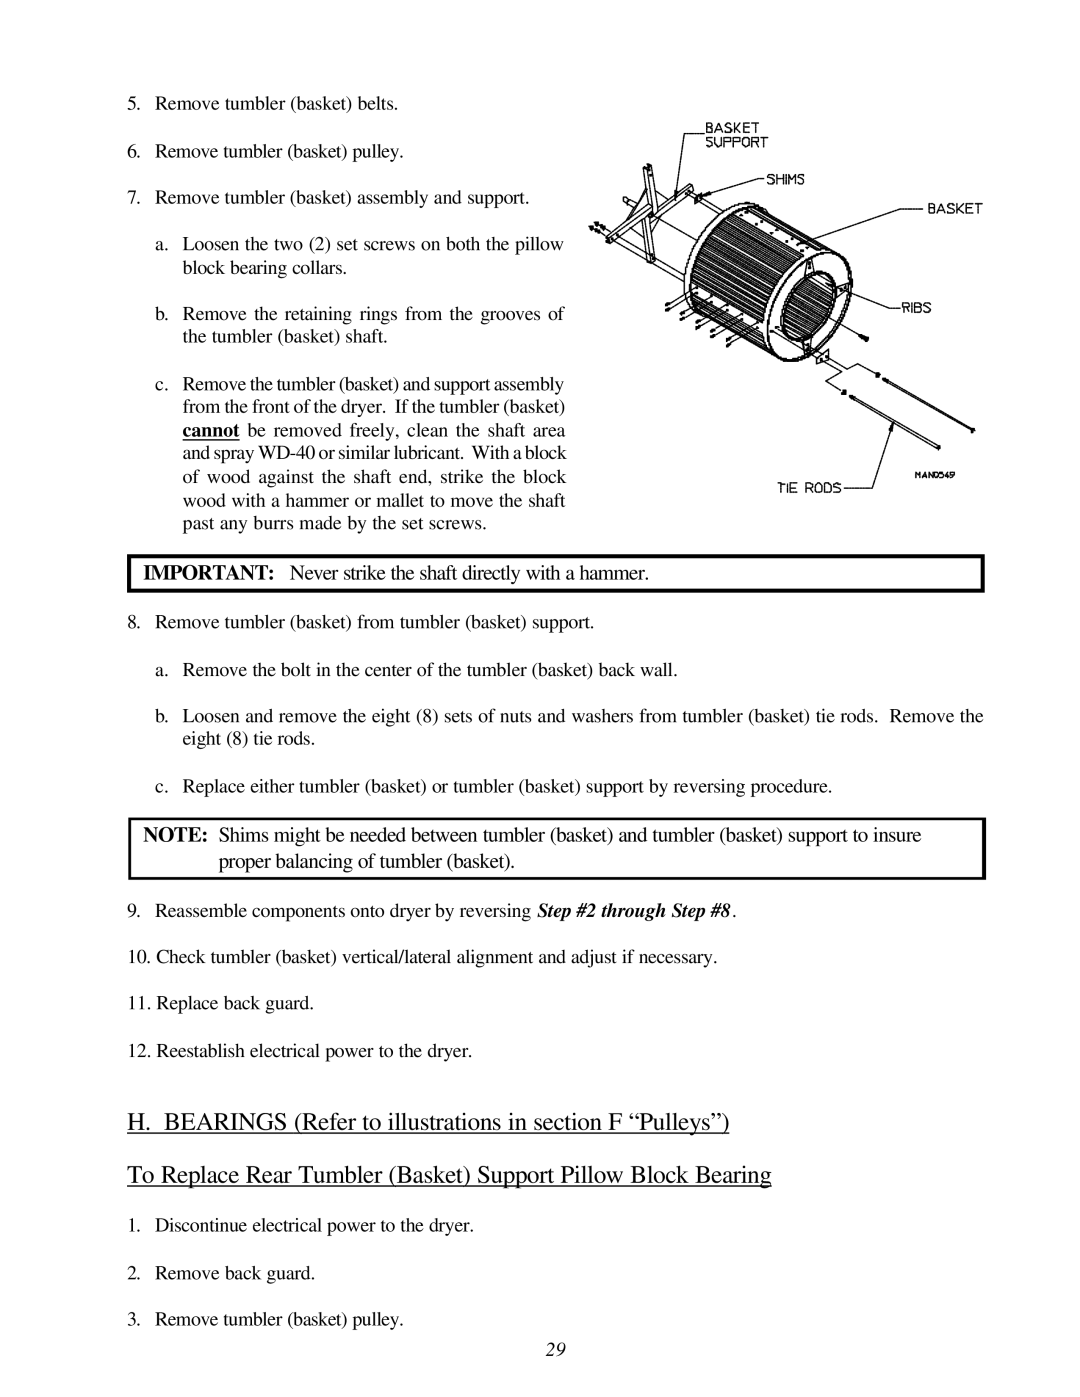
8.Remove tumbler (basket) from tumbler (basket) support.
a.Remove the bolt in the center of the tumbler (basket) back wall.
b.Loosen and remove the eight (8) sets of nuts and washers from tumbler (basket) tie rods. Remove the eight (8) tie rods.
c.Replace either tumbler (basket) or tumbler (basket) support by reversing procedure.
NOTE: Shims might be needed between tumbler (basket) and tumbler (basket) support to insure proper balancing of tumbler (basket).
9.Reassemble components onto dryer by reversing Step #2 through Step #8.
10.Check tumbler (basket) vertical/lateral alignment and adjust if necessary.
11.Replace back guard.
12.Reestablish electrical power to the dryer.
H. BEARINGS (Refer to illustrations in section F “Pulleys”)
To Replace Rear Tumbler (Basket) Support Pillow Block Bearing
1.Discontinue electrical power to the dryer.
2.Remove back guard.
3.Remove tumbler (basket) pulley.
29