5.1.4 Change the System Setting
Please follow the steps below to change the date and time of the system setting through the network as necessary.
Set the Date and Time of the system
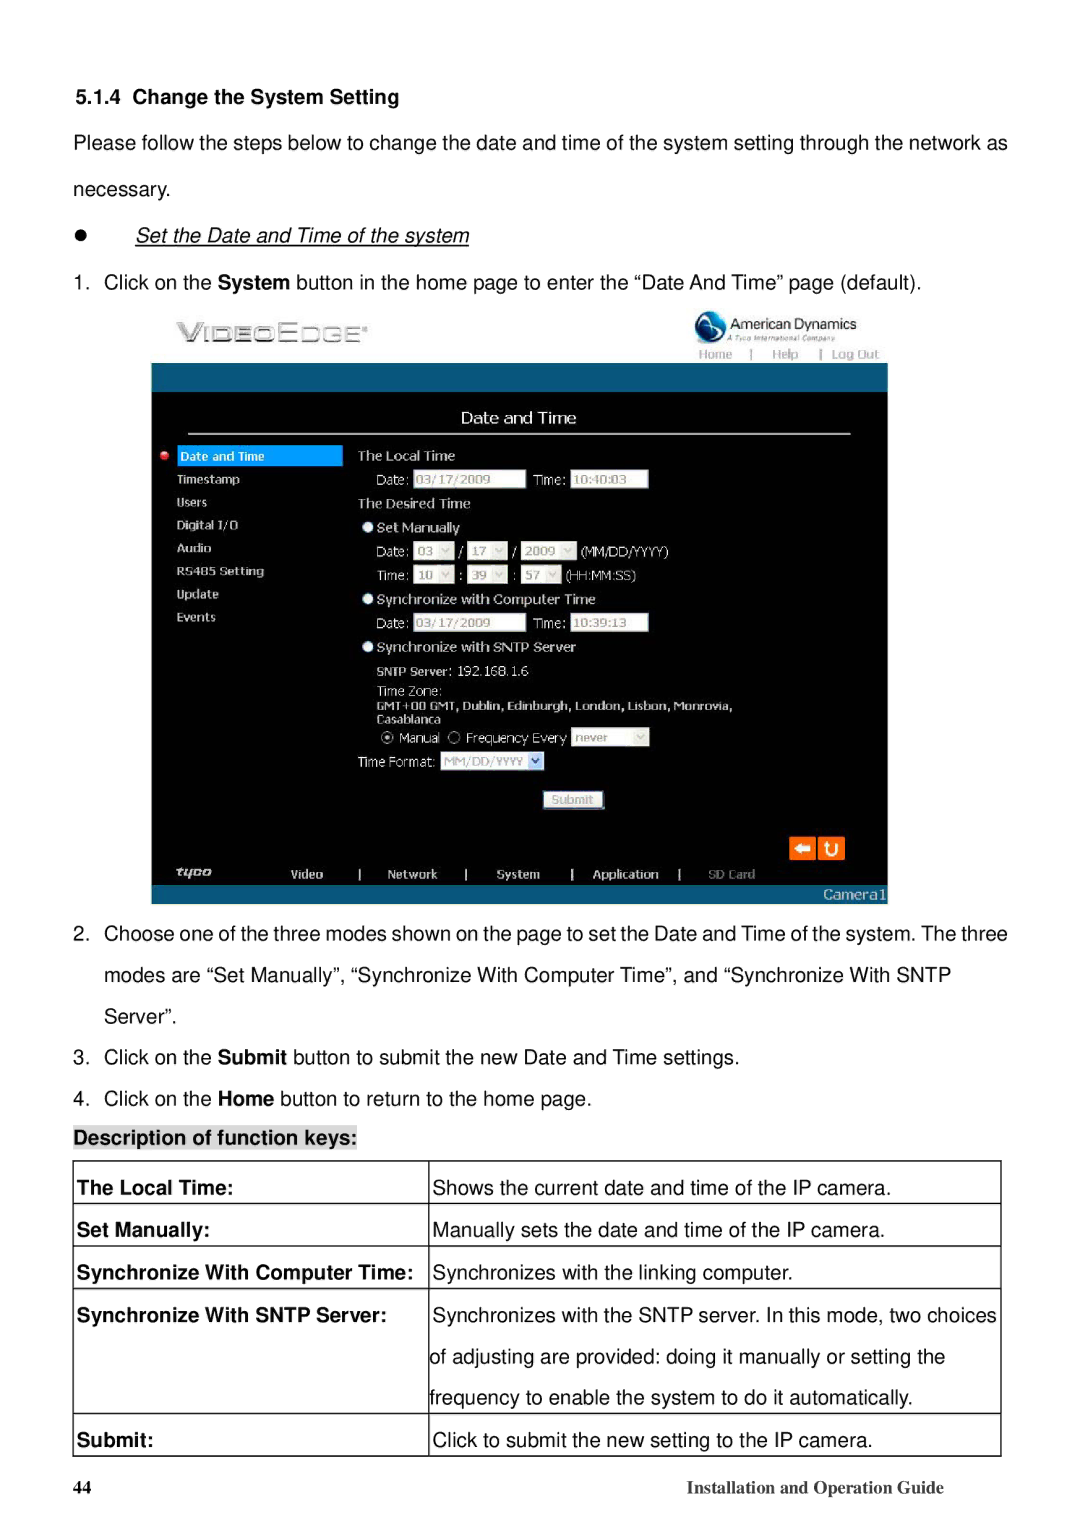
1. Click on the System button in the home page to enter the “Date And Time” page (default).
2.Choose one of the three modes shown on the page to set the Date and Time of the system. The three modes are “Set Manually”, “Synchronize With Computer Time”, and “Synchronize With SNTP Server”.
3.Click on the Submit button to submit the new Date and Time settings.
4.Click on the Home button to return to the home page.
Description of function keys:
The Local Time: | Shows the current date and time of the IP camera. |
Set Manually: | Manually sets the date and time of the IP camera. |
Synchronize With Computer Time: | Synchronizes with the linking computer. |
Synchronize With SNTP Server: | Synchronizes with the SNTP server. In this mode, two choices |
| of adjusting are provided: doing it manually or setting the |
| frequency to enable the system to do it automatically. |
Submit: | Click to submit the new setting to the IP camera. |
44 | Installation and Operation Guide |