Configuration and Installation
Connecting an IR device
IR devices connect to the AXB-IRS4 with an IR device cable. The cables supplied with the AXB- IRS4 are designed to accommodate the IR devices in your system. IR cables have a two-pin connector on one end that plugs into the AXB-IRS4, and the other end has a device-specific interface adapter such as an IR emitter.
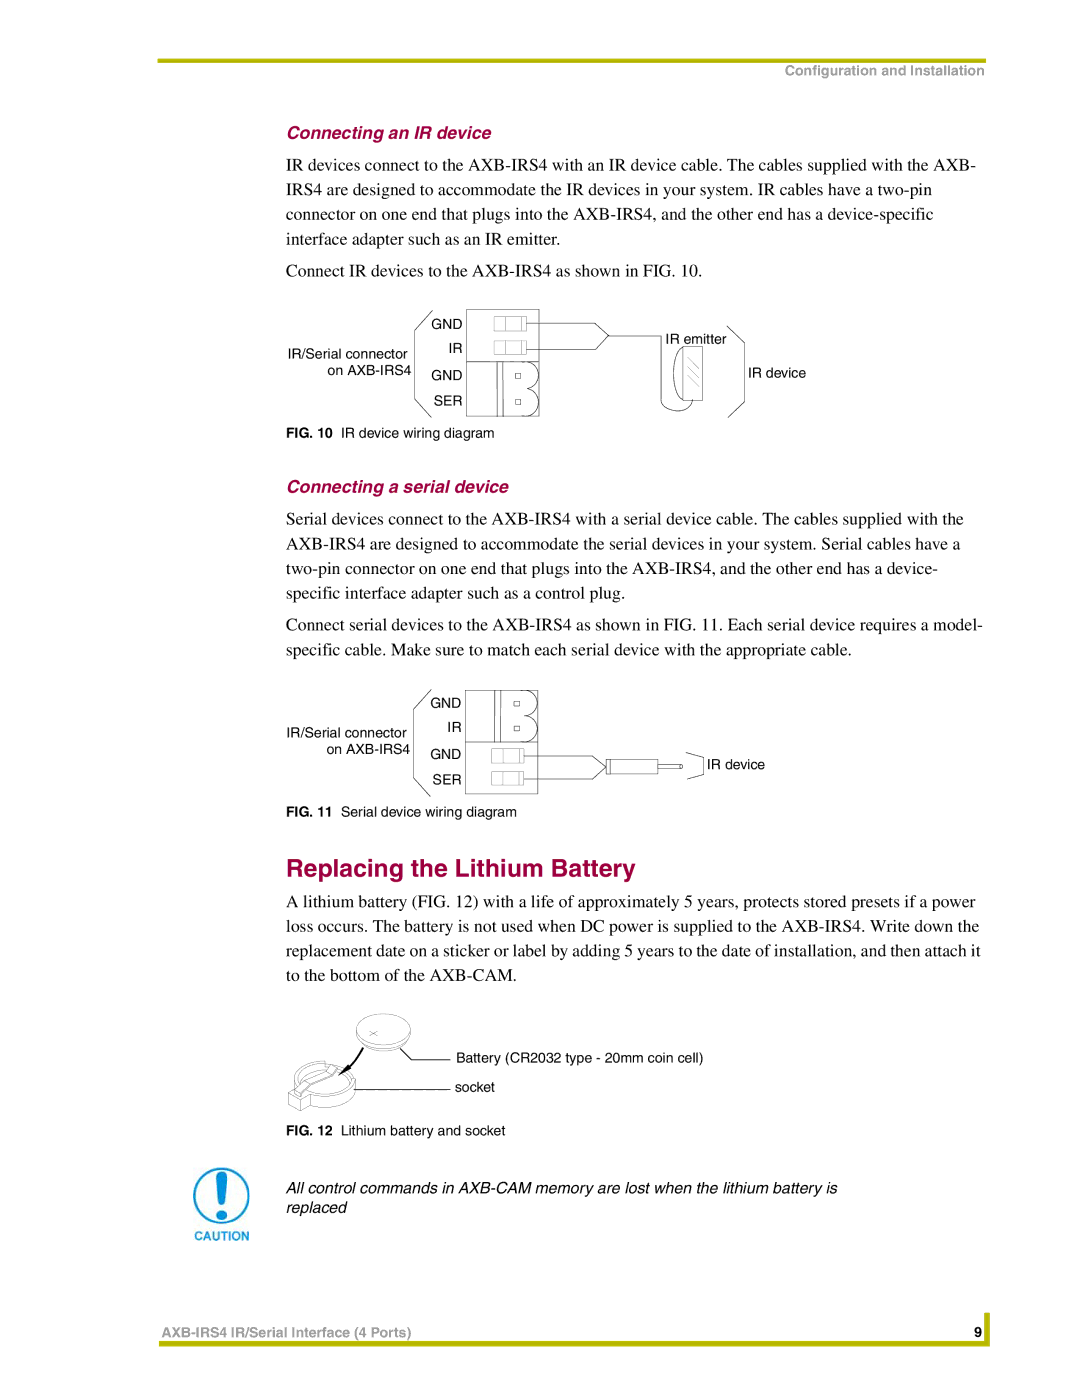
Connect IR devices to the AXB-IRS4 as shown in FIG. 10.
| GND |
IR/Serial connector | IR |
|
on AXB-IRS4 | GND |
|
 SER
SER
FIG. 10 IR device wiring diagram
IR emitter
IR device
Connecting a serial device
Serial devices connect to the AXB-IRS4 with a serial device cable. The cables supplied with the AXB-IRS4 are designed to accommodate the serial devices in your system. Serial cables have a two-pin connector on one end that plugs into the AXB-IRS4, and the other end has a device- specific interface adapter such as a control plug.
Connect serial devices to the AXB-IRS4 as shown in FIG. 11. Each serial device requires a model- specific cable. Make sure to match each serial device with the appropriate cable.
| GND |
IR/Serial connector | IR |
|
on AXB-IRS4 | GND |
|
 SER
SER 


 FIG. 11 Serial device wiring diagram
 IR device
Replacing the Lithium Battery
A lithium battery (FIG. 12) with a life of approximately 5 years, protects stored presets if a power loss occurs. The battery is not used when DC power is supplied to the AXB-IRS4. Write down the replacement date on a sticker or label by adding 5 years to the date of installation, and then attach it to the bottom of the AXB-CAM.
 Battery (CR2032 type - 20mm coin cell)
socket
FIG. 12 Lithium battery and socket
All control commands in AXB-CAM memory are lost when the lithium battery is replaced
AXB-IRS4 IR/Serial Interface (4 Ports) | 9 | |
| | |

![]() SER
SER
 SER
SER 


 FIG. 11 Serial device wiring diagram
![]() IR device
IR device![]() Battery (CR2032 type - 20mm coin cell)
Battery (CR2032 type - 20mm coin cell)