How to Install the Temperature/Humidity Sensor
1.Choose a location and install the temperature/humidity sensor. Avoid locations in direct sunlight or other locations that may affect the sensor reading, such as near windows, room entrances, air ducts, or other heat sources.
Note: When securing the sensor, tighten the tie wrap over the recessed channel of the sensor casing.
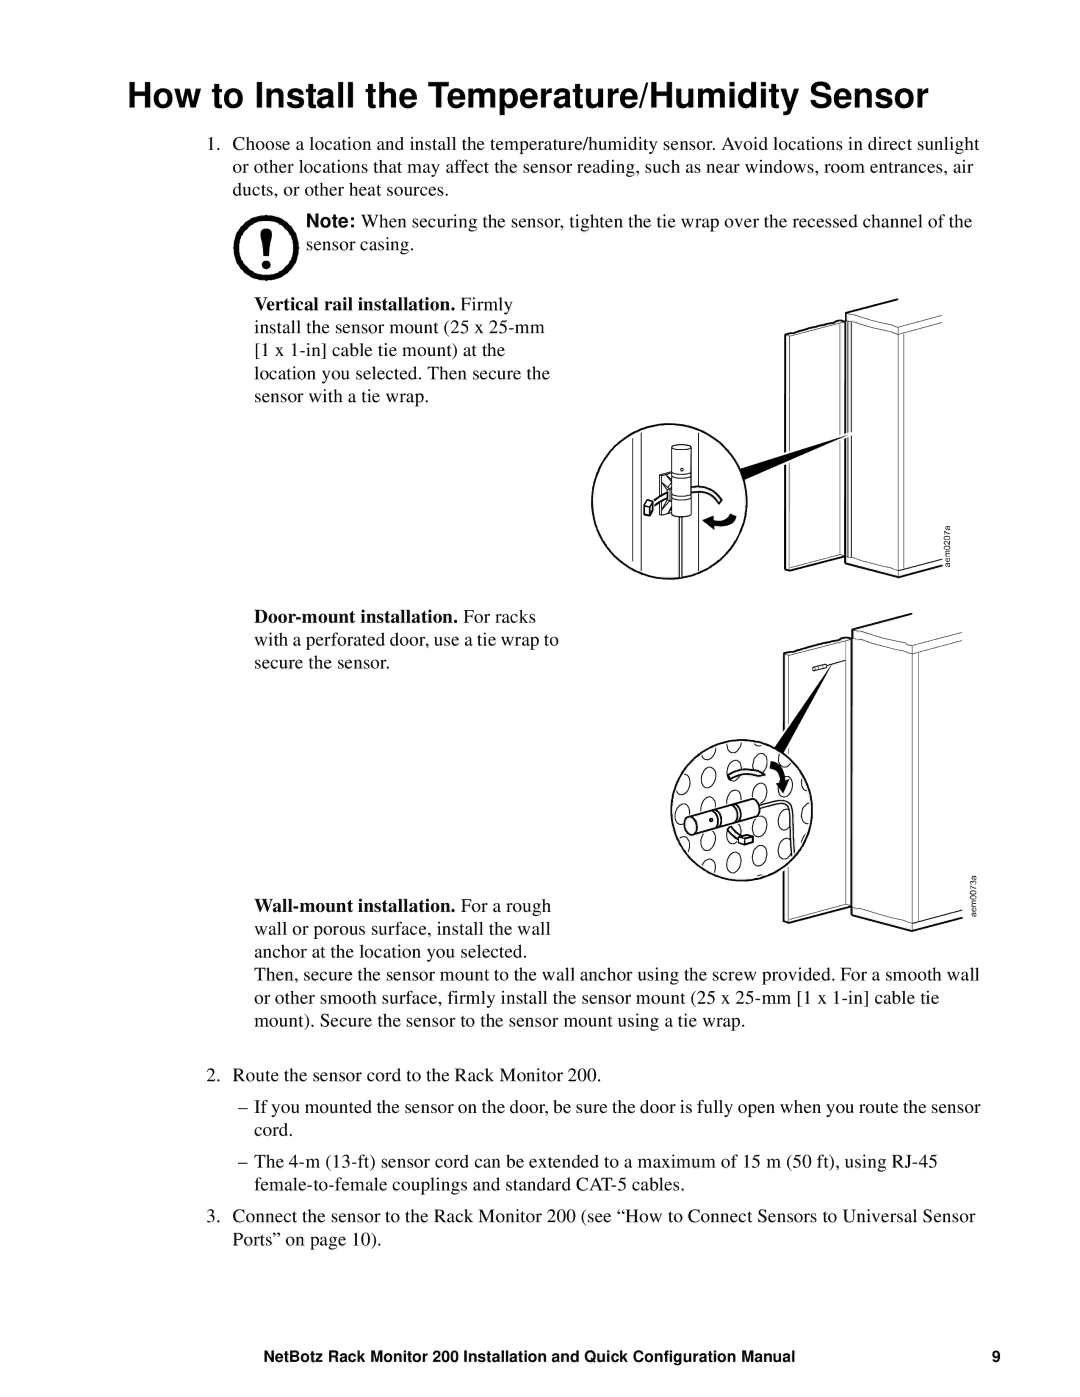
Vertical rail installation. Firmly install the sensor mount (25 x
Then, secure the sensor mount to the wall anchor using the screw provided. For a smooth wall or other smooth surface, firmly install the sensor mount (25 x
2.Route the sensor cord to the Rack Monitor 200.
–If you mounted the sensor on the door, be sure the door is fully open when you route the sensor cord.
–The
3.Connect the sensor to the Rack Monitor 200 (see “How to Connect Sensors to Universal Sensor Ports” on page 10).
NetBotz Rack Monitor 200 Installation and Quick Configuration Manual | 9 |