 QUICKSETUP
The DT250 is equipped with a shared analog
This table illustrates the different output from the RF Out connector.
| Power Indicator | TV Out Mode | Actual Output | |
| Light | (RF Out) | ||
|
| |||
Standby | Red | Analog | RF signal with analog | |
(Sleep) | programming from analog broadcast | |||
|
| |||
|
|
| stations | |
|
|
|
| |
On |
|
| Analog RF signal in channel 3 or 4 | |
Green | NTSC CH 3/4 | converted from digital programming | ||
(Active) | ||||
contents broadcasted by digital | ||||
|
| |||
|
|
| ||
|
|
| stations | |
|
|
|
|
Standard Install - RF Input / Output
EN
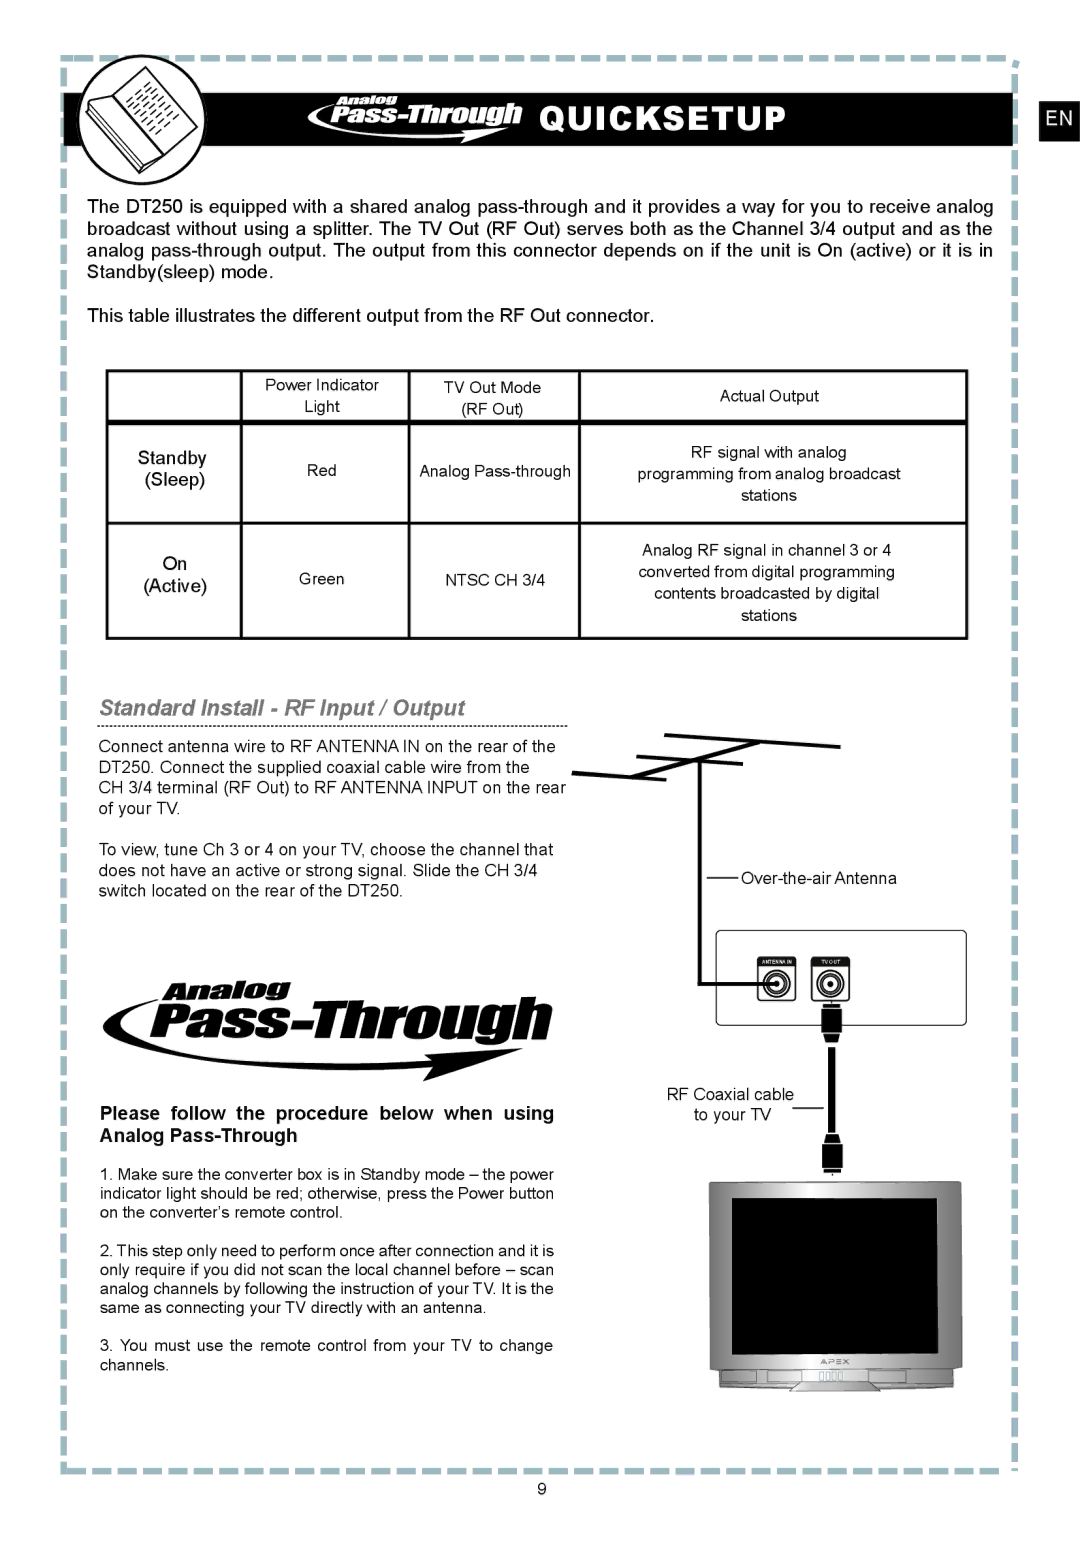
Connect antenna wire to RF ANTENNA IN on the rear of the DT250. Connect the supplied coaxial cable wire from the CH 3/4 terminal (RF Out) to RF ANTENNA INPUT on the rear of your TV.
To view, tune Ch 3 or 4 on your TV, choose the channel that does not have an active or strong signal. Slide the CH 3/4 switch located on the rear of the DT250.
Please follow the procedure below when using Analog
1.Make sure the converter box is in Standby mode – the power indicator light should be red; otherwise, press the Power button on the converter’s remote control.
2.This step only need to perform once after connection and it is only require if you did not scan the local channel before – scan analog channels by following the instruction of your TV. It is the same as connecting your TV directly with an antenna.
3.You must use the remote control from your TV to change channels.
ANTENNA IN | TV OUT |
|
|
RF Coaxial cable to your TV
9
