You have completed the basic Initial Setup. Now you are ready to set up the GUIDE Plus+® System. Continue with the GUIDE Plus+® System setup as detailed on the next page.
Instructions continue on the next page.
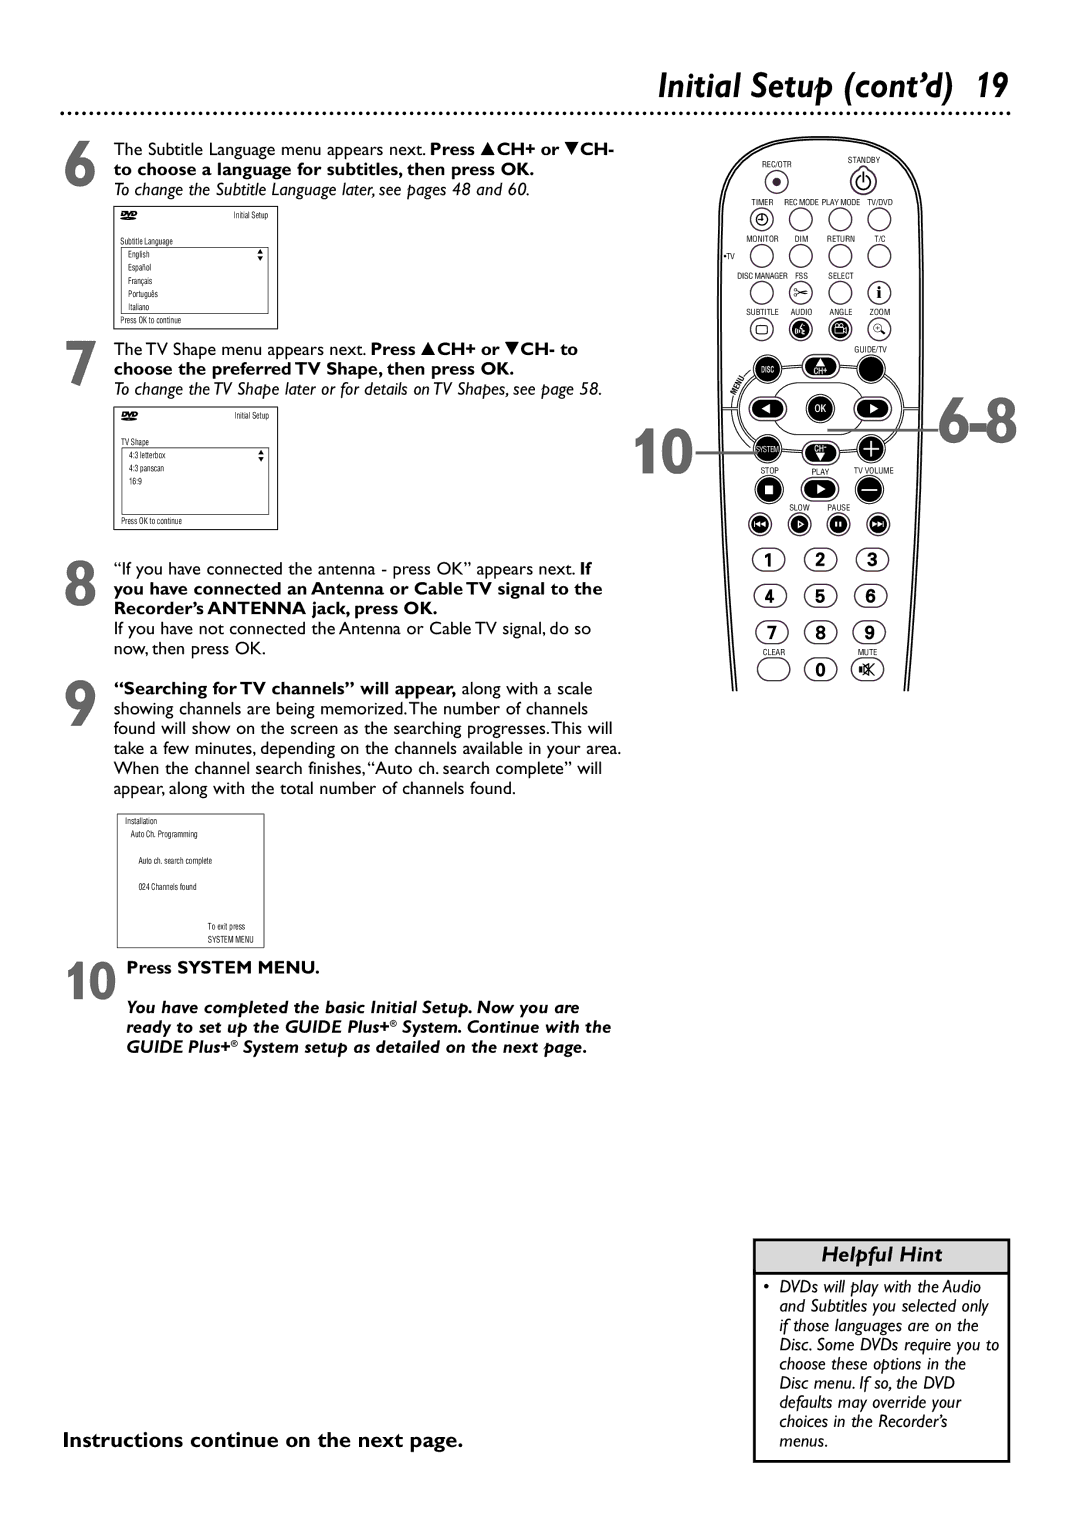
Press SYSTEM MENU.
10
Press OK to continue
8 “If you have connected the antenna - press OK” appears next. If you have connected an Antenna or Cable TV signal to the Recorder’s ANTENNA jack, press OK.
If you have not connected the Antenna or Cable TV signal, do so now, then press OK.
9 “Searching for TV channels” will appear, along with a scale showing channels are being memorized.The number of channels found will show on the screen as the searching progresses.This will take a few minutes, depending on the channels available in your area. When the channel search finishes, “Auto ch. search complete” will appear, along with the total number of channels found.
Installation
Auto Ch. Programming
Auto ch. search complete
024 Channels found
To exit press
SYSTEM MENU
4:3 letterbox 4:3 panscan 16:9
K
L
TV Shape
Initial Setup
~
7 The TV Shape menu appears next. Press 8CH+ or 9CH- to choose the preferred TV Shape, then press OK.
To change the TV Shape later or for details on TV Shapes, see page 58.
English
Español
Français
Português Italiano
Press OK to continue
K
L
Subtitle Language
Initial Setup
~
The Subtitle Language menu appears next. Press 8CH+ or 9CH- to choose a language for subtitles, then press OK.
To change the Subtitle Language later, see pages 48 and 60.
6
Initial Setup (cont’d) 19
| REC/OTR |
| STANDBY | ||
|
|
|
| ||
| TIMER | REC MODE PLAY MODE | TV/DVD | ||
| MONITOR | DIM | RETURN | T/C | |
| •TV |
|
|
| i |
| DISC MANAGER FSS | SELECT | |||
| SUBTITLE | AUDIO | ANGLE | ZOOM | |
| ` |
|
|
|
|
|
|
|
| GUIDE/TV | |
| DISC |
| CH+ |
|
|
10 |
|
| OK |
| |
SYSTEM |
| CH- |
| ||
STOP |
| PLAY | TV VOLUME | ||
| Ç |
|
|
|
|
|
| SLOW | PAUSE |
| |
| H |
|
| k | G |
CLEARMUTE
Helpful Hint
•DVDs will play with the Audio and Subtitles you selected only if those languages are on the Disc. Some DVDs require you to choose these options in the Disc menu. If so, the DVD defaults may override your choices in the Recorder’s menus.
