Hookups (cont’d) 15
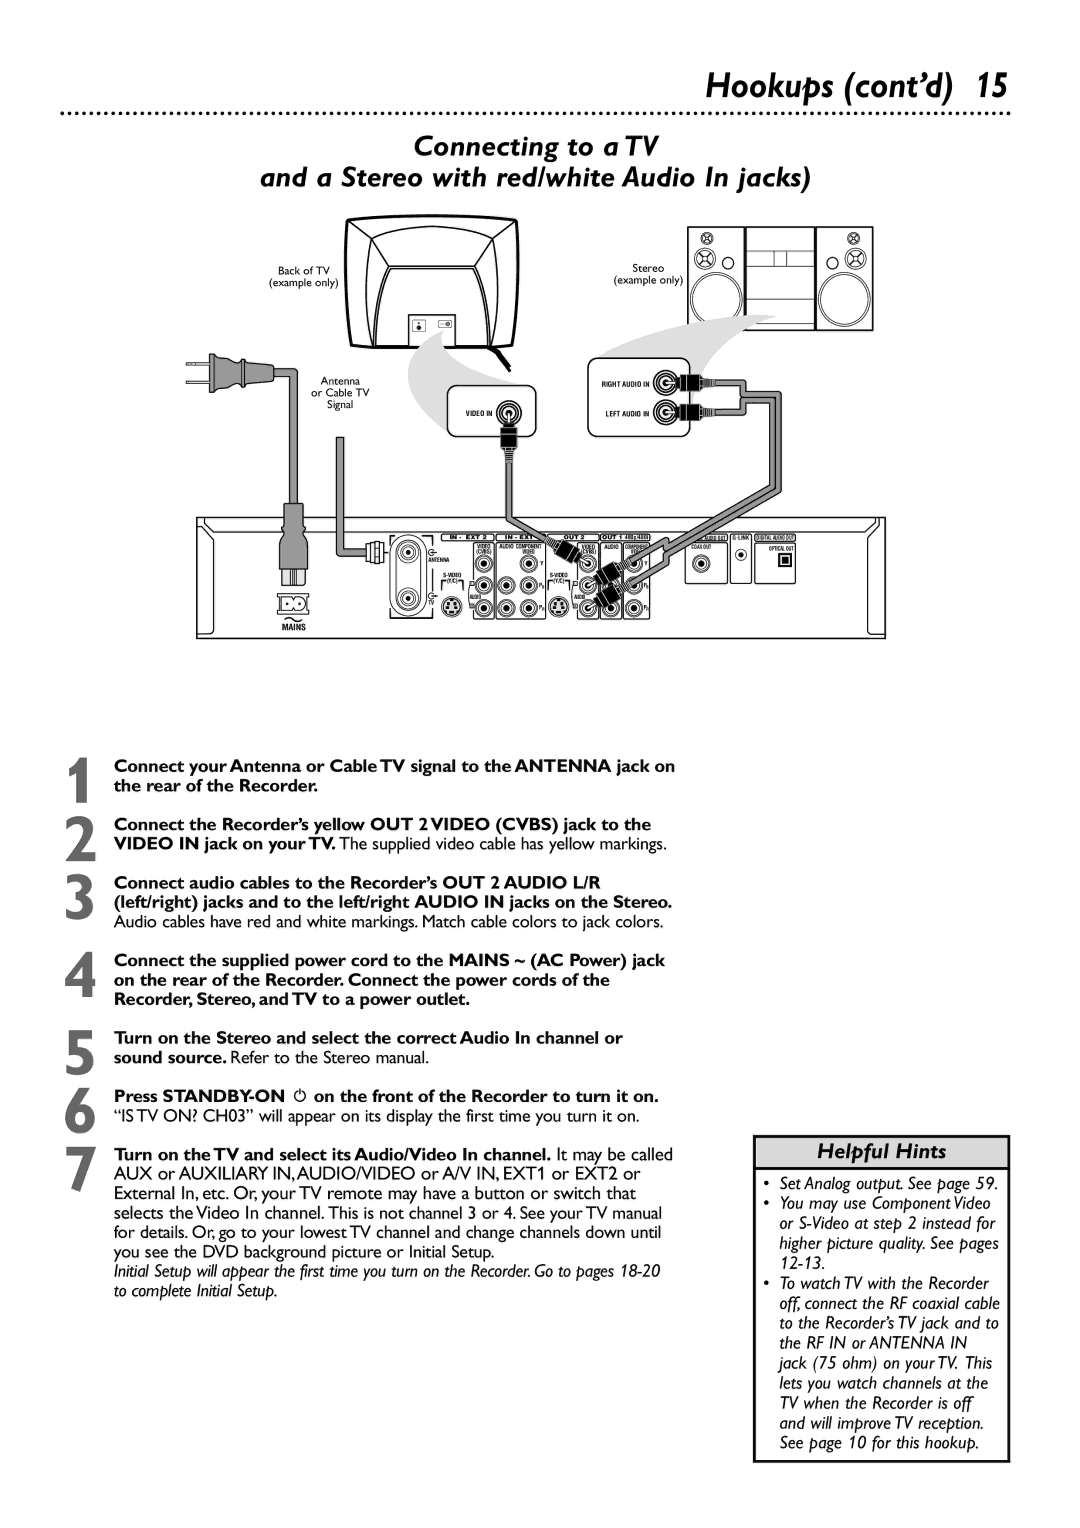
Connecting to a TV
and a Stereo with red/white Audio In jacks)
Back of TV | Stereo |
(example only) | (example only) |
Antenna
or Cable TV
Signal
RIGHT AUDIO IN
VIDEO IN | LEFT AUDIO IN |
IN - EXT 2 | IN - EXT 1 | OUT 2 | OUT 1 480p/480i | |||
| VIDEO | AUDIO COMPONENT |
| VIDEO | AUDIO | COMPONENT |
| (CVBS) | VIDEO |
| (CVBS) |
| VIDEO |
ANTENNA |
| Y |
|
|
| Y |
|
|
|
|
| ||
|
|
|
|
| ||
(Y/C) | L | PB | (Y/C) | L |
| PB |
|
|
|
|
| ||
TV | AUDIO |
|
| AUDIO |
|
|
R | PR |
| R |
| PR | |
|
|
|
|
| ||
MAINS
DIGITAL AUDIO OUT | DIGITAL AUDIO OUT |
COAX OUT | OPTICAL OUT |
1 Connect your Antenna or Cable TV signal to the ANTENNA jack on the rear of the Recorder.
2 Connect the Recorder’s yellow OUT 2 VIDEO (CVBS) jack to the VIDEO IN jack on your TV. The supplied video cable has yellow markings.
3 Connect audio cables to the Recorder’s OUT 2 AUDIO L/R (left/right) jacks and to the left/right AUDIO IN jacks on the Stereo. Audio cables have red and white markings. Match cable colors to jack colors.
4 Connect the supplied power cord to the MAINS ~ (AC Power) jack on the rear of the Recorder. Connect the power cords of the Recorder, Stereo, and TV to a power outlet.
5
6
7 Turn on the TV and select its Audio/Video In channel. It may be called AUX or AUXILIARY IN,AUDIO/VIDEO or A/V IN, EXT1 or EXT2 or External In, etc. Or, your TV remote may have a button or switch that selects the Video In channel. This is not channel 3 or 4. See your TV manual for details. Or, go to your lowest TV channel and change channels down until you see the DVD background picture or Initial Setup.
Initial Setup will appear the first time you turn on the Recorder. Go to pages
Helpful Hints
•Set Analog output. See page 59.
•You may use Component Video or
•To watch TV with the Recorder off, connect the RF coaxial cable to the Recorder’s TV jack and to the RF IN or ANTENNA IN jack (75 ohm) on your TV. This lets you watch channels at the TV when the Recorder is off and will improve TV reception. See page 10 for this hookup.