Installing a Battery and Changing a Faceplate
Your Mini Camera requires one AAA battery (not supplied) for power. For the best performance and longest battery life, we recommend an alkaline battery. Your mini camera also comes with two additional color faceplates for replacement.
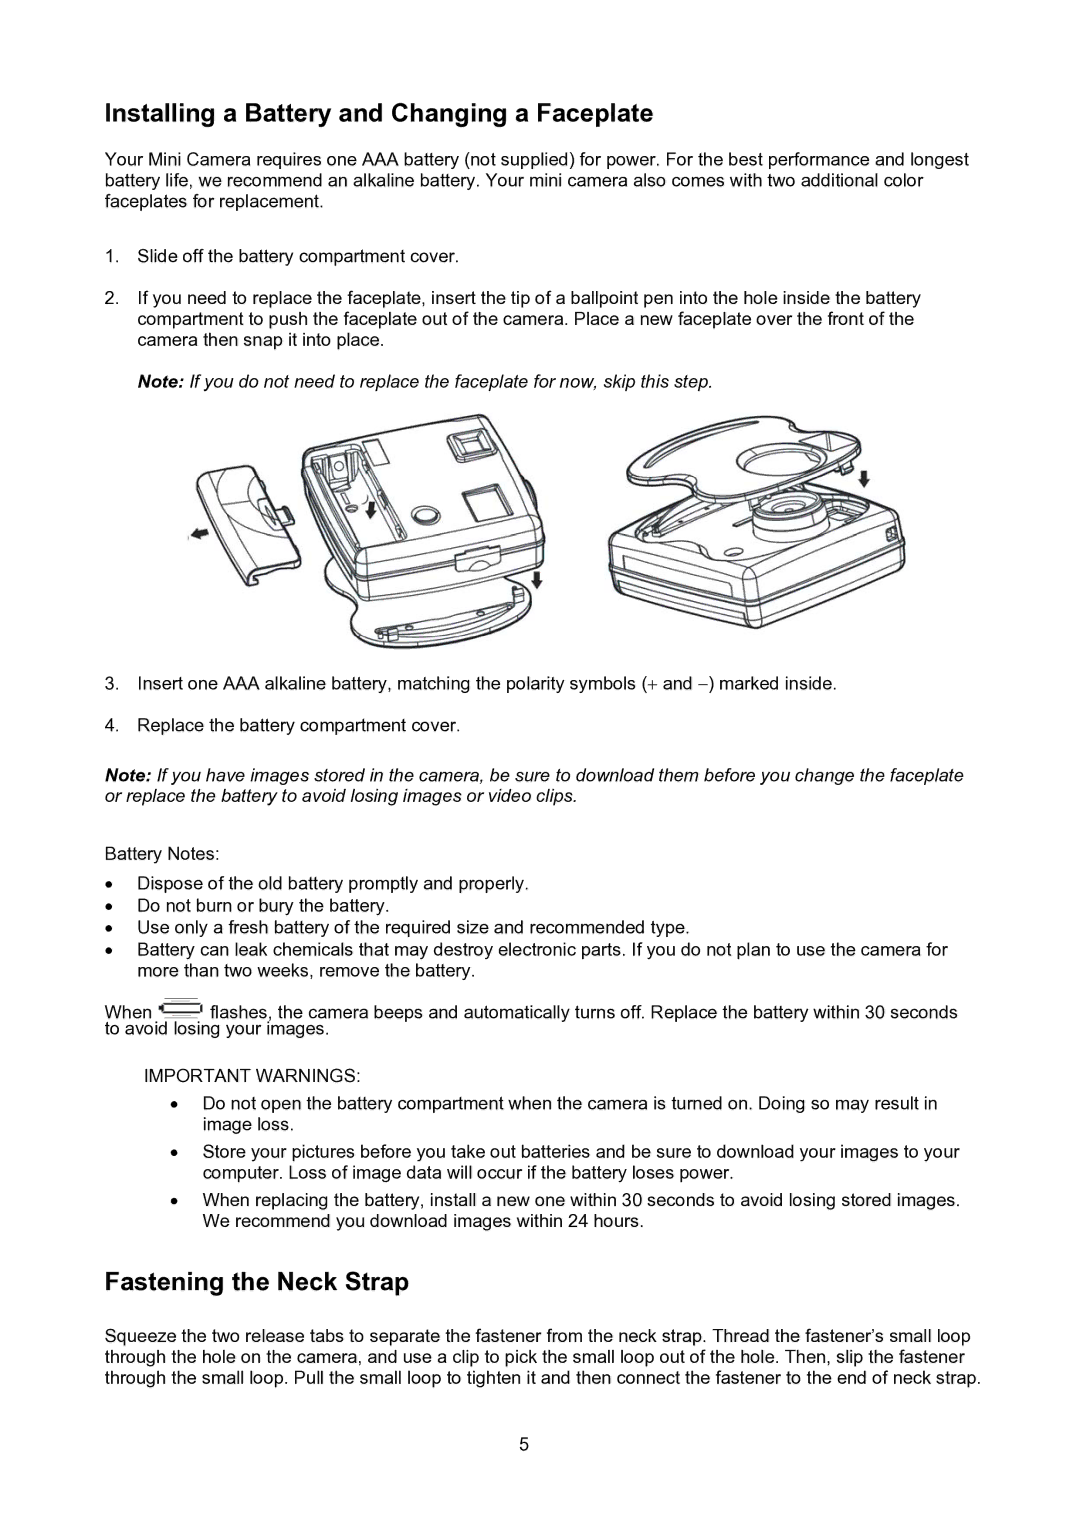
1.Slide off the battery compartment cover.
2.If you need to replace the faceplate, insert the tip of a ballpoint pen into the hole inside the battery compartment to push the faceplate out of the camera. Place a new faceplate over the front of the camera then snap it into place.
Note: If you do not need to replace the faceplate for now, skip this step.
3.Insert one AAA alkaline battery, matching the polarity symbols (+ and −) marked inside.
4.Replace the battery compartment cover.
Note: If you have images stored in the camera, be sure to download them before you change the faceplate or replace the battery to avoid losing images or video clips.
Battery Notes:
•Dispose of the old battery promptly and properly.
•Do not burn or bury the battery.
•Use only a fresh battery of the required size and recommended type.
•Battery can leak chemicals that may destroy electronic parts. If you do not plan to use the camera for more than two weeks, remove the battery.
When ![]() flashes, the camera beeps and automatically turns off. Replace the battery within 30 seconds to avoid losing your images.
flashes, the camera beeps and automatically turns off. Replace the battery within 30 seconds to avoid losing your images.
IMPORTANT WARNINGS:
•Do not open the battery compartment when the camera is turned on. Doing so may result in image loss.
•Store your pictures before you take out batteries and be sure to download your images to your computer. Loss of image data will occur if the battery loses power.
•When replacing the battery, install a new one within 30 seconds to avoid losing stored images. We recommend you download images within 24 hours.
Fastening the Neck Strap
Squeeze the two release tabs to separate the fastener from the neck strap. Thread the fastener’s small loop through the hole on the camera, and use a clip to pick the small loop out of the hole. Then, slip the fastener through the small loop. Pull the small loop to tighten it and then connect the fastener to the end of neck strap.
5